Creating a Project
Creating a new project is quick and easy with the New Project Wizard.
- In Word, select File > Doc-To-Help.
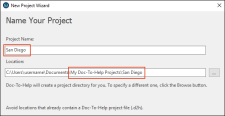
- Select New Project. The New Project Wizard opens.
-
Name your project San Diego. Doc-To-Help saves the project in a folder with the same name within the default My Doc-To-Help Projects folder. This makes it easy to keep your projects organized.
-
Click Next.
The next page gives you the opportunity to import settings from an existing project. Since we are going to work through a few settings later, we will skip this page.
-
Click Next.
On the next page you can select the default language for your project. The initial setting may be different, depending on your computer setup (e.g., it might be English, German, French, or something else), but you can choose another language from the drop-down list. Doc-To-Help chooses the correct character set based on the language chosen.
-
Click Next.
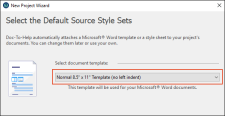
On the next page you can use the wizard to select the template (.dotx) file for your Microsoft® Word source documents.
Doc-To-Help uses templates to determine how content will look and behave in both your source documents (when authoring in Word) and your final targets (online and print-based outputs).
Doc-To-Help automatically chooses your target template based on your selections.
- If it is not already selected, choose Normal 8.5" x 11" Template (no left indent) and click Next.
-
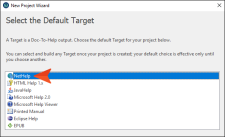
On the next page, you can select your default target. You can generate any of these targets from your project at any time, but the default chosen here will be the one displayed when you open your project.
Choose NetHelp (Doc-To-Help's browser-based uncompiled HTML format). This output can be used on the web, within a software application, or on a file server.
-
Click Next.
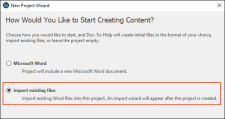
On the next page you can select a type of for your first document. We are going to use an existing document to start our project.
-
Choose Import existing files and click Next.
Note Doc-To-Help will launch an import wizard after the project is created to make the import process simple.
-
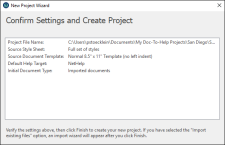
Review the new project information and click Finish.
Next, let's import a document.

