Importing a Document
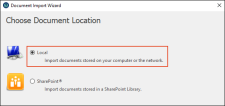
Our project is created, but since we chose the "Import existing files" option, the Document Import Wizard opens.
-
Choose Local to import documents stored on your computer and then click Next.
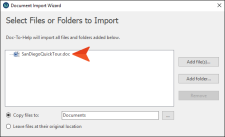
- Click Add file(s). A dialog automatically opens to C:\Users\[username]\Documents\My Doc-To-Help Projects.
-
Navigate to Samples > All About San Diego Sample > Documents, and select SanDiegoQuickTour.doc.
-
Click Open. The document displays in the wizard.
- Click Import. The document is imported.
-
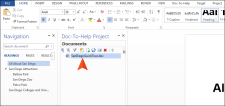
Click Close. The imported document displays in the Documents window pane of the Doc-To-Help Project panel in Word. The first imported document listed in the Documents pane will open by default.
-
Select the Doc-To-Help ribbon. Notice that this ribbon lets you create links, add index entries, and more. This information is used to create the final outputs.
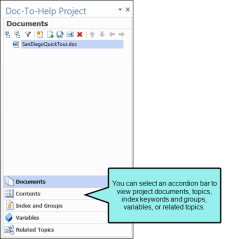
Also take a minute to look at the Doc-To-Help Project panel. (The panel should already be open, but if it isn’t, select the Project ribbon and click Project Panel.)
From here, you can open other project documents, quickly jump to topics in the project, and create links to project elements such as index keywords, variables, and topics.
Now it's time to learn more about specific Doc-To-Help features. Although the following lessons are divided to make them more manageable, it is recommended that you do them in order so that you can see the progression of your project.
Next, let's build output.


