Inserting an Image
We are going to add an image to our source document, but first we must copy an existing graphic into our project.
- Using Windows Explorer, navigate to C:\Users\[username]\Documents\My Doc-To-Help Projects\Samples\All About San Diego Sample\Media.
- Copy the SanDiego.jpg file.
-
Paste it into C:\Users\[username]\Documents\My Doc-To-Help Projects\SanDiego\Media. Although you can use images from any folder, it is a best practice to store all of your images in your project's Media folder.
- Now we are ready to insert our image in the SanDiegoQuickTour.doc file. In Word, the All About San Diego topic should already be displayed, since it was the last topic opened. After the third paragraph (which begins with "Although it is located along the Pacific Ocean…"), press ENTER to add a new empty paragraph.
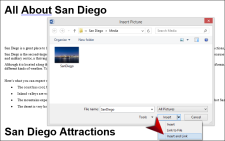
- Select the Insert ribbon, and click Pictures. The Insert Picture dialog opens.
- Navigate to the Media folder in your project (C:\Users\[username]\Documents\My Doc-To-Help Projects\SanDiego\Media), choose SanDiego.jpg, and click the down arrow next to the Insert button.
-
Choose Insert and Link. This is the recommended option for Doc-To-Help projects.
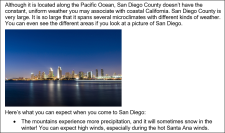
The image is now inserted in the document.
By the way, you can also quickly add multimedia (video or audio) to a document using the Multimedia button on the Doc-To-Help ribbon.
Next, let's apply a style.


