Within a condition tag set, you can create as many condition tags as you need.
[Menu Proxy — Headings — Online — Depth3 ]
How to Create a Condition
-
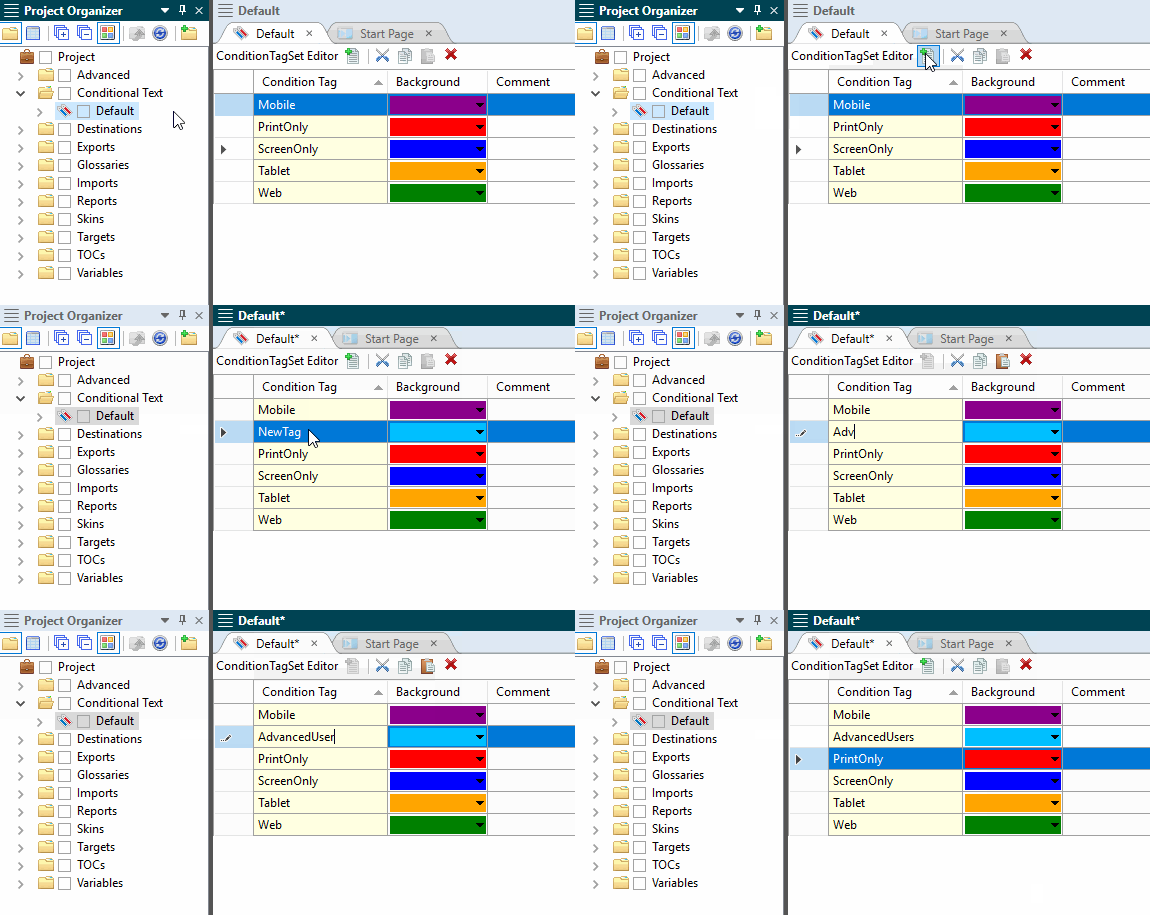
In the Project Organizer, expand the Conditional Text folder and double-click a condition tag set.
If it is a new condition tag set, some condition tags may already be provided for you. Each condition tag is associated with a color, making it easy to identify conditioned content in the Flare interface.
- In the Condition Tag Set Editor, click
 .
. -
On the NewTag row, press F2 and give the condition a name.
You can also do any of the following:
Rename a Tag
- Click the tag row and press F2.
- Type a new name and press ENTER.
Change the Color of a Tag
- Click the Background drop-down arrow and select Pick Color.
- Select a new color and click OK.
Add Comments to a Tag
You can add internal comments to indicate the purpose of a tag. Comments will not be displayed in the output.
- Click in the Comment cell of the tag row.
- Press F2.
- Type the comment and press ENTER.
- Click
 to save your work.
If the animation below is cut off, you can see the complete animation by clicking the link under it to open the full topic.

What’s Next?
After you have created condition tags, you can apply condition tags to content. See Applying Conditions to Content.


