If you have an Atlassian Confluence account, you can import pages (HTM and resource files) into Flare projects. You can import these files into a new Flare project or an existing one. Flare supports both the cloud and local versions of Confluence.
[Menu Proxy — Headings — Online — Depth3 ]
How to Import Confluence Files
The following steps describe how to import Confluence pages using the Import Confluence Wizard. However, you also have the option of adding a Confluence import file (see Adding a Confluence Import File) and then using the Confluence Import Editor (see Confluence Import Editor—Import and Re-Import).
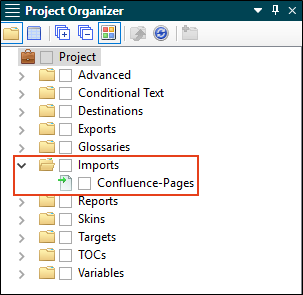
- Select Project > Import > Confluence Pages.
-
In the wizard, choose either Import into a new project (and complete the fields below) or Import into this project. However, if you do not have a project currently open, the file(s) will automatically be imported into a new project.
Project Fields
- Project name Type a name for the new Flare project that will be created after you perform the import.
- Project folder Accept the default location for the new project or click
 to find and select a folder.
 -
Output type Select the primary target for your project.
A target is a file that generates output from your project. You want your output to look and behave in a certain way, but not all authors have the same audience or work for the same company with the same needs and the same computer networking setup. Therefore, Flare lets you choose the best type of output(s) for your needs. A target file is used for each instance of an output type. And you can have many targets in your project (e.g., eight targets using PDF, two targets using HTML5).
This page of the wizard lets you select a primary target as you get your project off the ground. This means that—although you can use more than one target for your project—you might use one target most of the time. By selecting a primary target, you will be able to use shortcut buttons to build, view, and publish its output more quickly. Also, when you open topics in the XML Editor, they will be displayed by default with the styles and other specifications associated with the primary target. However, you can use the Layout and Medium drop-downs in the local toolbar of the XML Editor to view topics with other settings.
Do not worry if you're not yet sure of the best output type for your project. No matter which output type you select now, you can always change the primary target later.
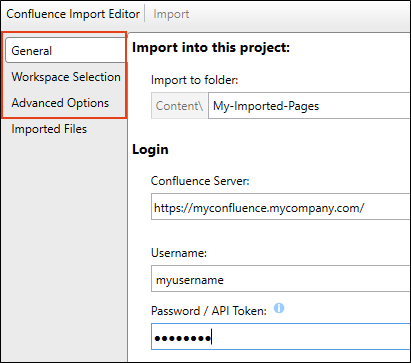
- Complete the Confluence Server, Username, and Password fields. Then click Submit. The Workspace Selection page should open automatically.
-
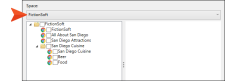
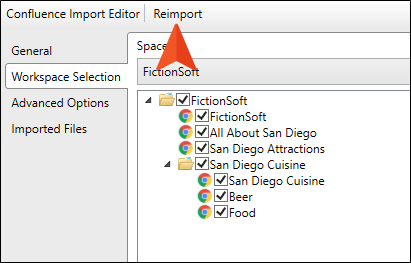
From the drop-down, select the space from which you want to import.
-
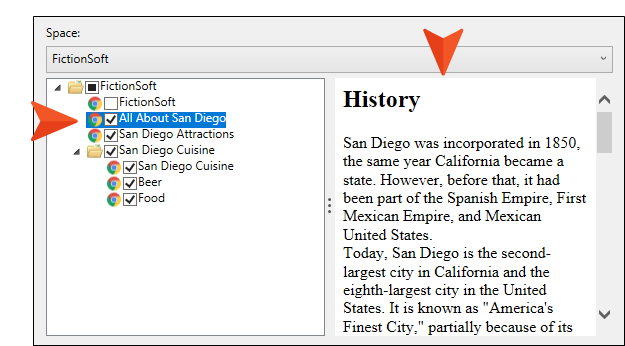
In the tree, select the pages to be imported. If you click on an item, a preview for it displays to the right.

-
(Optional) On the left, select Advanced Options and choose options as necessary.
Topics
- Import linked pages Select this if you want to automatically bring in other files that are linked to those you selected from the tree. For example, if you choose to import a page called “Beer,” which contains a link to a page called “Food,” this option imports both pages.
- Remove inline formatting Select this if you do not want to keep any inline formatting in the pages. If you do not select this option, the formatting will be retained. However, keep in mind that styles, rather than inline (local) formatting, is recommended in Flare projects.
- Remove style classes Select this if you want to remove any style classes that Confluence might have added to elements (such as tables and images). Otherwise, you might have some undefined styles after the pages are imported into Flare.
Resources
- Import resources Select this option if you want to include any supporting resource files (e.g., images, multimedia) in the import. In Flare, these will be added to the Resources folder in the Content Explorer, and they will link to the appropriate topics.
Reimport
- Link generated files to source files Select this option if you want to continue editing in Confluence and reimport as needed. Deselect it if you want to edit the imported files in Flare going forward.
- Click Finish and Accept.

If the animation below is cut off, you can see the complete animation by clicking the link under it to open the full topic.
Confluence Import Editor—Import and Re-Import
If you add a Confluence import file
When you double-click this file, it opens in the Confluence Import Editor. This editor contains most of the same fields and options as the Import Confluence Wizard.
After completing or changing any of these fields, you can click Import or Reimport in the toolbar.
How Elements are Converted From Confluence to Flare
Certain elements from Confluence are converted to their closest counterparts in Flare. The following table describes this.
|
Confluence |
Flare |
|---|---|
| top | |
|
Article title |
H1 |
|
Heading 1 through Heading 6 |
H1 through H6 |
|
Preformatted |
Text surrounded by <pre> tags |
|
Quote |
Text surrounded by <blockquote> tags |
| top | |
|
Bold |
Text surrounded by <strong> tags |
|
Font color |
Text surrounded by <span> tags |
|
Italic |
Text surrounded by <em> tags |
|
Monospace |
Text surrounded by <code> tags |
|
Strikethrough |
Text surrounded by <s> tags |
|
Subscript |
Text surrounded by <sub> tags |
|
Superscript |
Text surrounded by <sup> tags |
|
Underline |
Text surrounded by <u> tags |
| top | |
|
Bulleted list |
Bullet list |
|
Numbered list |
Numbered list |
|
Task list |
Bullet list |
| top | |
|
Center |
Center |
|
Left |
Left |
|
Indent |
Indent |
|
Outdent |
Outdent |
|
Right |
Right |
| top | |
|
Date |
Text |
|
Emoticon |
SVG image |
|
Gallery |
Table containing images |
|
Horizontal rule |
Horizontal rule |
|
Info |
Text surrounded by <div> tags |
|
Link |
Link |
|
Markup |
Text |
|
Status |
Text surrounded by <div> tags |
|
Symbol |
Symbol |
|
Table of contents |
Links in bulleted list |
|
Task list |
Bulleted list |
|
User mention |
Link |
| top | |
|
Blog post |
Text surrounded by <div> tags |
|
Change history |
Links in table |
|
Content by label |
Text surrounded by <div> tags |
|
Content by user |
Links in table |
|
Content report table |
Text in table |
|
Contributor |
Link |
|
Contributor summary |
Text and links in table |
|
Create from template |
Link |
|
Except include |
Text |
|
Favorite pages |
Text and links |
|
Include pages |
Text |
|
Labels list |
Links |
|
Microsoft Office Excel |
File added to Content Explorer |
|
Microsoft Office PowerPoint |
File added to Content Explorer |
|
Microsoft Office Word |
File added to Content Explorer |
|
Multimedia |
Multimedia file with image as placeholder |
|
|
File added to Content Explorer |
|
Popular labels |
Links in bulleted list |
|
Recently updated |
Links and text |
|
Recently updated dashboard |
Links |
|
Related labels |
Text |
|
Space attachments |
Links and text in table |
|
Space details |
Text |
|
Spaces list |
Links in table |
|
Status |
Text |
|
Task report |
Text and links in table |
|
User profile |
Links |
| top | |
|
Code block |
Text surrounded by <div> tags |
|
Column |
Text surrounded by <div> tags |
|
Expand |
Text surrounded by <div> tags |
|
Info |
Text surrounded by <div> tags |
|
No format |
Text surrounded by <div> tags |
|
Note |
Text surrounded by <div> tags |
|
Panel |
Text surrounded by <div> tags |
|
Section |
Text surrounded by <div> tags |
|
Tip |
Text surrounded by <div> tags |
|
Warning |
Text surrounded by <div> tags |
| top | |
|
Children display |
Link |
|
Livesearch |
Search bar in output |
|
Page index |
Link in table |
|
Search results |
Text and links |
|
Table of content zone |
Text |
|
Table of contents |
Links |
| top | |
|
Global reports |
Links and text in table |
|
Page properties |
Text |
|
Page properties report |
Text in table |
|
Popular labels |
Links |
What’s Noteworthy?
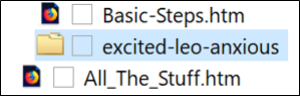
Note If you import a GIF image using the GIPHY integration in Confluence, the file will be imported without an extension and will resemble a folder in the Content Explorer.
Note The Imported Files tab in the Import Editor displays the files that have been imported previously.
Note A link icon ![]() displays on tabs in the XML Editor next to file names that are imported from and linked to another file or Flare project. However, if you are also using the built-in source control technology, the source control icons have a higher precedence and will therefore be displayed instead.
displays on tabs in the XML Editor next to file names that are imported from and linked to another file or Flare project. However, if you are also using the built-in source control technology, the source control icons have a higher precedence and will therefore be displayed instead.
What’s Next?
Now you can move on to any of the other basic steps:
- Step 2: Adding Content and Features
- Step 3: Designing
- Step 4: Developing Targets
- Step 5: Building and Publishing Output
Note You do not necessarily need to follow all of the above steps (and their substeps) in the exact order given. For example, as you add topics to a project, you may want to start applying styles and formatting to them right away, before adding other features to the project, such as a glossary. However, the above sequence probably makes the most overall logical sense. For example, you must start a project before adding content and features (i.e., topics, content, cross-references, etc.) to it.
