The test results page is what learners see when they complete the test at the end of the course. Results are automatically generated, and a default test results page displays. When viewing this page, learners can see if they passed or failed, their score, their answers vs. correct answers, and end-of-test feedback (if included).
Note Customizing a test results page is only applicable if you create a test node in the table of contents (TOC).
You can customize test results in the following ways. Do one or both:
-
Link Topic Create topics with custom content and a Test Results proxy, and then link the topics via the TOC Editor to display as the pass or fail page, along with the default autogenerated test results. See How to Add a Test Results Proxy and How to Link a Custom Test Results Page.
-
Edit Skin Add and edit the Test Results skin file to customize the look and feel of the test results page, and determine exactly what information is shown on it. See Editing the Test Results Skin Component.
The following describes how to create and link a topic to the test results page.
[Menu Proxy — Headings — Online — Depth3 ]
How to Add a Test Results Proxy
Creating a topic to use as a link for a custom test results page is just like creating any other content, but you also need to include a Test Results proxy. The proxy is necessary for displaying content such as the test results score, learner answers vs. correct answers, and feedback.
-
From the Content Explorer, create new topics for the pass and fail page(s). You can create two separate pages, one for a pass, and one for a fail. Or, you can create a generic results page to use for both.
-
Add information (e.g., content, images) that is suitable for your course. Be sure to convey a successful or unsuccessful test result.
-
Place the cursor in the topic where you want to display the test results (e.g., place at the end after the content).
-
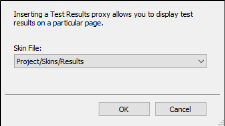
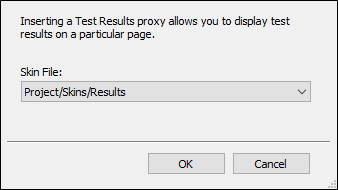
From the eLearning ribbon, select Test Results Proxy. Alternatively, from the Insert ribbon, select the Proxy drop-down, and choose Test Results Proxy.

-
In the Test Results Proxy dialog, from the Skin File drop-down, you can select a customized Test Results skin component. If you leave the default setting, the first Test Results skin component in the project will be used. Click OK.
Note Be sure to insert the Test Results proxy in both the pass and fail page topics.
Note If you have not created a skin component to associate with the proxy, you can always come back to the inserted proxy later and edit it once the skin component is created. See Editing the Test Results Skin Component.
-
Click
 to save all files.
Note If you are creating a knowledge check or a course without a gradable test, then a Test Results proxy is not needed. In this case, the navigation toolbar buttons for the first or last topic (i.e., Previous and Next), display as disabled in the HTML5 output.
How to Link a Custom Test Results Page
-
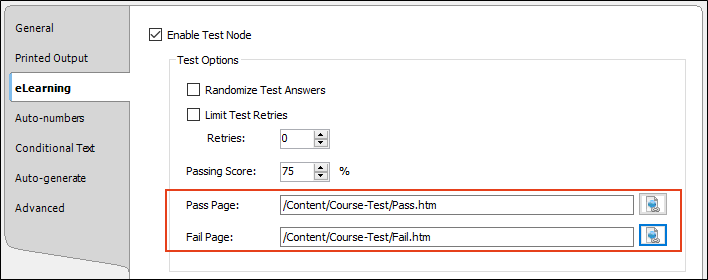
From the TOC Editor, right-click the test node and select Test Options.
-
From the eLearning tab, next to the Pass Page field, click
 .
. -
From the Select File dialog, navigate to your custom pass page file, and select Open. The file is added in properties as the link.
-
Do the same steps for the Fail Page option, and click OK.

-
Click
") to save your work.
to save your work.
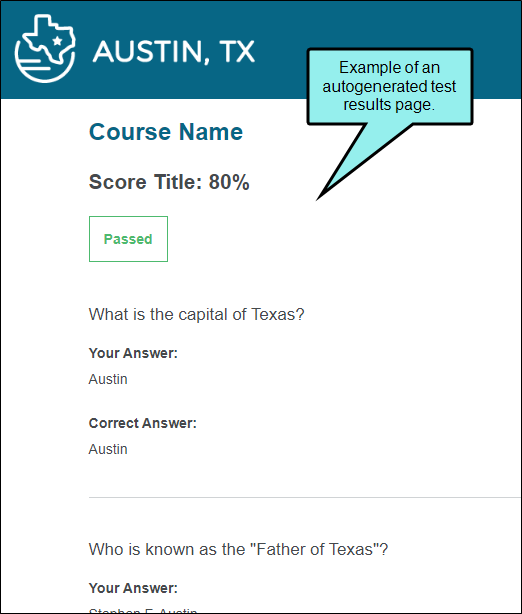
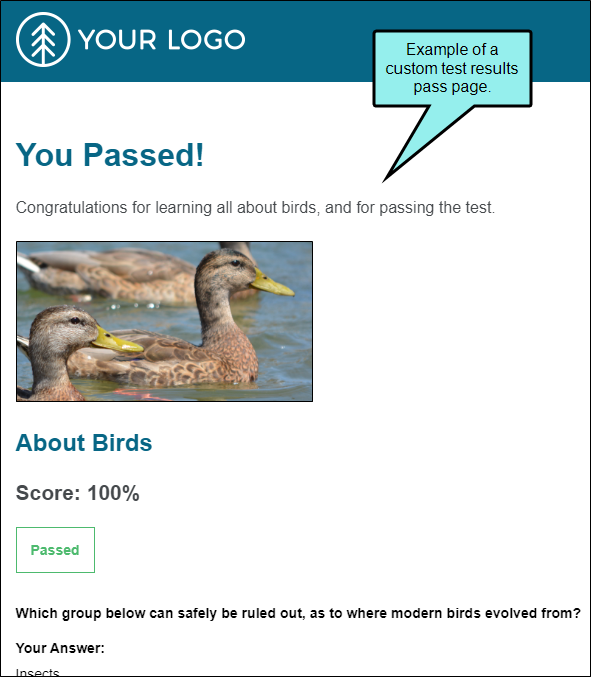
A custom test results page (i.e., a linked topic) might look like this in the output:
Note If you have custom test result topics, do not add them to the test node or to the TOC. Since they exist in the project and include the Test Results proxy, these topics will display upon a successful or unsuccessful attempt of the test.
The exception to this is if you want to place a test node at the beginning or mid-course rather than at the end. For this type of course layout, action is required to assist with the course's navigation sequence. There are a couple of options:
-
Create a single test results page for both a passed and failed scenario, and add it to the TOC at the end of the test. With the Test Results proxy in the test results page, this allows the learner to navigate past the test node. Using an autogenerated test results page won't work for this workflow, so be sure to use a custom test results page.
-
Create a hyperlink or cross-reference with a link to the next course topic in the TOC depending on if the learner passes or fails the test. For this option, you would add this link to your custom pass and fail page. In this case, the custom pass and fail pages do not need to be added to the TOC (only linked to in the Test Options properties). After the learner views the test results, they can click the link at the end of the topic to continue on with the course.
Note You don't need to add or alter the Test Results skin in order to see custom content on a test results page. But if you want to change the way the results look and feel, then you have to add and edit the Test Results skin file. See Editing the Test Results Skin Component.
What’s Next?
After you have optionally customized the test results, you can move on to Adding an eLearning Toolbar Proxy.


