


An external link is an "a" link (not a cross-reference) that lets you connect to another file (e.g., HTM, HTML, XML, PDF, Microsoft Office files) outside of your output. These steps involve a little planning ahead. You need to know the location where your files will be published, as well as the names of your output files.
How to Insert a Link to an External File
- (Optional) If you need to link to a specific place in the destination file that you are creating (e.g., a subheading in a PDF file), insert a named destination or a bookmark at that location. Named destinations are used in PDFs.
-
In the source topic where you want to insert the link, use the normal steps for inserting the type of navigation link that you want to create (text hyperlinks, topic popups, image hyperlinks).
-
From the Link to drop-down field, select External File.
Note If you want to link to a file that you've placed on a web server, instead of selecting "External File," you can select "Website" instead, and then enter the URL pointing to that file.
-
In the External File field, enter the path for the link, depending on the output type you are using.
Note Because the link usually needs to be relative, based on the final locations of your output files, it is preferable to enter the text directly into the External File field.
Most Output Types (e.g., PDF, HTML)
Enter the relative path from the source output topic to the destination topic, using a pair of periods to represent each folder level.
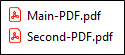
Example — PDF Outputs
From your project you are creating one PDF file called "Main-PDF" and another called "Second-PDF." Suppose that you plan to publish these outputs in the same folder on a server.
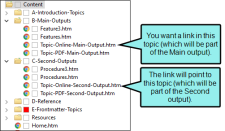
In the Main PDF, you want to create a link that opens the second PDF, and immediately goes to a specific heading within it (where a topic from your project begins).
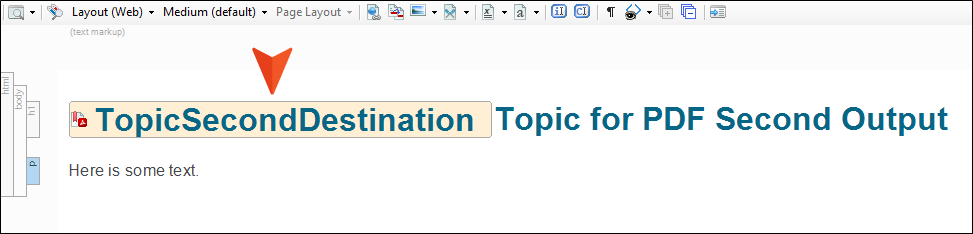
First of all, you open the destination topic (the one that will be in the Second PDF) in your project and add a named destination before the first heading. Let's say you call it "TopicSecondDestination."

In that case, when you create the link in the other topic (the one that will be in the Main PDF), you would enter the following in the External File field:
../../Second-PDF.pdf
And in the Named Destination field, you enter the following:
TopicSecond Destination
Example — HTML5 Outputs
From your project you are creating one HTML5 output called "Main" and another HTML5 output called "Second." Suppose that you plan to publish these outputs in adjacent folders on a server. The first output will be stored in a folder named "Main," and the other output will be placed in a folder named "Second."

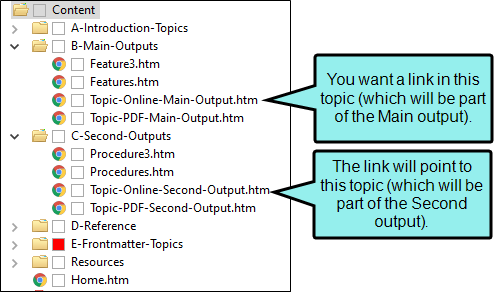
In the Main output, you want to create a link in a topic that opens a different topic in the Second output. The destination topic is located within that HTML5 output in a folder named "C-Second-Outputs" and it is named "Topic-Online-Second-Output.htm."
In that case, you would enter the following in the External File field:
../../../Second/Content/C-Second-Outputs/Topic-Online-Second-Output.htm
HTML Help (CHM Files)
Use one of the following:
- NameOfOutput.chm::/NameOfTopic.htm
- mk:@MSITStore:PathToOutput\NameOfOutput.chm::/NameOfTopic.htm
Use the first method if you plan to publish your CHM files to the same folder (recommended). Use the second method if you plan to publish your CHM files in different folders.
Example — CHM Outputs
You have a project called "FirstHelp" and another called "SecondHelp." Also, let's assume that the first project will generate a CHM file named "First.chm," and the second will generate a CHM file named "Second.chm." (The names of the CHM files can be specified on the General tab of the Target Editor. Enter the desired name in the Output File field. If you plan to publish the files to the same folder, they need to have different names.)
Suppose you want to create a text hyperlink in a topic called "Welcome," which is located within the FirstHelp project. When a user clicks on this link, you want it to open a topic called "About the Company," which is located within the SecondHelp project. Therefore, you open the Welcome topic in the FirstHelp project. Then you highlight the text to be used in the hyperlink, and you select Insert > Hyperlink. The Insert Hyperlink dialog opens. Next, from the drop-down field you select External File. What do you enter in the External File field?
We will take a look at two different situations. First, let's say that you plan to publish both CHM files to the same folder (perhaps on your company's intranet). In that case, you would enter the following:
SecondHelp.chm::/About the Company.htm
On the other hand, let's say that you plan to publish First.chm to one folder, and you plan to publish Second.chm to a separate folder, such as the following: C:\Documentation\More Help. In that case, you would enter the following:
mk:@MSITStore:C:\Documentation\More Help\SecondHelp.chm::/About the Company.htm
Note If you want to link content to an external CHM file, an alternative is to use the "HTML Help File" option from the "Link to" field, instead of the "External File" option.
- (Optional) You can click
 to select any bookmarks within the destination file, or
  if you need to select a named destination in a PDF file. See Inserting Bookmarks and Creating Named Destinations.
 - In the link dialog, click OK.
- Click
") to save your work.
to save your work. - Generate the output for the projects and publish the files to the appropriate location(s).
Note You can use the built-in analysis tool and reports to find broken links. See Viewing Broken Links and Reports.
Note The Eclipse Viewer cannot display PDFs opened from links.
