


A keyword link is a Help control that lets you open topics related to the current topic based on index keywords that they share.
[Menu Proxy — Headings — Online — Depth3 ]
Example
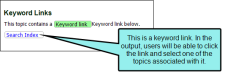
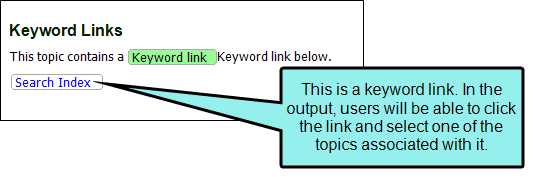
Example You have inserted an index keyword called "Accounting department" to some of the topics in your project, including the current topic that you are working on. At the bottom of this topic, you insert a keyword link that includes the "Accounting department" index keyword. In the final output, when users click this Help control, they can select and open any topics that also contain the "Accounting department" keyword.
How to Insert a Keyword Link
- Insert index keywords into the appropriate files.
- Open the content file.
- In the XML Editor, click in the topic where you want to insert the link (usually at the bottom of the topic).
-
Select Insert > Keyword Link Control (K-link).
The Insert Keyword Link Control dialog opens. The index keywords that you have inserted into topics are listed on the left side of the dialog.
-
In the All Keywords section, double-click an index keyword that you want to add to the keyword link.
Do one of the following:
-
In the All Keywords section, double-click an index keyword that you want to add to the keyword link.
-
In the All Keywords section, click on an index keyword that you want to add to the keyword link. Then click
 .
. The index keyword is added to the "All Keywords" section on the right side of the dialog. Do this for each index keyword that you want to add to the link.
-
-
(Optional) If you want to specify other options for the control, click
 and make your selections. Click OK to close the dialog when you are finished.
- Style Class You can select the style class to be used for the control.
- Label You can change the text shown on the control.
-
Display topics in You can specify that the links should be displayed in a popup menu (same as default) or as a simple list.
Note For projects that are merged, the list option is supported for standard merging (e.g., linking to an FLPRJ file in the table of contents). However, it is not supported for automerging in WebHelp Plus output.
- Target Frame You can choose the type of frame used when a link is clicked.
- Page Default The destination file opens in the same window as the output window.
- Parent Frame The destination file opens in the parent frame of the current topic while hiding that topic.
- New Window The destination file opens in a new browser window.
- Same Frame The destination file opens in the same window frame as the current topic.
- Top Frame The destination file opens in the same output window, removing all other framesets. You might use this option, for example, if the destination topic has its own frameset.
- Popup Window The destination file opens in a popup box on top of the current topic.
- Style Class You can select the style class to be used for the control.
-
Click OK. The keyword link is added to the topic.
- Click
") to save your work.
to save your work.
What’s Noteworthy?
Note Another type of automated link that can be added to topics is a relationship link, which has a similar result but works a bit differently than Help controls. One benefit of a relationship link is that you can create all of your link information in one place, in a single relationship table. Another benefit is that you can have multiple types of links at the bottom of topics (e.g., one for "Related Information," one for "Related Tasks," and one for "Reference Materials"). See Relationship Tables.
Note When people click a link like this in the output, the text shown for each of the topics depends on whether the topic in question has a title or heading. The title set in the Properties dialog has the highest level of precedence. If there is no topic title specified in the Properties dialog, Flare uses text associated with h1 through h6 heading styles. If there is no topic title or headings in a topic, Flare uses the topic file name.
What's Next?
If you want to change the way the link looks, you can modify the style of the keyword link. See Editing Keyword Links.
You also may want to apply an "online only" condition tag to the paragraph tag holding the link. The main reason for this has to do with creating print-based output. When you generate print-based output, Flare automatically removes any Help control links in your topics, since they do not make sense in print output. However, this may leave an empty <p> tag at the end of that topic. This means that there will be an extra empty paragraph, where you might not expect there to be one. For example, in print-based output, you might notice that a particular topic ends near the bottom of the page. Let's say that on the next page, a new heading should start. Furthermore, let's say that the heading style specifies a page break before it. If you have an empty paragraph after the text on the first page, you might end up with a blank second page before the new heading starts on the third page. Applying a condition tag to the paragraph holding the Help control link will ensure that an empty paragraph does not occur in that location. See Applying Conditions to Content.
