

You can apply a page or column break to lists or items within them. You might do this if you want a list to end with a particular item on one page and begin with another list item on the next page or column, without interrupting the flow of the list. You can do this by setting manual page breaks (Insert > Page Break) or by using style settings. For example, you could create a class of the li style and you could call it something like "PageBreakBefore" (li.PageBreakBefore). For most items in a list, you could use the parent li style, but if you want a page break to occur on a particular list item, you could apply your li.PageBreakBefore style to it.
[Menu Proxy — Headings — Online — Depth3 ]
How to Insert a Manual Page Break for a List
-
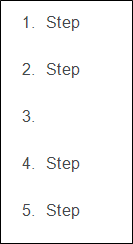
Place your cursor on an empty line in the list where you want to insert the page break. When you generate print-based output, the break occurs after this insertion point.
If this is between list items, you will initially see a number or bullet next to that empty line.
-
If there is a <p> tag within the <li> tag, remove the <p> tag by making it a simple list item. To do this, right-click the li structure bar and select Make Simple Item(s).
-
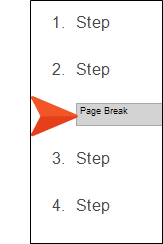
Select Insert > Page Break.
A gray bar is displayed in the XML Editor, and the number or bullet is removed. The gray bar is also represented by a structure bar on the left side of the XML Editor. You can apply conditions to the break, in case it should be used in some outputs but not others.
In the code, Flare uses the MadCap:pageBreak element where a page break is inserted.
How to Use a Style to Set a Page or Column Break for Lists
- From the Content Explorer, open the stylesheet that you want to modify.
-
From the Medium drop-down in the Stylesheet Editor, make sure the proper medium is selected before you begin. In the Advanced view, you can open multiple mediums at once; you just need to look at the title at the top of the medium pane and make sure you are working in the correct one. If you are not using stylesheet mediums for your different outputs or if you want all mediums to have the same settings, just leave the medium set to default and continue.
Mediums can be used if you want to use one group of settings for online output types and another group of settings for print-based output types. For example, you might use the default medium for your online outputs and the print medium for your print outputs.
Please note that Flare remembers the last medium that you used when working in the stylesheet, so it may or may not be the one that you want to use the next time around.

- In the local toolbar, make sure the first button displays
 . If the button displays
  instead, then click it.
 - In the upper-left corner of the editor, click in the drop-down field and select
 .
. - Select a list style. For example, you can select ol for ordered (numbered) lists, ul for unordered (e.g., bullet) lists, or li for individual list items. You can select the parent style (e.g., li), or you can select a class that you may have created for that tag (e.g., li.Bold, li.Italic).
- From the Show drop-down list on the upper-right side of the editor, select
 .
. - (Optional) You can use the toggle button in the local toolbar to show properties below in a group view
 or an alphabetical view
  .
. - If you are using the grouped view, expand the PrintSupport group.
-
Do any of the following:
-
To the right of page-break-before, click
 and select one of the options for setting a page break before the list item.
- always A page break will always occur before the list item.
- auto A page break will neither be forced nor prevented before the list item.
- avoid A page break will not occur before the list item.
- inherit The page break setting of the parent tag is used.
- left One or two page breaks will occur before the list item so that the next page is formatted as a left page.
- right One or two page breaks will occur before the list item so that the next page is formatted as a right page.
-
To the right of page-break-after, click
and select one of the options for setting a page break after the list item:- always A page break will always occur after the list item.
- auto A page break will neither be forced nor prevented after the list item.
- avoid A page break will not occur after the list item.
- inherit The page break setting of the parent tag is used.
- left One or two page breaks will occur after the list item so that the next page is formatted as a left page.
- right One or two page breaks will occur after the list item so that the next page is formatted as a right page.
-
To the right of page-break-inside, click
and select one of the options for setting a page break inside the "rendering box" of the list item:- auto A page break will neither be forced nor prevented inside the rendering box of the list item.
- avoid A page break will not occur inside the rendering box of the list item.
- inherit The page break setting of the parent tag is used.
-
- Click
") to save your work.
to save your work. - In the content file where you have inserted a list, click the structure bar where you want to apply the style. In other words, if you want to apply it to the entire list, click the ol or ul bar. If you want to apply it to a list item, click the li bar. Then select the style class (e.g., from the Home ribbon or Styles window pane).

Note Let's say you've created a class for the li style (e.g., li.PageBreakBefore) and you've specified a page break for it. Suppose you want to apply that style class to an item in one of your lists so that it starts on the next page. However, you also want to add a paragraph tag to it (e.g., so that you can add a comment after the item without altering the overall sequence of the list). In that case, you should make sure to apply the list style class to the item first and then add the paragraph tag to it afterward.
Note It is also possible to use styles to set breaks on tables.


