Information for Network Administrators
Periodically, you might need to upgrade Elasticsearch or Content Services, or both.
[Menu Proxy — Headings — Online — Depth3 ]
How to Upgrade Elasticsearch From 5.6 to 7.10.2
- Navigate to the Elasticsearch folder at the location where you have Flare installed (e.g., C:\Program Files\MadCap Software\MadCap Flare 20\Flare.app\Resources\Elasticsearch).
-
Copy this Elasticsearch folder from your local machine to the remote server and rename it Elasticsearch7.x.
Important This folder can be copied anywhere on the remote server, but the rest of these steps are written assuming you have copied it to the root C:\ drive. It also assumes your existing Elasticsearch folder for 5.6 that you previously copied during the initial Elasticsearch installation is located on the root C:\ drive as well.
-
On the remote server, launch the command prompt (CMD) as an admin and run the following commands:
-
cd c:\Elasticsearch\bin
-
elasticsearch-service.bat stop
-
elasticsearch-service.bat remove
Note The three commands above are used to remove the Elasticsearch 5.6 service.
-
cd c:\Elasticsearch7.x\bin
-
elasticsearch-service.bat install
Note The two commands above are used to add the Elasticsearch 7.10.2 service.
-
-
Using Windows Explorer, do the following:
-
Navigate to c:\Elasticsearch\config\elasticsearch.yml (the file that has been used for Elasticsearch 5.6).
-
Open the elasticsearch.yml file in a text editor.
-
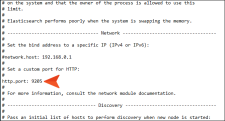
Under the Network section, find the string “http.port: 9200” and change the port to something other than 9200 (e.g., 9205).
-
Save your changes in this file.
-
-
Using Windows Explorer, do the following:
-
Navigate to c:\Elasticsearch7.x\config\elasticsearch.yml (the file that will be used for Elasticsearch 7.10.2).
Note You might also need to open the properties for this file and remove the Read-Only check mark.
-
Open the elasticsearch.yml file in a text editor.
-
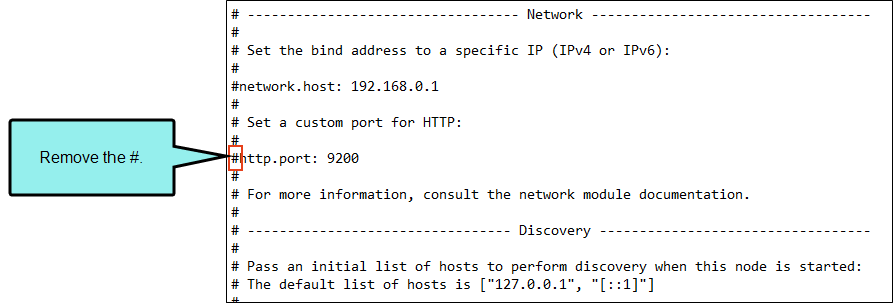
Under the Network section, find the string “http.port: 9200” and remove the # character from it. Leave the port number at 9200.

-
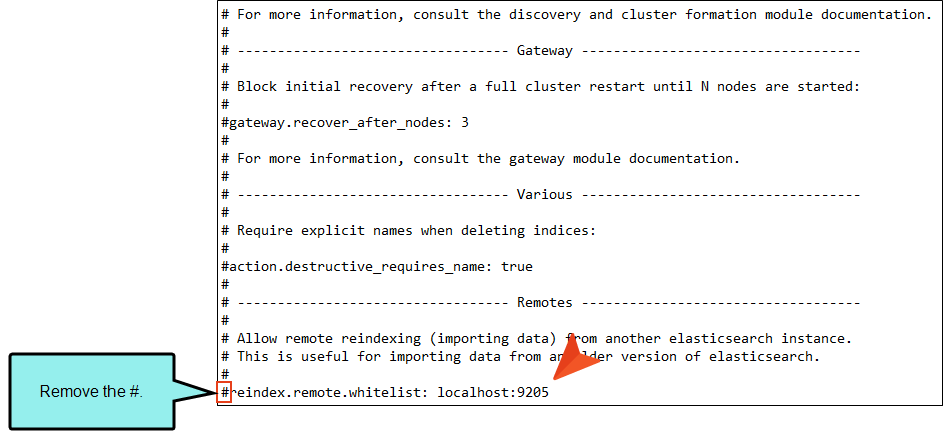
On the last line of the file (i.e., the whitelist), remove the # at the beginning of the line. Also, change the number to match the configured port for the Elasticsearch 5.6 file (e.g., 9205).

-
Save your changes in this file.
-
-
In the command prompt, run the following commands:
-
elasticsearch-service.bat start
-
cd c:\Elasticsearch\bin
-
elasticsearch
Note This will run the Elasticsearch 5.6 service in a console and won’t be part of Windows Services. Do not close the command prompt, which would stop the Elasticsearch 5.6 Service.
-
-
Continue with the next set of steps to upgrade Content Services.

How to Upgrade Content Services From .NET Core 3.1 to 6.0.13
If you have upgraded Elasticsearch, you also need to upgrade Content Services. There might be other times when you need to upgrade Content Services only.
-
On the remote server, open the Internet Information Services (IIS) Manager, and stop the service.
-
Download and install the Microsoft .NET 6.0.13 Windows Hosting Bundle from the following link.
Copyhttps://dotnet.microsoft.com/download/dotnet-core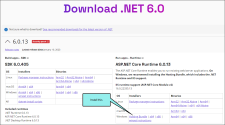
-
On the local machine, navigate to the Web.ContentServices folder at the location where you have Flare installed (e.g., C:\Program Files\MadCap Software\MadCap Flare 20\Flare.app\Resources\WebHelp2\ContentServices\Web.ContentServices).
-
Copy and paste this Web.ContentServices folder to the remote server. It can be pasted anywhere on the remote server. This is just a temporary folder that you will use in the steps below; you can delete this folder later.
-
Upgrade the Content Services portal. The older files referenced in the following sub steps have to do with those you copied to C:/inetpub/wwwroot, as described in Installing Elasticsearch on a Remote Server. So navigate to C:/intepub/wwwroot.
-
Keep the following folders in the older Web.ContentServices folder (located under C:/inetpub/wwwroot):
- Logs
- Targets
- Uploads
Remove the other folders.
-
Keep the following files in this Web.ContentServices folder:
- appsettings.json
- Indices.db
- web.config
Remove the other files.
- Copy all of the new folders and files (except appsettings.json and web.config)from the temporary Web.ContentServices folder to the old Web.ContentServices folder.
-
-
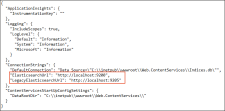
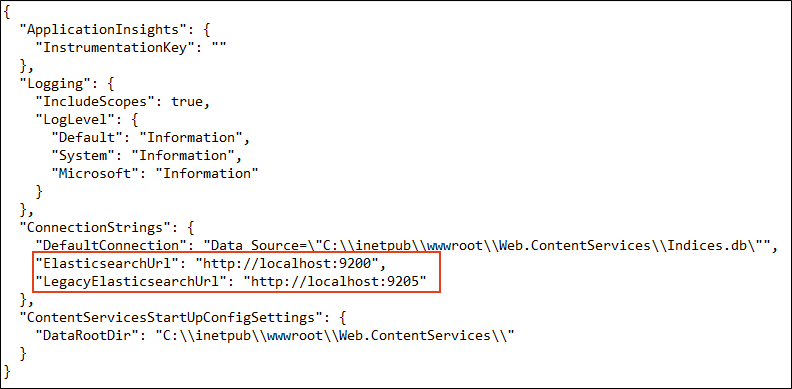
Open the appsettings.json file. Add a comma at the end of the ElasticsearchURL line. Then paste the following under that line (assuming the port number you entered previously is 9205):
"LegacyElasticsearchUrl": "http://localhost:9205"
-
Save your changes in this file.
- Open the IIS Manager and start the service.

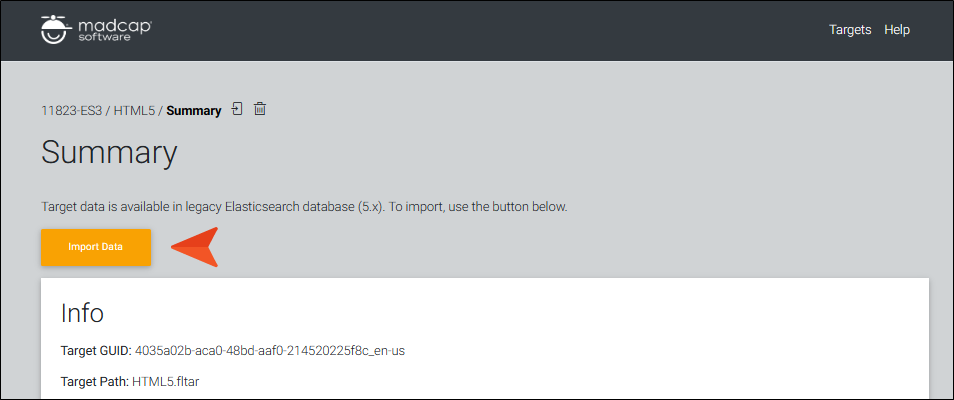
Import Data From Elasticsearch 5.6 to 7.10.2
-
Launch Content Services (i.e., the URL to your server where Elasticsearch is installed).
-
Open a target from the grid.
-
Click Import Data.
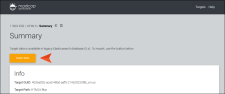
Note If you have do not yet have data for Elasticsearch 7.10.2, you should see the large Import Data button. This button will go away after your first import. There is also a smaller import button at the top of the portal.

-
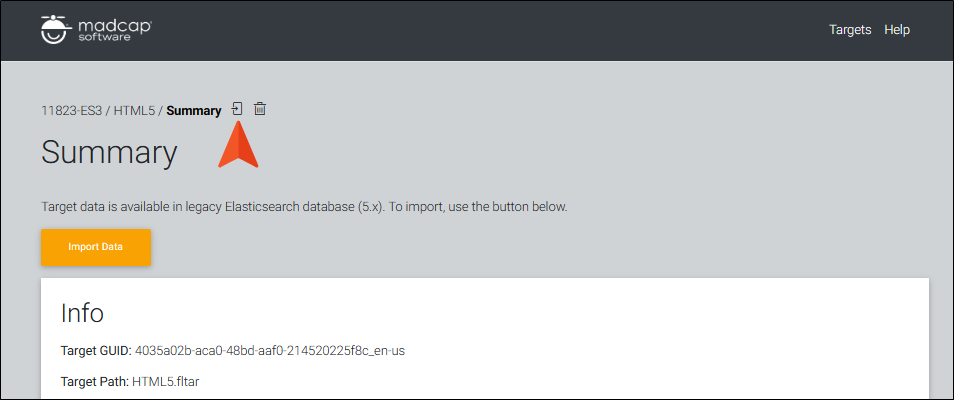
In the popup, click Import Data again.
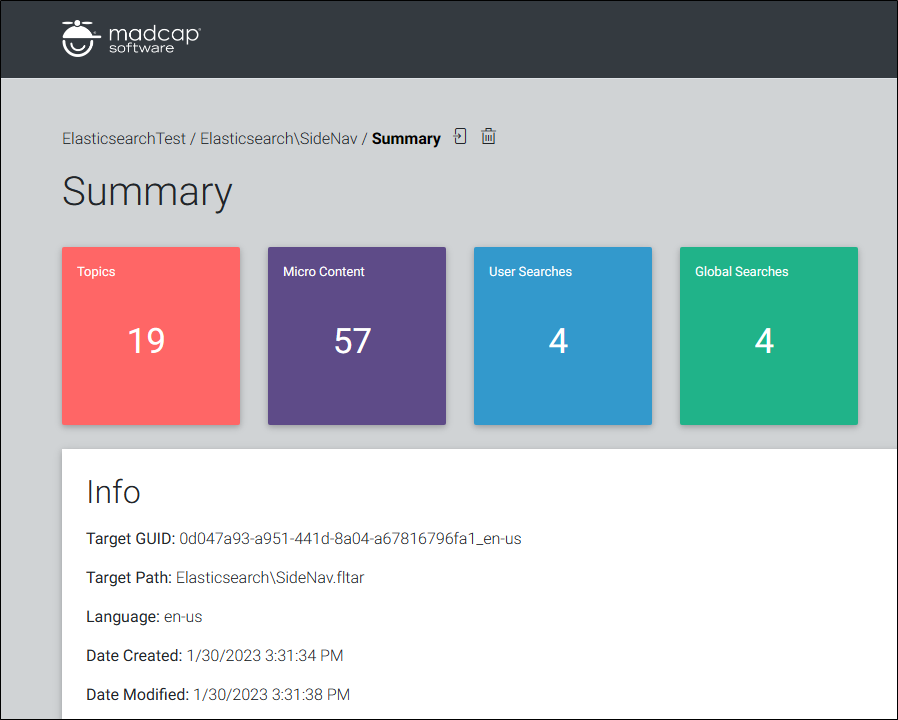
You should see the tiles populated with numbers, representing your imported data.