Using a skin, you can modify the appearance of table of contents (TOC) entries in online output. In order to see these items in the output, you must include them in your project.
Styles for many of the TOC entries are supported only in WebHelp and WebHelp Plus outputs. However, there is one icon style that is supported only in Microsoft HTML Help.
How to Specify Style Settings for TOC Entries
- Open a Standard skin.
- Select the Styles tab.
-
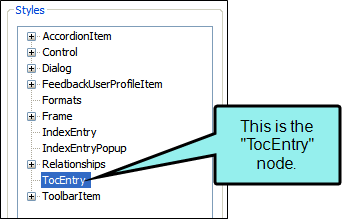
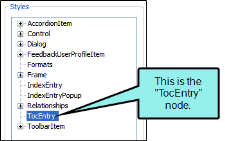
In the Styles section, select the Toc Entry node.
- Select the Property Groups or Alphabetical List option to display the properties for the node.
-
In the Properties section, set the values for the properties that you want modify.
Book Icon
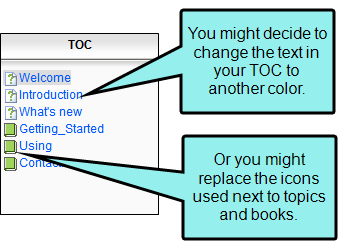
To select a different icon image for the book items in the TOC:
Expand the TocIcons property group on the right side of the editor and select an image from the Book Icon field. Click the down arrow in this field and then select Browse for Image to find and select an image file.
Book Icon Alternate Text
To change the alternate text for the book icon
Expand the TocIcons property group on the right side of the editor and enter new text in the Book Icon Alternate Text field.
Book Open Icon
To select a different icon image for the book items in the TOC when they are open (or selected):
Expand the TocIcons property group on the right side of the editor and select an image from the Book Open Icon field. Click the down arrow in this field and then select Browse for Image to find and select an image file.
Book Open Icon Alternate Text
To change the alternate text for the book icons in the TOC when they are open (or selected)
Expand the TocIcons property group on the right side of the editor and enter new text in the Book Open Icon Alternate Text field.
Font Background Color
To change the color of the area behind the font:
Expand the Font property group on the right and change the value in the Background Color field. Click the down arrow to open a color palette window. You can click a color shown, or you can click More colors and select a different color or create a custom color. If you are change the color for a style item that also has a gradient, the gradient properties have precedence over the solid color.
Font Color
To change the color of the font:
Expand the Font property group on the right and change the value in the Color field. Click the down arrow to open a color palette window. You can click a color shown, or you can click More colors and select a different color or create a custom color. If you are change the color for a style item that also has a gradient, the gradient properties have precedence over the solid color.
Font Family
To select a specific font family (e.g., Arial, Tahoma, Verdana):
Expand the Font property group on the right and change the value in the Font Family field. From the drop-down, select the font family or font set that you want to use.
Font Size
To change the size of the font:
Expand the Font property group on the right and change the value in the Font Size field. Click the down arrow to open a small window. In this window, you can enter the size of the font in the lower-left field (either type a number or use the up and down arrows). You can select the unit of measurement (e.g., pixels, points, centimeters) using the lower-right drop-down arrow.
Font Style
To change the style of the font (e.g., make it italic):
Expand the Font property group on the right and change the value in the Font Style field. Click the down arrow and select either italic or normal.
Font Weight
To change the weight of the font (e.g., make it bold):
Expand the Font property group on the right and change the value in the Font Weight field. Click the down arrow and select either bold or normal.
HTML Help Icon Index
To select a different icon image for the items in HTML Help:
Expand the TocIcons property group on the right side of the editor and select an image from the Html Help Icon Index field.
Mark as New
To specify whether all TOC icons should include an asterisk (indicating a new entry).
Expand the TocIcons property group on the right and change the value in the Mark As New field. Click the down arrow and select either false or true.
Mark as New Alternate Text
To change the alternate text for the "mark as new" icon (see Accessibility):
Expand the TocIcons property group on the right side of the editor and enter new text in the Mark As New Icon Alternate Text field.
Topic Icon
To select a different icon image for the topic items in the TOC:
Expand the TocIcons property group on the right side of the editor and select an image from the Topic Icon field. Click the down arrow in this field and then select Browse for Image to find and select an image file.
Topic Icon Alternate Text
To change the alternate text for the topic icon
Expand the TocIcons property group on the right side of the editor and enter new text in the Topic Icon Alternate Text field.
- Click
") to save your work.
to save your work.