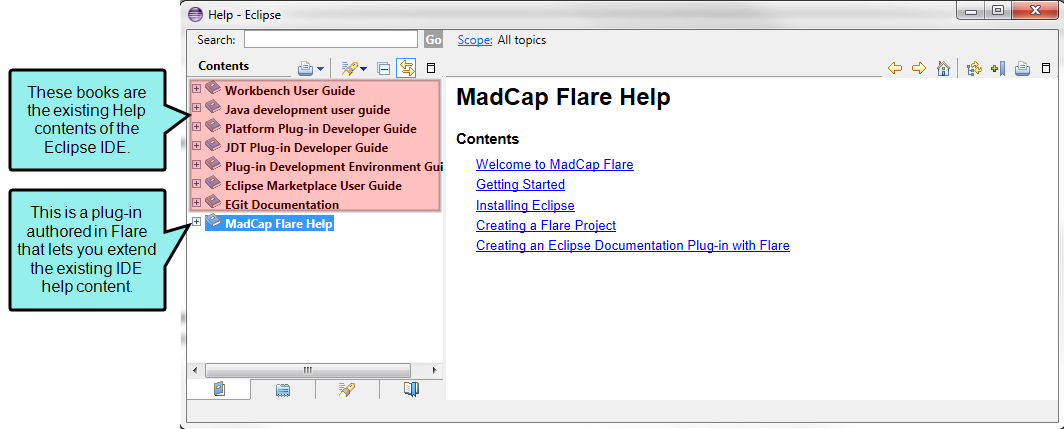
The Eclipse Help output type gives you the ability to create a plug-in for the Eclipse Help system. A plug-in lets you extend the existing Help contents of the Eclipse IDE by including your own documentation.
If you plan to create an Eclipse plug-in with Flare, you must install some additional Eclipse components before getting started. Once the components are in place, you must also set up the Eclipse Help options in the Target Editor in Flare.
[Menu Proxy — Headings — Online — Depth3 ]
Installing Eclipse
Before you begin, you must install the required Java Runtime Environment (JRE) and Java version on the system where you will be building and publishing the Eclipse Help output.
How to Download and Install the JRE
The JRE for Eclipse is part of the Eclipse IDE for Java EE Developers package distribution and can be downloaded from the eclipse.org website. This distribution contains all of the features that you need to build an Eclipse plug-in with Flare.
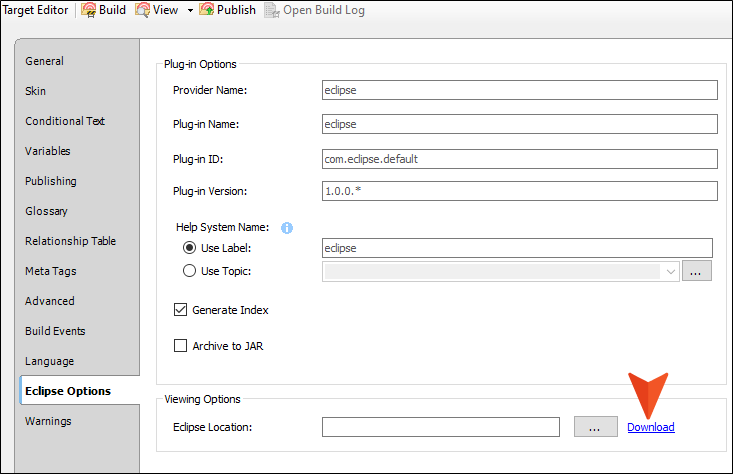
- In Flare, add or open an Eclipse Help target.
- In the Target Editor, select the Eclipse Options tab.
-
Under Viewing Options, click Download.

This opens the Eclipse IDE for Java EE Developers page on the eclipse.org website.
-
Under the Download Links area, download the appropriate Eclipse IDE package for your operating system:
- Windows 32-bit Select this link if your computer is running a 32-bit operating system.
- Windows 64-bit Select this link if your computer is running a 64-bit operating system.
-
On the Eclipse downloads page for your operating system, click the Download link.
This downloads a ZIP file to your computer. Depending on your internet bandwidth and connection speed, you should plan for the download to take a minimum of several minutes.
-
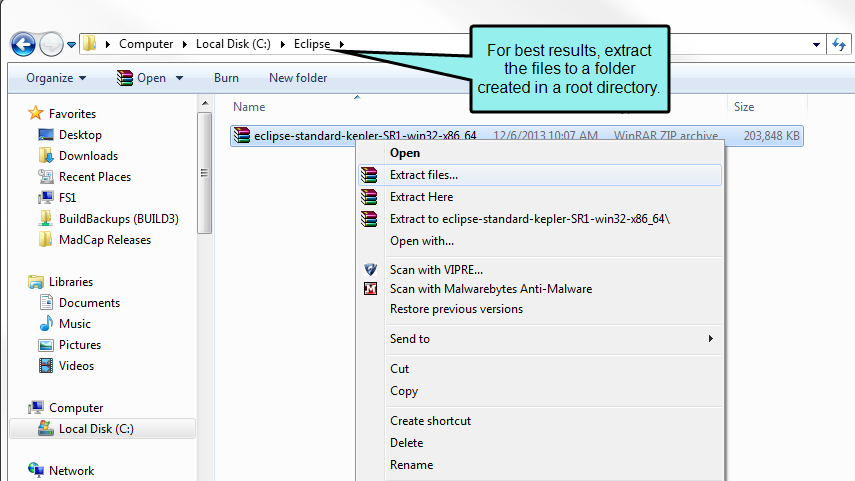
When the download is complete, create a folder on your computer where you can decompress the download in Windows.
Note For best results, create the folder in a root directory, such as C:\Eclipse. Users have reported Eclipse issues when extracting the files to a mapped network drive or to a location with spaces in the path.

-
Use a decompression utility to extract the ZIP file that you downloaded into the folder you created.
Note The Eclipse installation documentation details known issues when using the built-in decompression utility that is included with all versions of Windows. To learn more, visit this link: http://wiki.eclipse.org/Eclipse/Installation.
-
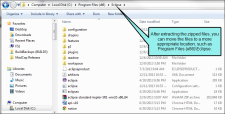
After extracting the zipped files to the folder you created, you can move the files to a more appropriate location such as Program Files\Eclipse or Program Files (x86)\Eclipse. Please note that these are just examples. You might use a different location than Program Files or Program Files (x86).
- Continue by downloading and installing Java on your system.

How to Download and Install Java
To generate the Eclipse Help output type, you must have Java Version 7 (Update 45) or later installed on your system.
- In a web browser, navigate to the Java downloads page at http://java.com/en/download/manual.jsp.
-
Under the Windows area, download the appropriate Windows Offline file for the 32- or 64-bit operating system:
- Windows 64-bit Download the file named "jre-7u45-windows-zx64.exe."
- Windows 32-bit Download the file named "jre-7u45-windows-i586.exe."
- Double-click the EXE file. The Open File-Security Warning dialog appears.
- In the dialog, click Run. In a few moments, the Java Setup - Welcome dialog opens.
- At the Welcome to Java message, click Install.
- At the installation complete message, click OK. The Verify Java Version page should now be open in your web browser.
- In the web page, click the Verify Java Version button.
- If your web browser needs permissions to run the verification process, click the Run this time button. In a few moments, a Java Detection message appears.
- In the Java Detection message, click Run.
- If the verification is successful, close your web browser.
Continue by starting the Eclipse platform for the first time.
How to Start Eclipse for the First Time
After installing the required JRE and Java version on your computer, do the following:
- In Windows, navigate to the folder where you moved the decompressed Eclipse files.
- Double-click the file named eclipse.exe. The Open File - Security Warning dialog appears.
- In the dialog, click Run. In a few moments, the Workspace Launcher appears.
- In the Select a Workspace dialog, choose a workspace folder. Then click OK.
- When the Java - Eclipse window appears, click Help > Check for Updates.
- If any updates are found, it is recommended that you install them. If no updates are found, click OK.
Creating an Eclipse Plug-In With Flare
To create your Eclipse plug-in with Flare, add a new Eclipse Help target
The Eclipse Help output type is viewed in the Eclipse Help Viewer (or if you are including context-sensitive Help, the Eclipse Dynamic Help window).
Eclipse Help Configurations
The viewer is powered by a java-based web server instance that ships with the Eclipse IDE. This makes it possible for you to distribute the published Eclipse Help output using these Eclipse Help configurations:
|
Eclipse Help Configuration |
Eclipse Plug-In Reference |
Description |
|---|---|---|
|
Standalone Help Application |
org.eclipse.help.standalone |
This is a standalone Help system, which contains a pared down version of the Eclipse IDE. It includes all of the Eclipse Help content, as well as most of the features included in the integrated Eclipse Help system. This is best used when developing a standalone Help system for applications not based on the Eclipse framework. |
|
Infocenter |
org.eclipse.help.Infocenter |
This is a server-based Help system, where the Eclipse plug-in that you create is installed on a server. This gives your users the ability to access your output over the internet (or over an intranet). |
|
Extension Points |
org.eclipse.help.toc
org.eclipse.help.index |
If your programmers are developing a rich client application, the Eclipse plug-in that you generate with Flare lets you integrate your content using the Eclipse Help extension points (i.e., table of contents, keyword index, and HTML content pages) . |
How to Build and View an Eclipse Help Target
- After specifying the options in your Eclipse Help target (see Specifying Eclipse Options), click the Build button in the Target Editor.
- When prompted if you want to view the generated output, click Yes.
-
When the message appears to notify you that the Help Viewer extension site must be refreshed, click OK.
Note If you do not want to see the notification message when building Eclipse Help in the future, clear the "Show this dialog" check box before clicking OK.
This launches the Help - Eclipse window.
Understanding the Eclipse Help Output
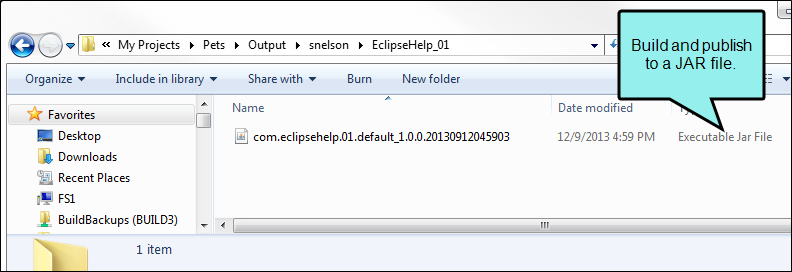
When you build and publish your Eclipse Help output, Flare creates a collection of output files. The files provide Eclipse with the instructions it needs to load your Flare content in the Eclipse Help Viewer. Your plug-ins files can be distributed as a collection of files in a folder.

They can also be bundled in a single, executable Java archive (JAR) file.
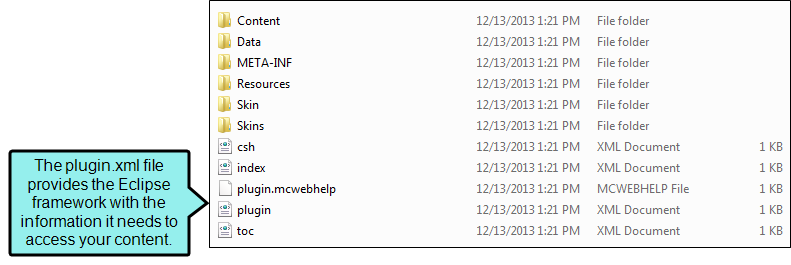
The Eclipse Help output contains the following files and resources:
XML-Based Plug-In File and Extension Points
The plug-in file (plugin.xml) generated by the Eclipse Help output type provides the Eclipse framework with the XML-based instructions it needs to load and access the files you published with Flare.
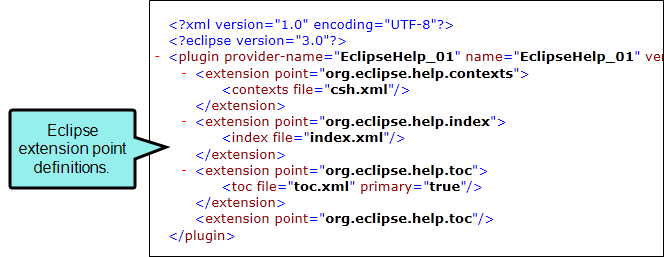
The content of the file specifies the different extension points for your plug-in. These extension points are required for your output to load in Eclipse and include the following:
- org.eclipse.help.contexts If you have created context-sensitive Help
- org.eclipse.help.index If you have included index keywords in your target, this extension point registers the Flare keyword index file (i.e., index.xml) for Eclipse.
- org.eclipse.help.toc If you have created a table of contents in your target, this extension point registers the Flare-generated table of contents file (i.e., toc.xml) for Eclipse.
Following is an example of a plugin.xml file generated for the Eclipse Help output:
Content and Resource Folders
The output also includes the following content and resource folders:
- Content This folder contains the HTML content files that you authored in Flare. If you do not want your content files in a separate Content folder, you can omit it when publishing your target.
- Data This folder contains XML and JavaScript instructions for your Flare output.
-
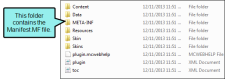
META-INF When you build your output and generate a JAR file (see Specifying Eclipse Options), the Eclipse Help output creates a file named "Manifest.MF." This file contains information about the files that are packaged in your archive.
- Resources This folder contains JavaScript instructions for your Flare output.
- Skin This folder contains components related to the user interface of the Eclipse Help Viewer.
- Skins This folder also contains components related to the user interface of the Eclipse Help Viewer.

Distributing the Eclipse Help Output
You can choose whether to publish the Eclipse Help output that you generate with Flare as a collection of files in a folder or as a single executable file. Depending on your development environment, you will use the Eclipse framework to deliver your output in one of three modes: Infocenter, Standalone, or Rich Client Platform (RCP).
Infocenter (Information Center)
In Eclipse, Infocenter mode lets you deliver server-based documentation via the Help-Eclipse window. This mode is typically selected when developing Eclipse-based applications (e.g., client- and web-based applications).
With this mode, your developers must install an Eclipse information center on a server. Once the Eclipse server is installed, you can upload the Eclipse Help output that you generated in Flare to the server. There are a variety of ways that you can connect the plug-in that you generated in Flare. To learn more, see the Eclipse documentation at http://help.eclipse.org.
Standalone Help System
In Eclipse, you can deliver documentation via the Eclipse Help Viewer as a standalone application. This application gets packaged and installed locally on a user's system and includes a light version of Eclipse that contains only the Eclipse Help system.
Standalone mode is typically selected when developing applications that are not Eclipse-based. To learn more, see the Eclipse documentation at http://help.eclipse.org.
RCP
In Eclipse, this mode lets you deliver documentation as part of an Eclipse RCP application. Typically, documentation is accessed using a Help menu. Unlike the Infocenter and standalone mode, the optional RCP workbench supports Eclipse context Help and the Eclipse Help Viewer.
This mode is typically selected when developing applications that are not Eclipse-based. To learn more, see the Eclipse documentation at http://help.eclipse.org.

