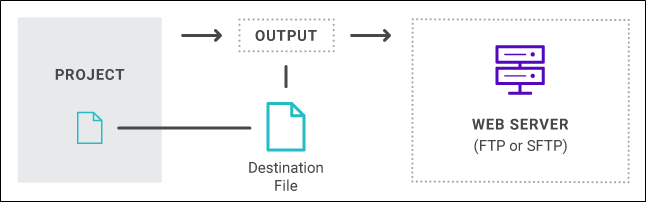
You can create a destination file using Secure File Transfer Protocol (SFTP) if you want to publish output (HTTP) files to a web server over a TCP/IP network, and you need a much more secure option than File Transfer Protocol (FTP).
[Menu Proxy — Headings — Online — Depth3 ]
How to Create a Destination File Using SFTP
- Open the Project Organizer.
- Open an existing destination file or add a new one.
- In the Destination Editor, click in the Type drop-down field, and select SFTP.
- In the Host Name field, enter or select the name of the remote server or the computer where the output files will be published (e.g., acme.com).
- In the Port field, enter the port that you will use to connect to the remote server. Typically, you can obtain the port from your network administrator. The default port for SFTP is 22.
- In the Connection Mode field, select either Active or Passive. These two modes have to do with security firewalls and how connections are made between the server and the client. With Active mode, the client initiates the connection for the command channel, and the server initiates the connection for the data channel. With Passive mode, the client initiates the connection for both channels. From a security standpoint, Active mode is more beneficial for the server side, and Passive mode is more beneficial for the client side.
-
In the Directory field, enter the folder where the output files will be published. You might enter something like this: public_html/Help/FictionSoftPro. You can also leave the default setting of "public_html" if you are publishing to the root directory on the server.
Note When you publish output, only the files and subfolders within your target's output folder are sent to the destination. The target output folder itself is not included. For example, let's say you have a target named "AdvancedOutput." If you want the output to be placed in a destination with the same folder name, you need to create the "AdvancedOutput" folder at the final location first. Then in your publishing destination file, you can point to that exact folder. When you publish the output, the necessary files will automatically be placed inside it.
- (Optional) You can the Comment field to provide a description of the destination so that its purpose is clear.
-
In the Server Validation field, select one of the options.
See the full topic for details.
- None Select this if there is no validation of the SFTP server.
- Known Hosts File Select this if the SFTP server is listed in a known hosts file.
- Public Key File Select this to validate the server against a public key.
- In the Hosts File field, click
 to find and select the hosts file.
 -
In the Authentication field, select one of the options.
- Password Select this if the server connection is authenticated by the user name and password set in the Login dialog (Login Credentials).
- Public Key Select this if the server connection is validated against a public/private key pair match. You need to supply the private key and password for the server.
- Both Select this if the server connection requires both the user and private key validation.
- In the Key File field, click to find and select the key file.
- In the Key Password field, enter the key password.
- Select Login Credentials and enter the user name and password required for accessing the server to which you are publishing. This field is enabled only after you enter the host name.
- (Optional) Select Anonymous Login if you want to publish to the server without being required to enter a user name or password. (You may need to check with your network administrator to determine if this is allowed.)
- (Optional) In the View URL field, you can enter an address corresponding to your publish destination. This field is for your own internal purposes, and is simply a quick way for you to open the output associated with the destination by clicking the button to the right.
-
(Optional) You can select the upload options.
- Upload Only Changed Files Select this option if you want Flare to republish only the files that have changed. This can save significant time.
- Remove Outdated Published Files Select this option if you want Flare to identify files that were previously published to the destination but are no longer in the source files. Flare will then remove such files from the destination.
- Click
") to save your work.
to save your work.

