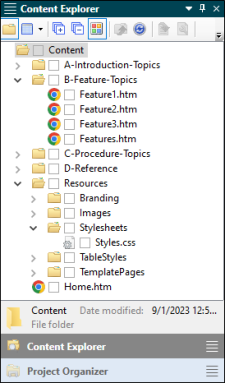
The Content Explorer (along with the Project Organizer) is one of the most often used areas of the Flare interface. Just as it sounds, the Content Explorer is used to hold all of the content-related items in your project—both topics and non-topic files.
[Mini-TOC Proxy — Online — Depth1]
Tip You can drag and drop files from Windows into the Content Explorer.
Tip If you have a content file open and want to quickly find where it is stored in the Content Explorer, you can right-click the file and select Locate in Explorer. You can also open the Project ribbon and click Locate in Explorer. Flare opens the Content Explorer, expanding folders to show where the file is located.
Tip You can quickly insert a text hyperlink to a file (e.g., topic, image, snippet) in the Content Explorer. To do this, click and drag the destination file from the Content Explorer to the location in the topic where you want to insert it. As you drag the file into the topic, a vertical red bar acts as a guide to help you place the link in the topic. When you release the mouse button, the Insert Hyperlink dialog opens. You can modify any fields in the dialog (if necessary) and click OK to insert the hyperlink.
Note If you are working with HTML Help and import a RoboHelp project that has been merged with other CHM files or includes shortcut controls, the linked files are placed in a special subfolder in the Content Explorer (Resources > CHMSupport).
Note If you import Microsoft Word documents containing embedded images into a project, Flare places copies of those image files in subfolders within the Resources > Images folder. This is done in order to avoid naming conflicts with embedded images from other Word documents that you might import. The subfolders are named after the Word documents being imported.

