Markdown is a markup language using plain formatting syntax. You can import Markdown (.md) files into Flare projects. This might be necessary, for example, if software developers or subject matter experts write content in Markdown and you want to include that information in your Flare project.
[Menu Proxy — Headings — Online — Depth3 ]
Flavors
There are multiple variations, or "flavors," of Markdown.
-
CommonMark This is a standardized syntax of Markdown, and Flare supports this flavor entirely.
-
Other Flavors A variety of other Markdown implementations have been created over the years to support additional features beyond the most common HTML elements. Flare may import extra markup from those flavors, but some might not be fully supported.
Markdown Syntax and Flare Results
Depending on the Markdown flavor, various syntax and tags will be converted in Flare in different ways. The following resources are helpful to understand Markdown's basic and extended syntax:
-
Basic Syntax
Copyhttps://www.markdownguide.org/basic-syntax/ -
Extended Syntax
Copyhttps://www.markdownguide.org/extended-syntax/
Usually the conversion is straightforward because there is an obvious HTML counterpart.
Examples
|
Markdown Syntax |
HTML Result in Flare |
|---|---|
|
## My Second-Level Heading |
<h2>My Second-Level Heading</h2> |
|
I am **really** serious! |
<p>I am <strong>really</strong> serious!</p> |
|
- First thing - Second thing - Third thing |
<ul> <li>First thing</li> <li>Second thing</li> <li>Third thing</li> </ul> |
Note If you add regular HTML into Markdown files, it will be imported properly into Flare as HTML.
Custom Tags
Flare is able to import custom tags that you add to Markdown files.
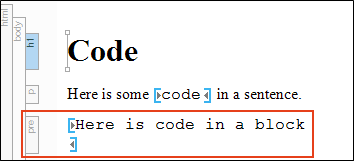
Example A person writes the following in a Markdown document.

After this document is imported into Flare, it will look as follows. Notice the structure bar at the top indicates the custom code tag name when you click inside the content below.

Note At this time, MadCap-specific tags (e.g., markup for a drop-down effect) cannot be imported from Markdown into Flare.
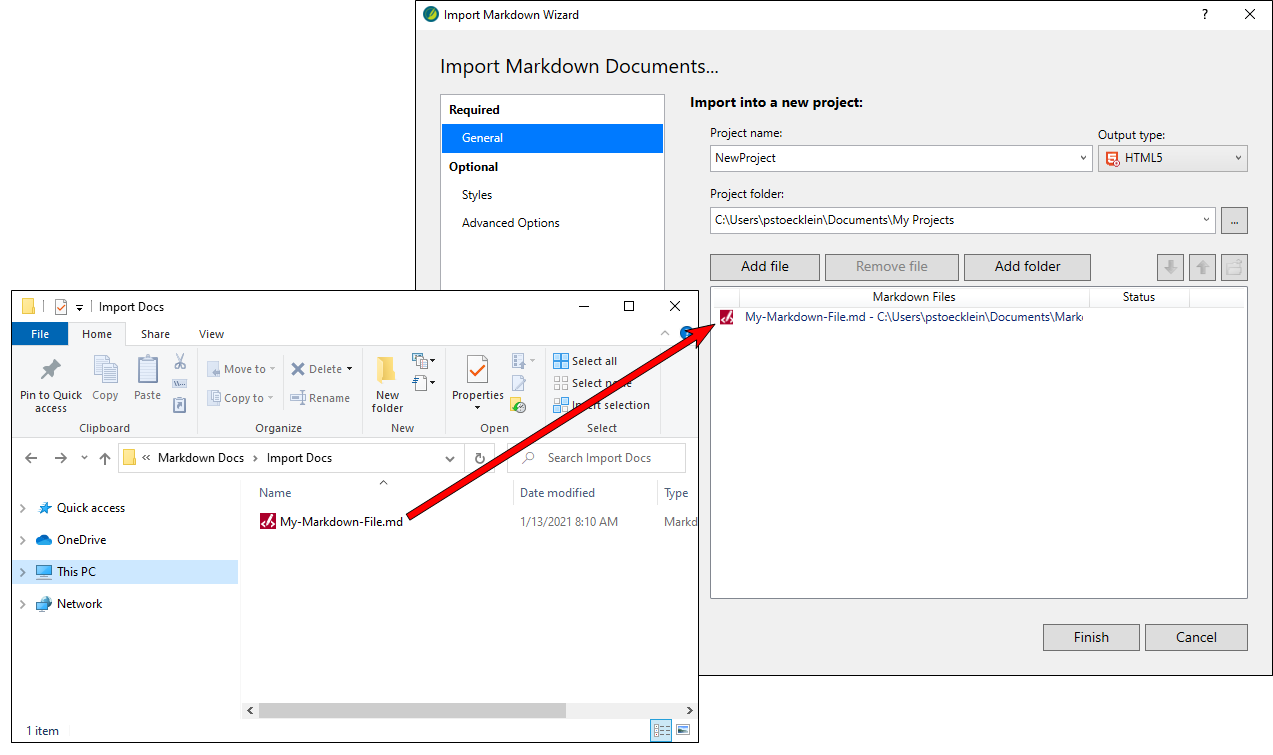
How to Import Markdown Documents
The following steps describe how to import Markdown files using the Import Markdown Wizard. However, you also have the option of adding a Markdown import file
- Select Project > Import > Markdown Documents.
-
In the wizard, choose either Import into a new project (and complete the fields below) or Import into this project. However, if you do not have a project currently open, the file(s) will automatically be imported into a new project.
- Project name Type a name for the new Flare project that will be created after you perform the import.
- Project folder Click
 to find and select a folder.
 -
Output type Select the primary target for your project.
A target is a file that generates output from your project. You want your output to look and behave in a certain way, but not all authors have the same audience or work for the same company with the same needs and the same computer networking setup. Therefore, Flare lets you choose the best type of output(s) for your needs. A target file is used for each instance of an output type. And you can have many targets in your project (e.g., eight targets using PDF, two targets using HTML5).
This page of the wizard lets you select a primary target as you get your project off the ground. This means that—although you can use more than one target for your project—you might use one target most of the time. By selecting a primary target, you will be able to use shortcut buttons to build, view, and publish its output more quickly. Also, when you open topics in the XML Editor, they will be displayed by default with the styles and other specifications associated with the primary target. However, you can use the Layout and Medium drop-downs in the local toolbar of the XML Editor to view topics with other settings.
Do not worry if you're not yet sure of the best output type for your project. No matter which output type you select now, you can always change the primary target later.
-
Click Add file to choose Markdown documents. You can also select other options as necessary.
Option
Description

This removes the selected file(s) from the list.

This lets you choose a folder, so that all files in that folder are added for the import.

This moves the selected file or folder lower in the list (if you have more than one to import).

This moves the selected file or folder higher in the list (if you have more than one to import). The file at the top is used for the name of the Flare TOC that is created as a result of the import. Also, the order determines how the imported files are arranged in the TOC as topics.

This opens the file that is selected in the list.
-
(Optional) On the left, select Styles. You can use this page to associate the project with an external stylesheet, restore mapping default settings, map the Markdown styles to Flare styles, and choose which styles should be the start of new topics.(Optional) On the left, select Styles. You can use this page for various style settings.
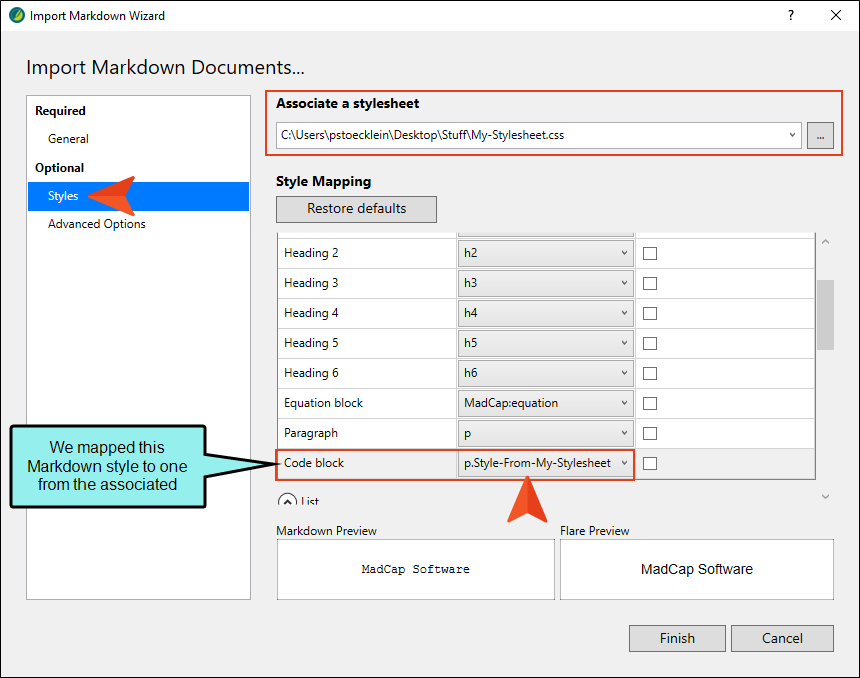
Associate a Stylesheet
This is purely optional. You can choose an existing stylesheet (such as one in the Flare project you are importing files into) by clicking
. After doing this, styles from that stylesheet become available in the mapping drop-down fields below, so that you can map Markdown tags to those from the stylesheet you chose.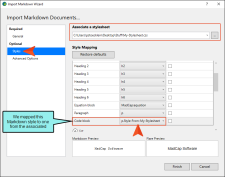
Style Mapping
- Restore defaults If you make mapping selections in the fields below but then change your mind, you can click this button, which will return the default settings.
-
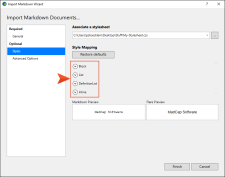
[Drop-Downs] You can expand these sections to see the styles found in the Markdown document(s).
-
Block These are styles that take up the entire space in a line (e.g., paragraphs, headings)
-
List These are styles that are used to create bulleted and numbered lists.
-
Definition List These are styles that are used to create definition lists, which are typically groups of terms and definitions.
-
Inline These are character-level styles that are applied only to certain words within a block (e.g., hyperlinks, bold text).
Selecting Styles
In these drop-down sections, you can map a style from the Markdown document(s) to another style.
Flare automatically populates the "Map to" column with the recommended style. For example, if Heading 1 is found in the Markdown document, the recommended style to map to is h1 in Flare. Therefore, you often don't need to choose a different style. However, sometimes you might want something different. If you want to map the style to something other than what is recommended, click the drop-down in a cell to select a style.
Example — Code Blocks
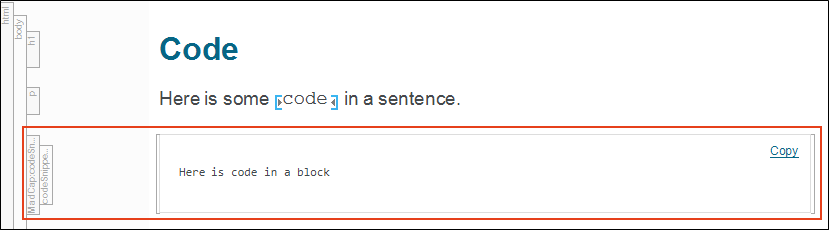
You have a code block in the Markdown document, Flare initially maps it to the MadCap:codeSnippet style.

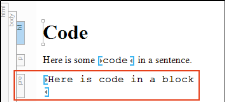
If you leave this setting, the content will be brought in to Flare like this:
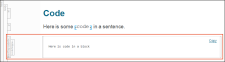
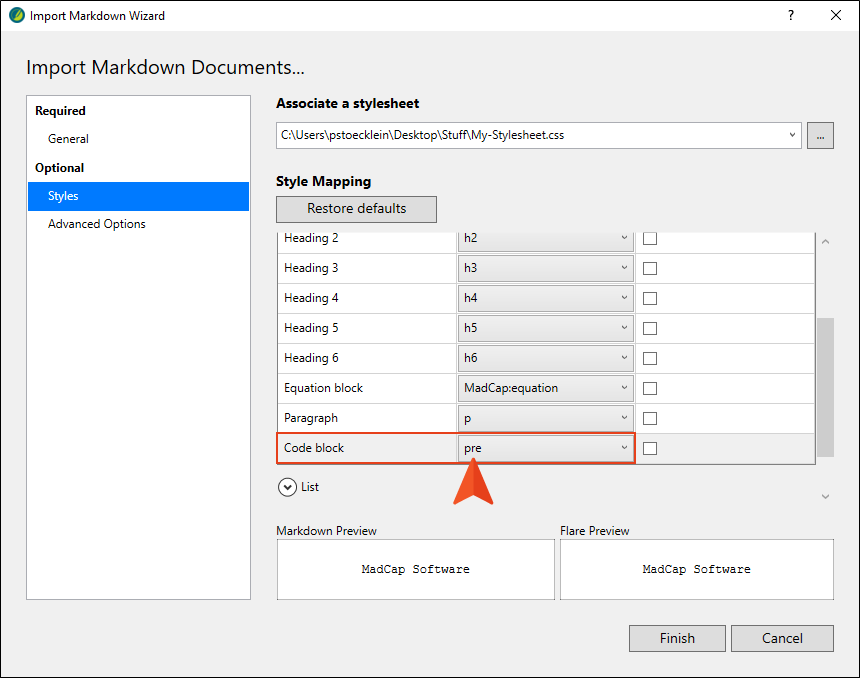
However, you might want to map code blocks to the "pre" style instead.
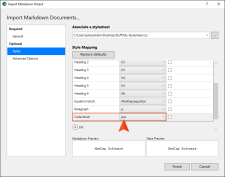
In that case, the content will be imported like this:
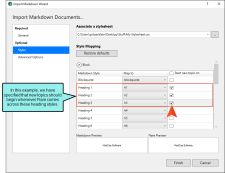
Specifying New Topics
If you want to specify that new topics should start with certain styles, expand the Block section and click the check box next to that style. The h1 style is selected by default (most authors start new topics on heading styles), but you can choose any block styles that you like.
-
Preview
When you select a style row, a preview is shown at the bottom so you can see how it looks.
-
(Optional) On the left, select Advanced Options. You can use this page to set various options. Click the quick Help buttons
 next to sections for more information.
Styles
-
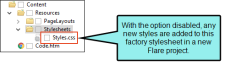
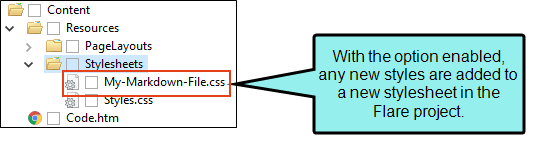
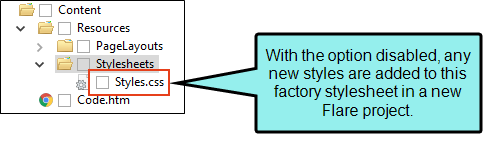
Create new stylesheet This creates a new stylesheet based on the settings you choose.
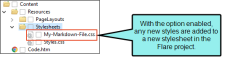
If you disable this option, the styles resulting from the import will be added to the project’s primary stylesheet.
Note If you choose to create a stylesheet when importing Markdown documents into a new project, that stylesheet will be automatically selected in the project properties. If you then open the Markdown Import Editor, deselect the option to create a new stylesheet, and reimport the documents, that stylesheet will continue to exist in the project.
Topics
-
Convert all simple lists to paragraph lists If you leave this option disabled, bulleted and numbered lists will be imported so that each item in the list just has an <li> tag. If you enable this option, <p> tags will be added within each <li> tag. However, you can add <p> tags later manually for list items where you want them. The benefit of having <p> tags within list items is that you can easily add paragraphs or other content within that item before the next bullet or number is shown.
Note Markdown supports both simple and paragraph lists. Although you can import simple lists as paragraph lists using this option, the reverse is not true. If you have paragraph lists in Markdown, they will not be converted to simple lists if you deselect the option. Those will just be imported as paragraph lists regardless of the option setting.
- Convert all definition lists to definition paragraph lists If you leave this option disabled, definition lists will be imported so that each item in the list just has a <dd> or <dt> tag. If you enable this option, <p> tags will be added within each <dd> or <dt> tag. However, you can add <p> tags later manually for definition or term items where you want them. Most authors tend to create definition lists without <p> tags, but you can add them if you want.
- Approximate filename length Enter the maximum number of characters to use for naming topic files. The default is 24.
Resources
- Resources If the Markdown files have links to other files, such as images, you can select this option to include those files in the import. However, the files need to be located on your computer in order to be imported.
- To project resources folder Select this to automatically import any extra files to the Resources folder in your project.
- To folder Select this if you want to import the extra files into a specific folder, such as a subfolder under Resources, or even in a different folder in the Content Explorer. Then use the field below to choose the folder.
Tables
-
Leave table styles as is This imports tables in a plain format with no styling.
-
Apply a selected table stylesheet to all imported tables This lets you select an existing Flare table stylesheet and apply it to all imported tables. That way, the imported tables will automatically have the look and feel associated with that table stylesheet.
Reimport
- Link generated files to source files Enable this if you want to continue editing in Markdown and reimport as needed. Deselect it if you want to edit the imported files in Flare going forward, severing the connection to the source files.
- Auto-reimport before generate output If you selected “Link generated files to source files,” you will likely make future content changes in the source files. When you make such changes, the source files need to be reimported into the project so that they can be included in the output. You have the option of reimporting the files manually. However, you can use this option instead and let Flare reimport the files automatically when you attempt to build output.
-
- Click Finish, then Accept.


Markdown Import Editor—Import and Re-Import
If you add a Markdown import file
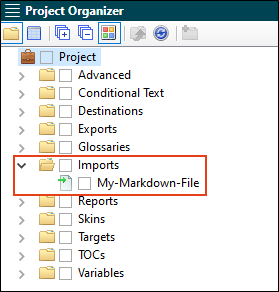
When you double-click this file, it opens in the Markdown Import Editor. This editor contains most of the same fields and options as the Import Markdown Wizard.
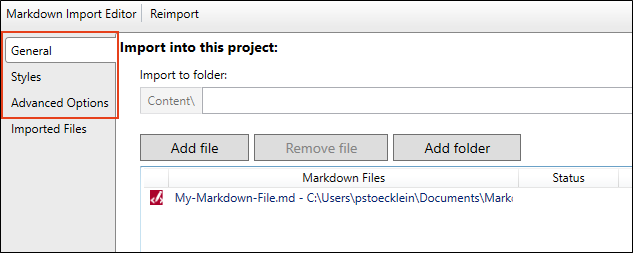
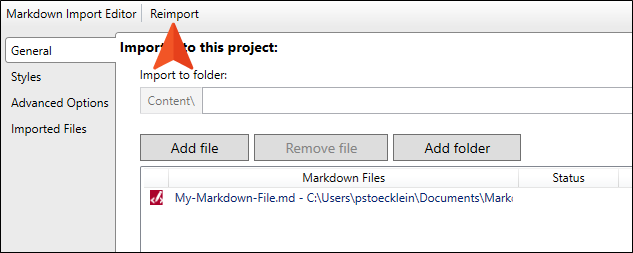
After completing or changing any of these fields, you can click Reimport in the toolbar.
What’s Noteworthy?
Note A link icon ![]() displays on tabs in the XML Editor next to file names that are imported from and linked to another file or Flare project. However, if you are also using the built-in source control technology, the source control icons have a higher precedence and will therefore be displayed instead.
displays on tabs in the XML Editor next to file names that are imported from and linked to another file or Flare project. However, if you are also using the built-in source control technology, the source control icons have a higher precedence and will therefore be displayed instead.
What’s Next?
Now you can move on to any of the other basic steps:
- Step 2: Authoring
- Step 3: Designing
- Step 4: Developing Targets
- Step 5: Building and Publishing Output
Note You do not necessarily need to follow all of the above steps (and their substeps) in the exact order given. For example, as you add topics to a project, you may want to start applying styles and formatting to them right away, before adding other features to the project, such as a glossary. However, the above sequence probably makes the most overall logical sense. For example, you must start a project before adding content and features (i.e., topics, content, cross-references, etc.) to it.

