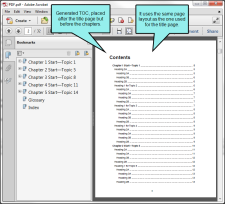
For print-based output, you can let Flare auto-generate a table of contents (TOC) for you. Alternatively, you can create a unique topic and insert a TOC proxy into it
[Menu Proxy — Headings — Online — Depth3 ]
How to Auto-Generate a TOC
- Open a print-based target.
-
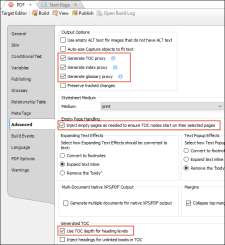
On the Advanced tab of the Target Editor, select Generate TOC Proxy.
Note This option is disabled by default for existing targets, but enabled for new targets. If a TOC proxy is already present in a topic or snippet that is being included in the output, this auto-generate option has no effect.
- Click
 to save your work.
When you generate the target, a TOC will be created and inserted at the beginning of the output. If your page layout includes a Title page type
Which Page Layout is Used?
If a TOC, index, or glossary is auto-generated, how does Flare know which page layout to use for them in the output? It uses the same page layout that is being used for the topic(s) just before it.
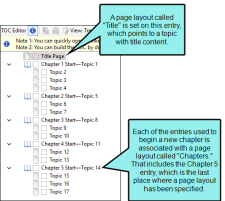
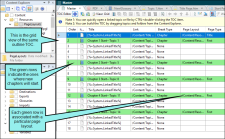
Example You have an outline TOC set up like this:
In this case, the generated TOC is going to be placed directly after the title page. It will use the "Title" page layout which is set on the first "Title Page" entry. That page layout has a Title page type in it. That's how Flare knows it should place the TOC directly after it and to use the same page layout to display the TOC.
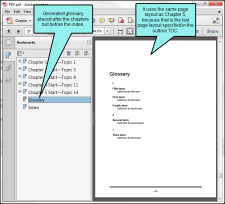
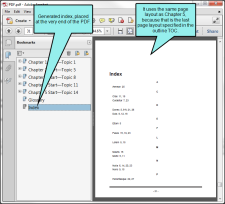
The generated glossary is going to be placed after the final entry, called "Topic 17," and the generated index will be placed after the glossary. Both of these will use the "Chapters" page layout, because it's the last one that was set.
Auto-Generate vs. Manual Proxies
The auto-generate method is much quicker and easier than the manual method. The manual method is more flexible but requires you to perform a number of extra steps, such as creating topics, inserting proxies, and adding files to the outline TOC. So if you simply want to quickly create print output with generated TOCs, glossaries, or indexes, the auto-generate option might be best for you. But if you want more control over the placement and look of the generated TOCs, glossaries, and indexes, you should use the manual method.
Editing Attributes for Generated TOCs, Indexes, and Glossaries
You can change the heading text for each of these auto-generated proxies in the language skin.
All other attributes for the generated glossary, index, and TOC can be controlled in your stylesheet.
Example
Example You need to create a PDF manual with five short chapters. You've created 17 topics that will make up those five chapters, and you've created a separate topic for a title page.
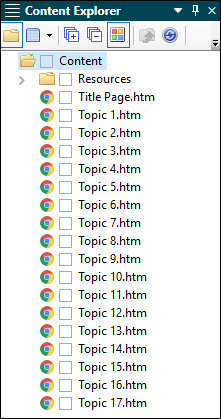
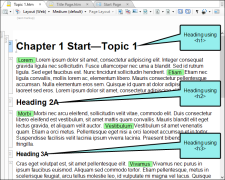
Your topics use <h1>, <h2>, and <h3> tags. These will become important when the TOC is generated.
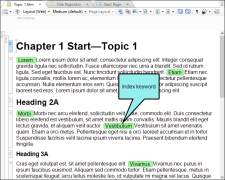
You've inserted index keywords throughout the topics. These will become important when the index is generated.
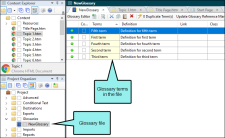
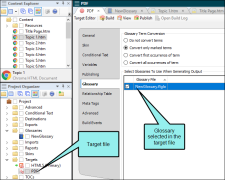
You've created a glossary file and associated it with the PDF target you're going to use. This will become important when the glossary is generated.
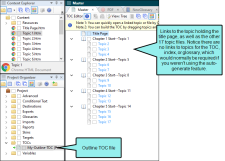
You've put all of your topics into an outline TOC file. You've associated your title topic with one page layout, and you've assigned a different page layout to the five topics that will serve as the starting point for each of the five chapters.
In the Target Editor, you select the Advanced tab and select Generate TOC Proxy, Generate Index Proxy, and Generate Glossary Proxy. In addition, you also select an option labeled Inject empty pages as needed to ensure TOC nodes start on their selected pages and another labeled Use TOC depth for heading levels. These last two options are not required to use the auto-generate feature, but they are popular options for generating print-based output.
After you generate the PDF output, it looks something like this:
What’s Noteworthy?
Note In order for the generated TOC to be useful, you should have headings in your topics with the appropriate styles (i.e., h1 through h6).


