After creating a slideshow, you can edit the content itself or the settings applied to the slideshow and individual slides. You can also edit your stylesheet to change the look of the container and different elements of the slideshow.
[Menu Proxy — Headings — Online — Depth3 ]
Editing Slideshow Content
To edit the content, open the file where the slideshow was inserted. Then click in the slideshow area and add, remove, or change the content just as you would normally do in the XML Editor.
Editing Slideshow Settings
To edit the settings for the slideshow, right-click in the slideshow or right-click the MadCap:slideshow structure bar. Then from the context menu select Edit Slideshow.
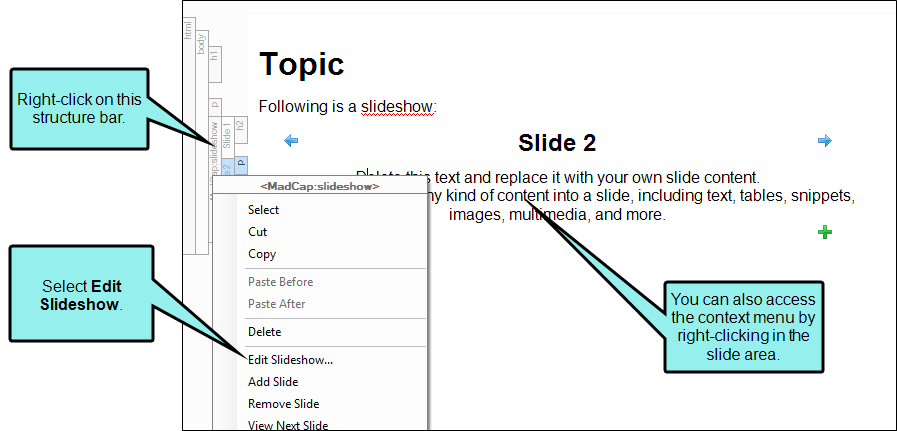
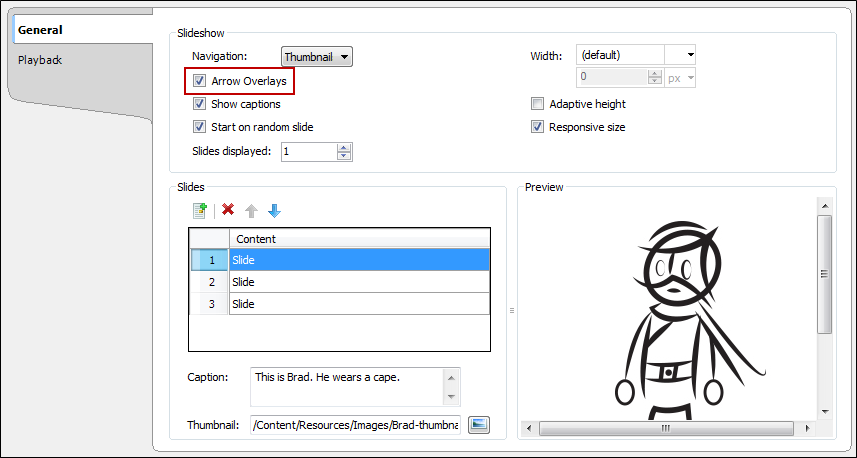
This opens the Edit Slideshow dialog, which can be used to specify settings for the slideshow.
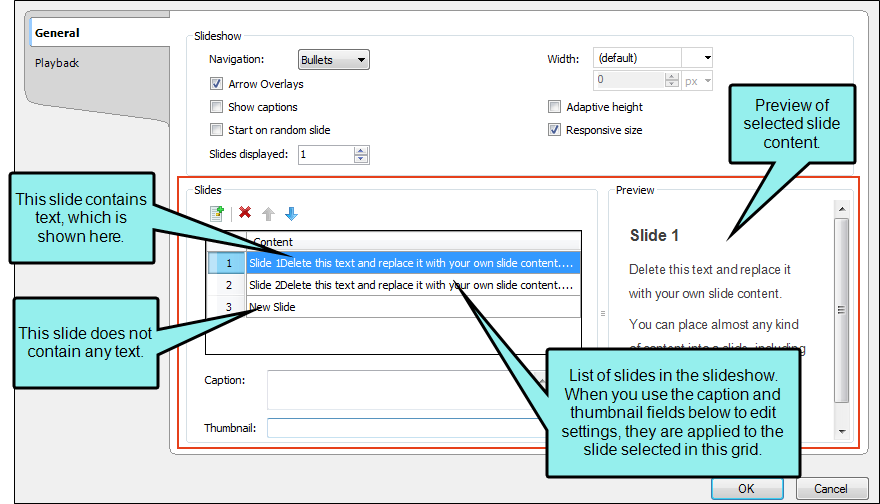
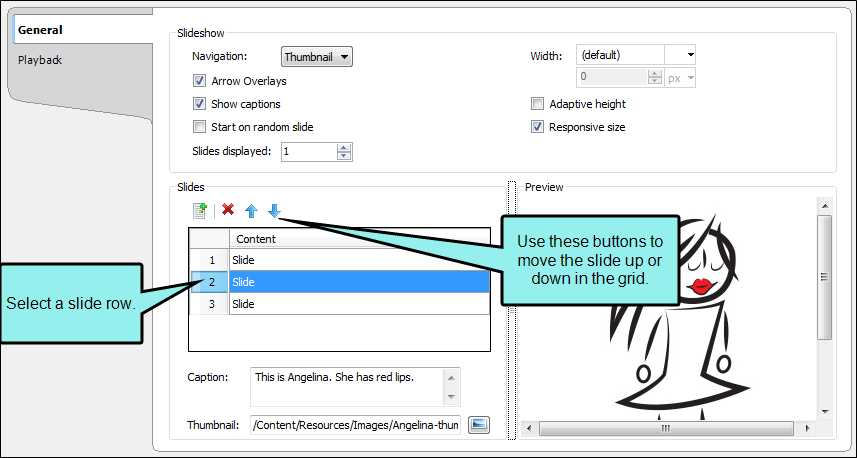
The top of the General tab contains various fields to control the slideshow as a whole.
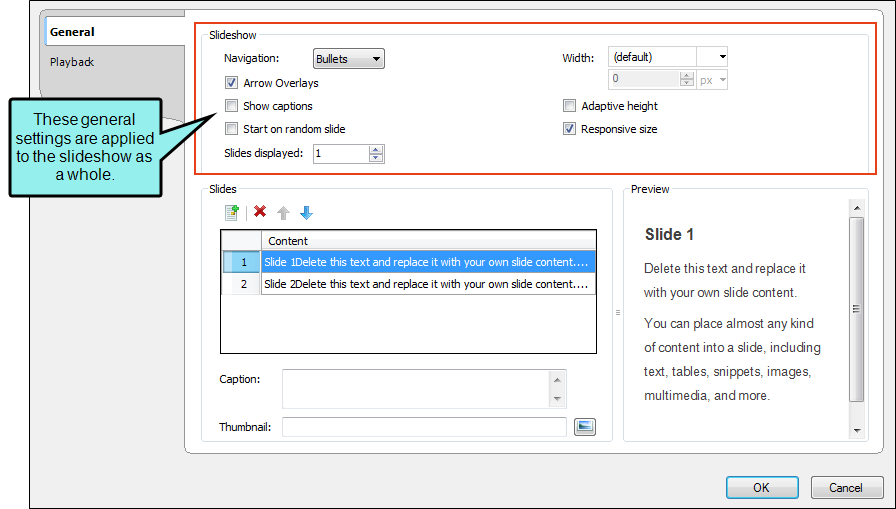
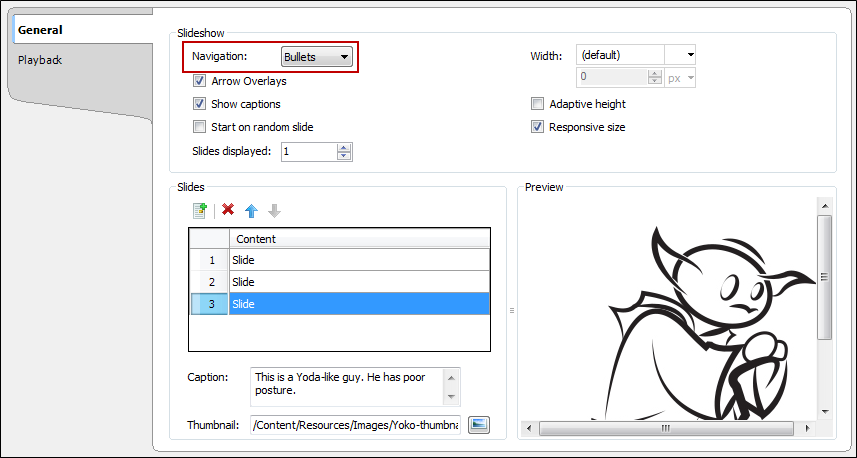
The bottom of the General tab lists the slides in the slideshow. You can add, remove, and rearrange the slides, and you can set captions and thumbnails for each one. If a slide contains text, that text is included in that slide row. If it does not contain text, the slide row might simply shows the word "New Slide."
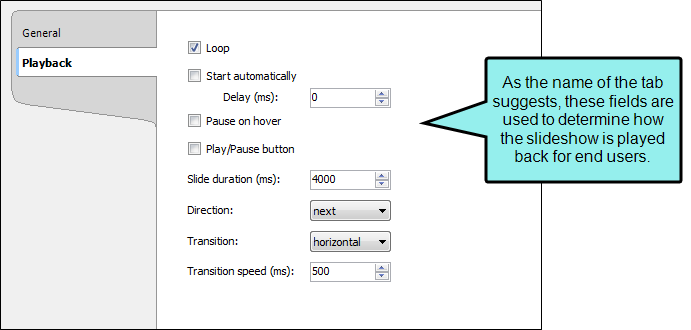
And a Playback tab lets you control various settings such as looping, whether to start the slideshow automatically, and more.
The features in the Edit Slideshow dialog are discussed in more detail below.
Editing Slideshow Styles
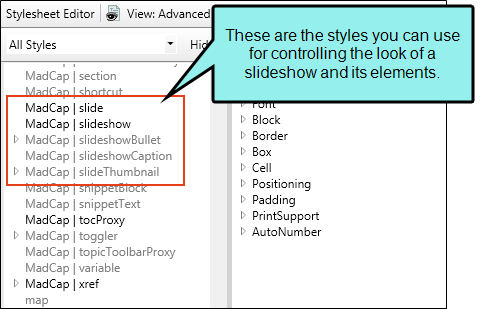
If you want to change style formatting for different parts of the slideshow, open your stylesheet and adjust the necessary properties for the following styles.
- MadCap|slide This controls the look of the containers holding individual slides.
- MadCap|slideshow This controls the look of the container holding the entire slideshow. Keep in mind that if you have competing styles set, those set in the MadCap|slide style take precedence. For example, if you set the background on MadCap|slideshow to blue and the background on MadCap|slide to yellow, the background will be yellow. But if you then change the background for MadCap|slide to (default), the background will show as blue.
- MadCap|slideshowBullet This controls the look of the series of dots used to navigate to specific slides. Keep in mind that if you choose to include thumbnail images, the MadCap|slideThumbnail style will be used instead.
- MadCap|slideshowCaption This controls the look of the caption at the bottom of the slide.
- MadCap|slideThumbnail This controls the look of the thumbnail image area at the bottom of the slide.
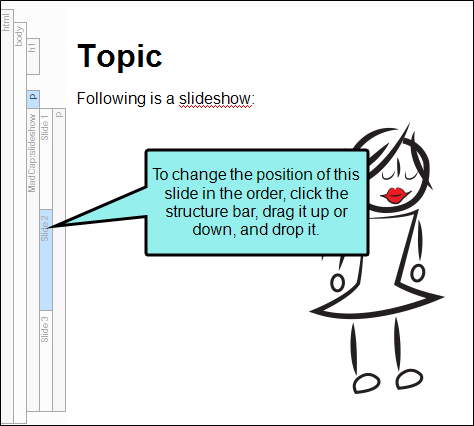
Order of Slides
There are a couple of ways to change the order of slides in a slideshow.
First, you can open the Edit Slideshow dialog. Select the Slides tab and use the up and down arrows to adjust the order of the slides.
You can also click and drag the slide structure bars up or down, just as you would move any other structure bars.
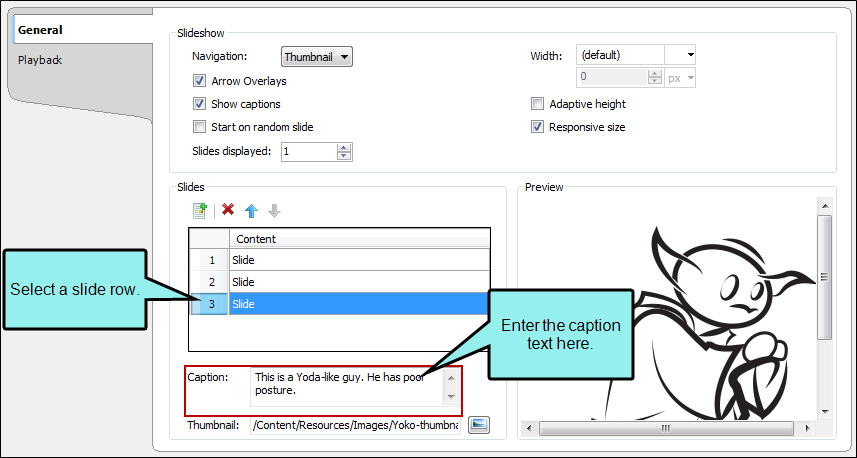
Captions
You can add text captions to each slide. You might use this to provide more detailed information about an image, video, or other content in the slide.
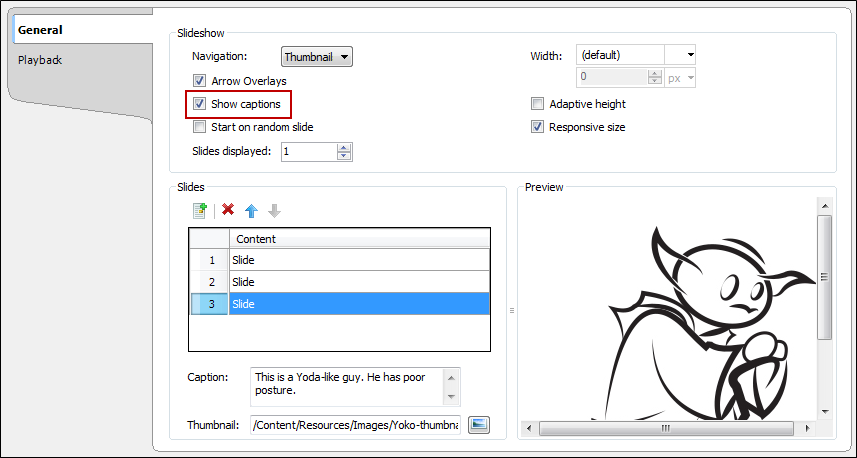
To do this, open the Edit Slideshow dialog. On the General tab, select a slide row, and at the bottom of the tab, enter text in the Caption field. If you want to insert a variable in a field, you can click  . The variable will appear as syntax in the field, but in the output the variable definition will be shown.
Then at the top of the tab, make sure Show captions has a check mark.
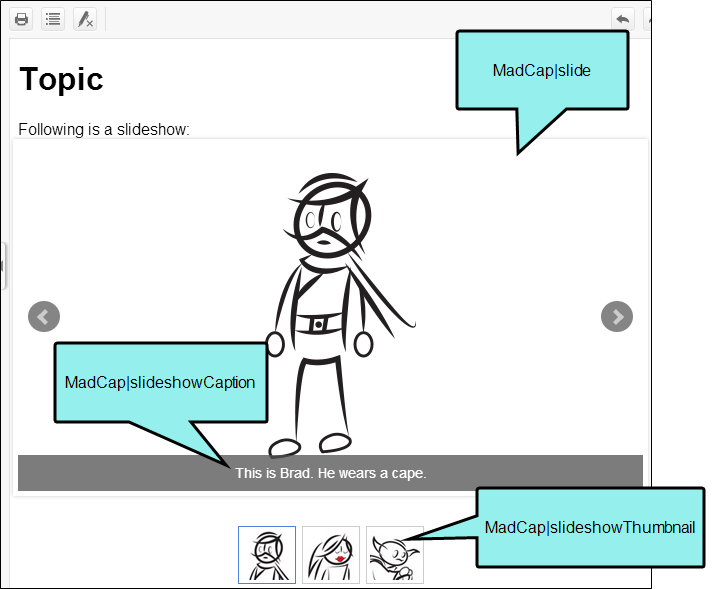
After you generate the output, the captions look something like this:
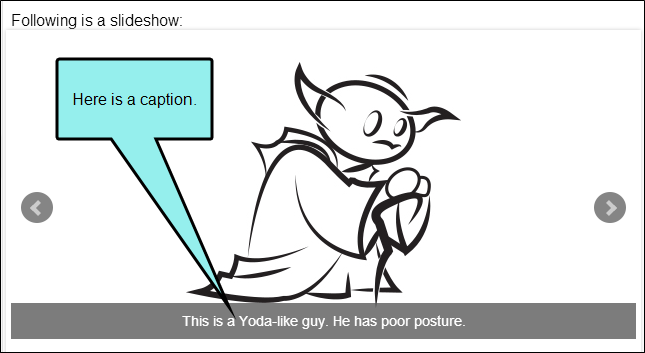
If you want to change the look of the captions (e.g., background color, font), you can open your stylesheet and change the necessary properties for the MadCap|slideshowCaption style.
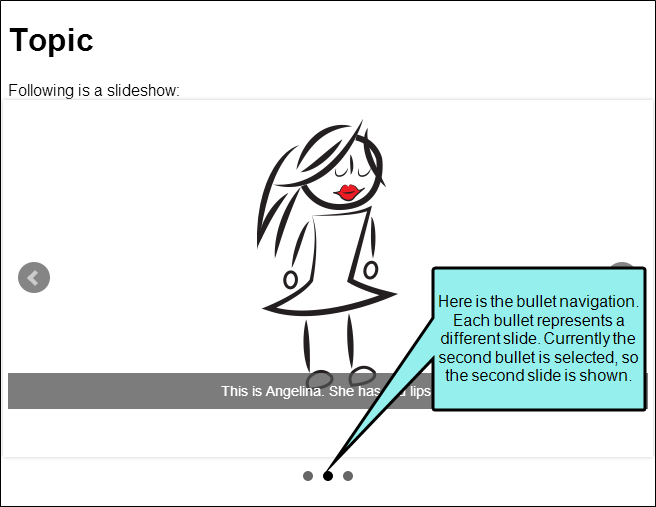
Bullets and Thumbnail Images
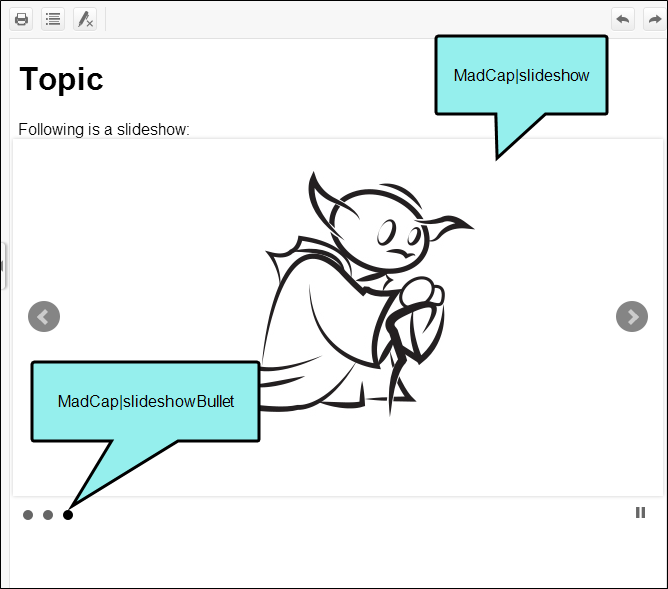
By default, each slideshow contains a series of dots (or "bullets") in the output representing each slide. To enable bullet navigation, open the Edit Slideshow dialog. On the General tab, click in the Navigation drop-down and select Bullets. If you don't want to show the bullets (or thumbnails), select None.
In the output, you can click on any bullet to move to a specific slide.
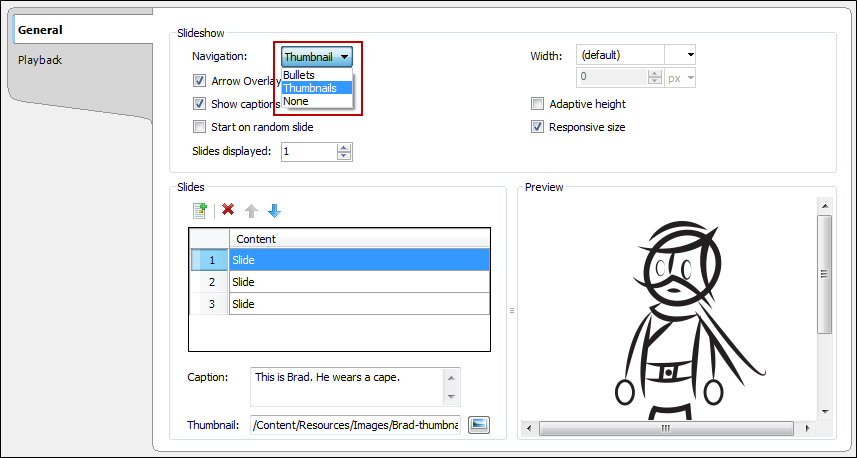
You can replace the generic bullets with small thumbnail images for each slide. To do this, open the Edit Slideshow dialog and select the General tab. Select a slide row, and at the bottom of the tab, next to the Thumbnail field click  . In the Insert Image dialog, find and select the image you want to use, and click OK. The Thumbnail image displays a path to the image you selected.
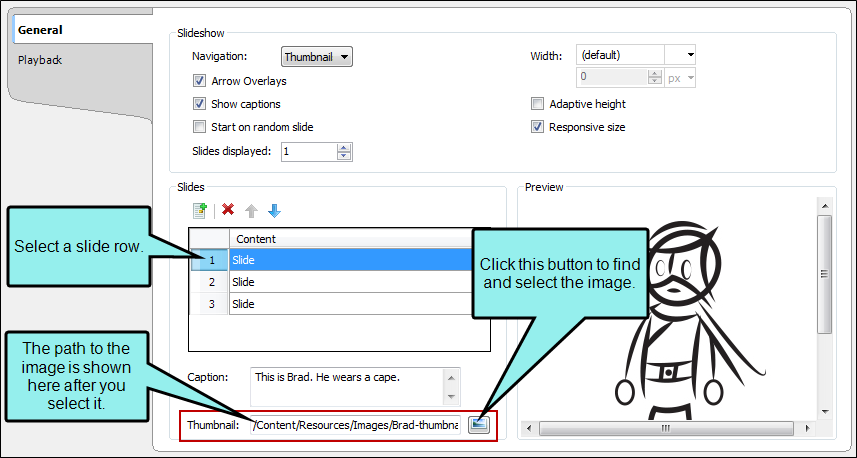
At the top of the tab, click in the Navigation drop-down and select Thumbnails.
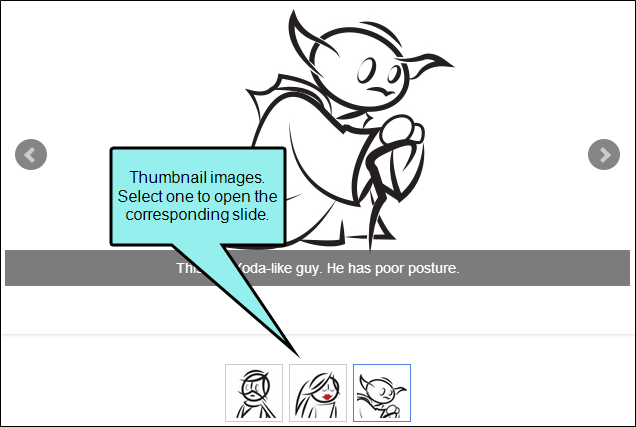
After you generate the output, the thumbnails might look something like this:
To remove a thumbnail, just delete the content in the Thumbnail field.
If you want to change the look of the bullets, you can open your stylesheet and change the necessary properties for the MadCap|slideshowBullet style.
If you want to change the look of the thumbnail image area at the bottom of the slide, you can open your stylesheet and change the necessary properties for the MadCap|slideThumbnail style.
Note If you have a slideshow set to use thumbnails but have not selected an image for a particular slide, a default thumbnail image is shown for that slide.
Starting Slide
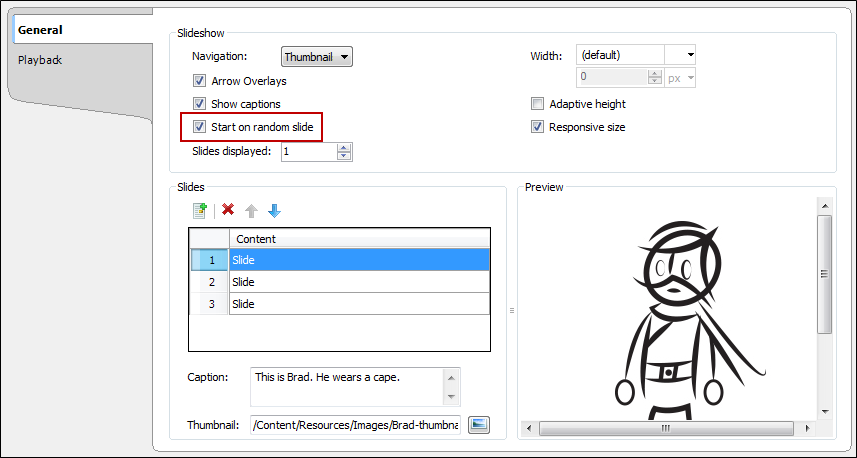
By default, the slideshow will initially show the first slide in the output. However, you can override this setting to start with a random one each time the slideshow is opened.
To do this, open the Edit Slideshow dialog. At the top of the General tab, select Start on random slide.
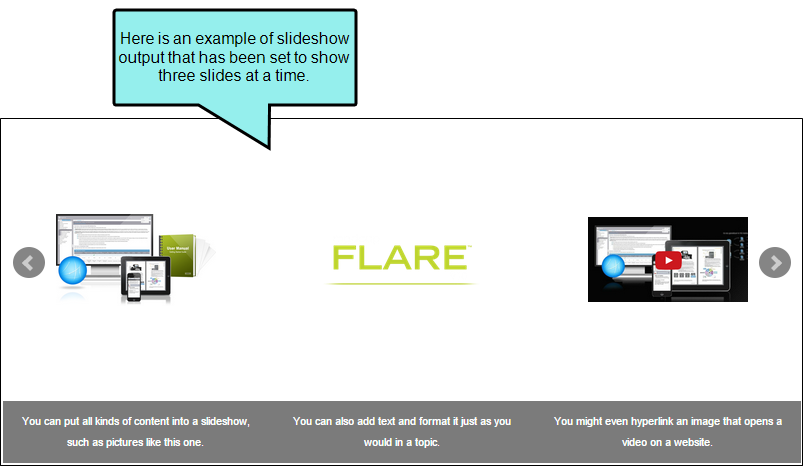
Number of Slides Displayed
You can tell Flare to display more than one slide in a slideshow at the same time.
Example You want three slides to be shown at once whenever someone views the slideshow. Therefore, you open the Edit Slideshow dialog, select the General tab and in the Slides displayed field you enter 3.
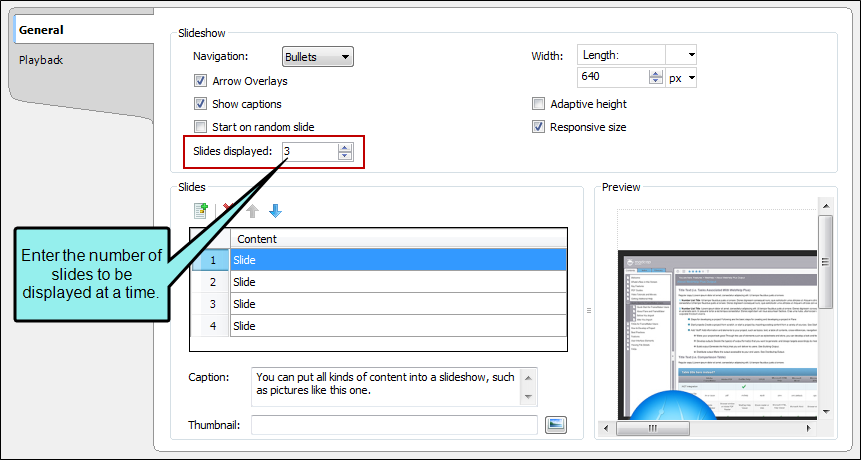
In the output, three slides are always shown side-by-side.
Navigation Controls (Arrow Overlays)
By default, navigation controls are added to slideshows. These display as arrows on the right and left sides of the slides so you can move to the next and previous slides easily.
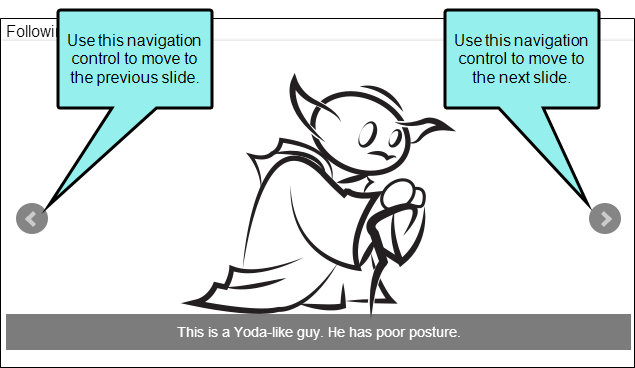
To enable the navigation controls, open the Edit Slideshow dialog. On the General tab, select Arrow Overlays.
If you are not looping the slideshow, the left arrow will not show on the first slide and the right arrow will not show on the final slide. If you are looping the slideshow, both the left and right arrows will show on each slide.
Size of Slides
You can control the size of slides in a few different ways. To do this, open the Edit Slideshow dialog. On the General tab, you can change any of the following:
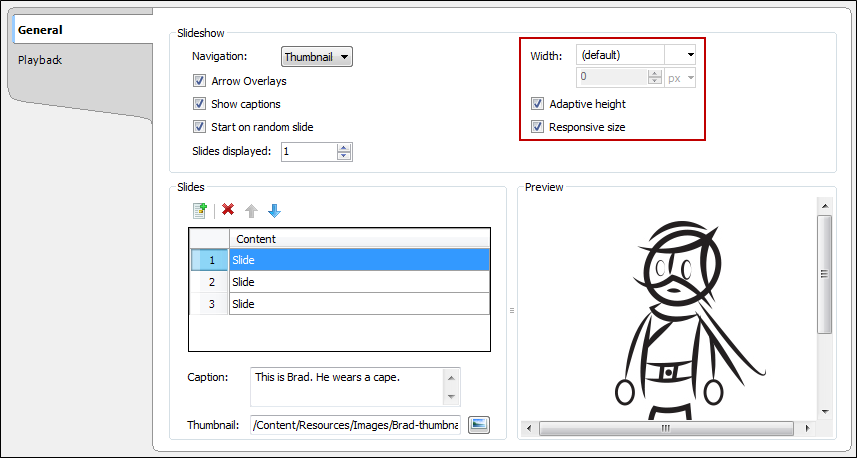
- Width You can limit the width of the slides to a specific value. In most cases, you probably want to leave this field set to (default) so that slide content is not cut off. However, if you want to set a specific width, click the arrow in the upper-right corner of the field and select Length. Then enter a number for the width in pixels.
-
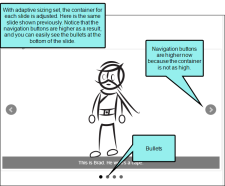
Adaptive height Select this option if you want the height of the slide to adjust automatically to the content in it.
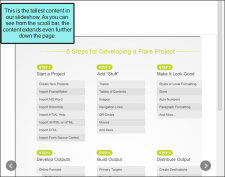
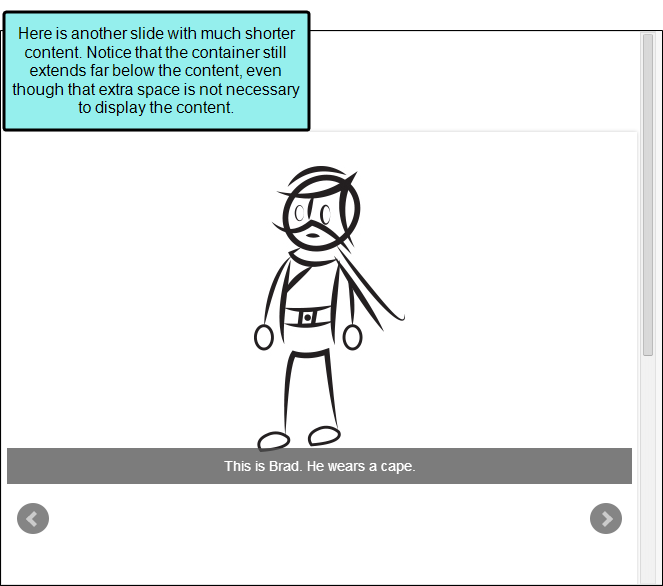
Example You have some slides with tall images and other slides with just a couple of lines of text. If you do not have this option set, all slides will be shown at the height of the tallest content in the slideshow. Therefore, the slides with minimal content may have lots of extra space below it.

But if you make the height adaptive, each slide will be adjusted so that the slides with shorter content are shorter in the output. This also makes it easier to see any bullets, thumbnails, captions, or auto controls at the bottom of the slide.
- Responsive size Select this option to make sure the content automatically resizes if the end user shrinks the size of the browser.


Playback Settings
If you do not set the slideshow to loop, it will end at the final slide. This means that in the output, you cannot click the right navigation arrow to continue and start over with the first slide. Or if you have auto play settings enabled, the slideshow will not automatically continue after the last slide is shown.
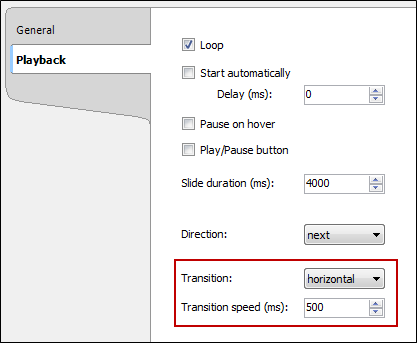
However, you can enable looping in the slideshow so that it will start over with the first slide. To do this, open the Edit Slideshow dialog. Select the Playback tab, and select Loop.
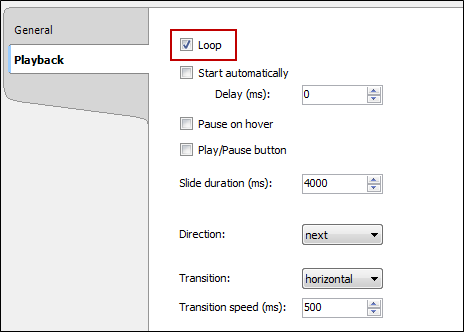
By default, slideshows require end users to navigate through them manually by clicking navigation buttons or bullet/thumbnail controls. But you can use auto play settings if you want the slideshow to start and progress automatically. To do this, open the Edit Slideshow dialog. Select the Playback tab, and change any of the following:
- Start automatically Select this if you want the slideshow to begin immediately once it is opened. Otherwise, end users would click a "play" auto button, which you can add by selecting the "Play/Pause button" option.
- Delay (ms) If you want the initial slide to be delayed before beginning to play, enter a time value (in milliseconds) in this field (1000 milliseconds=1 second).
- Pause on hover Select this if you want the slideshow to be paused when the end users overs the mouse cursor over it.
- Play/Pause button Select this if you want to add a play and pause button at the bottom of the slideshow. End users will be able to start and pause the slideshow at any point by clicking these controls.
- Slide duration (ms) Select the amount of time (in milliseconds) the slide should display before moving on to the next one. The default setting is 4000 (i.e., 4 seconds).
- Direction Select the direction you want the slideshow to progress during auto play. You can make the slideshow progress to the next slide (default setting) or to the previous slide.
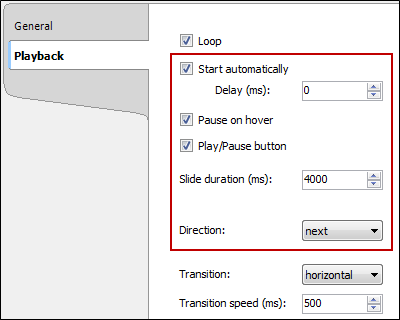
You can specify how slides transition from one to another. To do this, open the Edit Slideshow dialog. Select the Playback tab, and change either of the following:
-
Transition Select whether you want slides to move from one to the other horizontally, vertically, or with a fade effect. Horizontal is the default setting.
Note The fade transition does not support multiple slides.
- Transition speed (ms) Select how fast slides come into view in milliseconds. The higher the number, the slower the transition speed. The default setting is 500 (½ second).