


You can use absolute positioning for elements in a topic
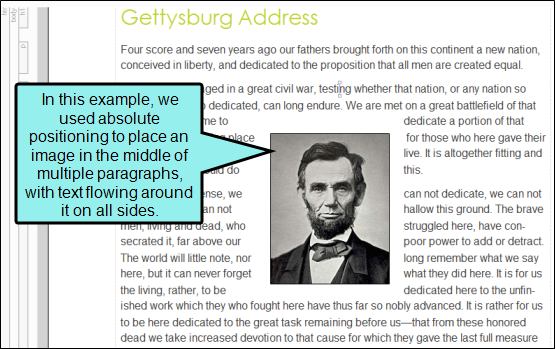
You can set absolute positioning on just about any kind of element, including images, div tags, paragraphs, lists, QR codes, and more. When doing this, you can also specify the element's location and resize it. In addition, you can determine if text should flow around it, and how.
[Menu Proxy — Headings — Online — Depth3 ]
Common Properties and Options for Absolute Positioning
When you have an element with absolute positioning, you can control its look and behavior as you normally would, using any number of available properties (e.g., border, font, background), depending on the type of element. However, you will find that there are a handful of properties and options that are related to and particularly important for absolute positioning, whether they are set on styles or locally.
Absolute Position, Z-Index, and Text Wrap Options
The most important property for this feature is "position" with a value of "absolute." As already mentioned, this property removes the element from the main flow of the document content. If you are using a style to control absolute positioning, you can set this property in your stylesheet.
In conjunction with the absolute position setting, the z-index property is used to control the stacking order of elements. When you use absolute positioning, you will find that there are three primary ways that absolutely positioned elements are displayed with the other content: Square, Behind Text, and In Front of Text.
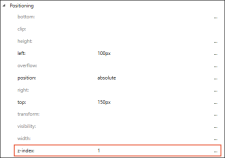
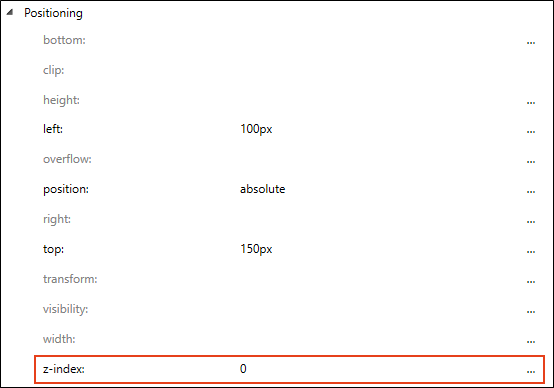
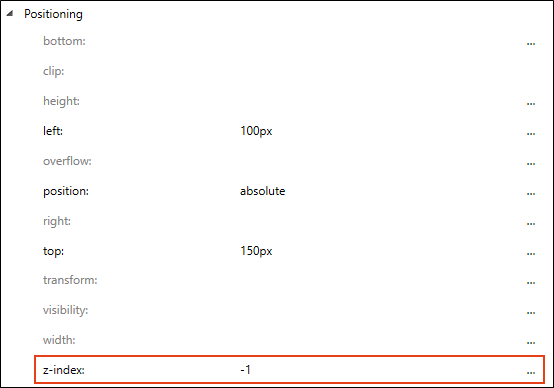
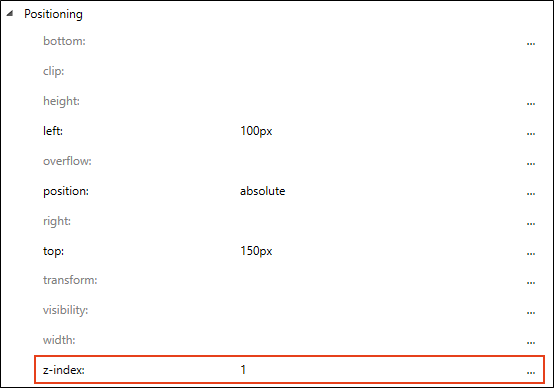
If you are using a stylesheet, you can set the z-index property in the Positioning property group.
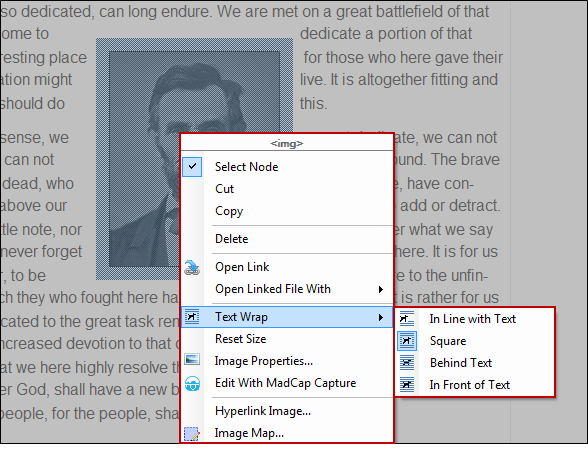
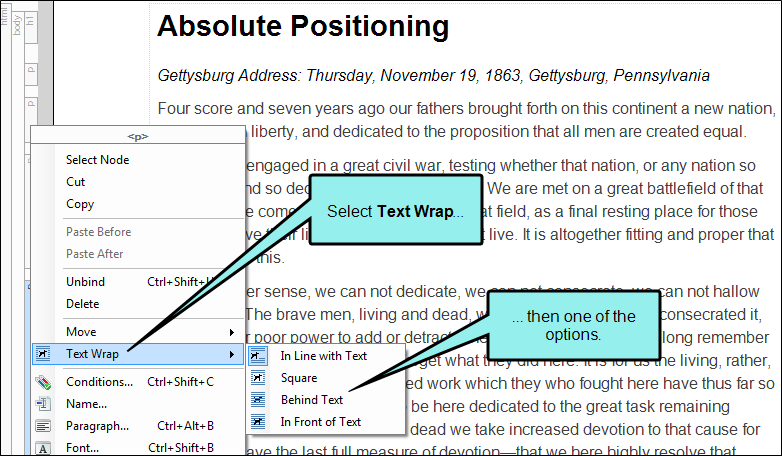
If you are editing a topic locally, you can right-click on the element (in the case of objects such as images or QR codes) or right-click on the structure bar (in the case of paragraphs, lists, and other content), and from the context menu select Text Wrap. Then from the submenu, select one of the three options: Square, Behind Text, or In Front of Text. After you select an option, the absolute and z-index settings are automatically placed on the element locally.
-
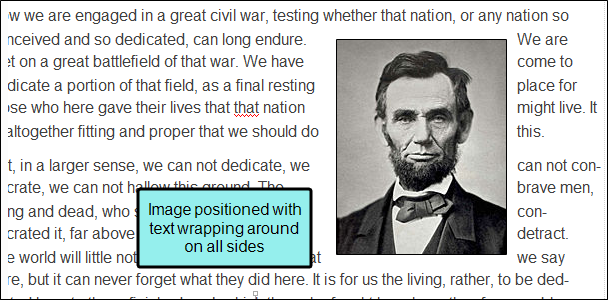
Square Wraps text around the absolutely positioned element on any or all sides.

By default, this effect uses a z-index of 0.
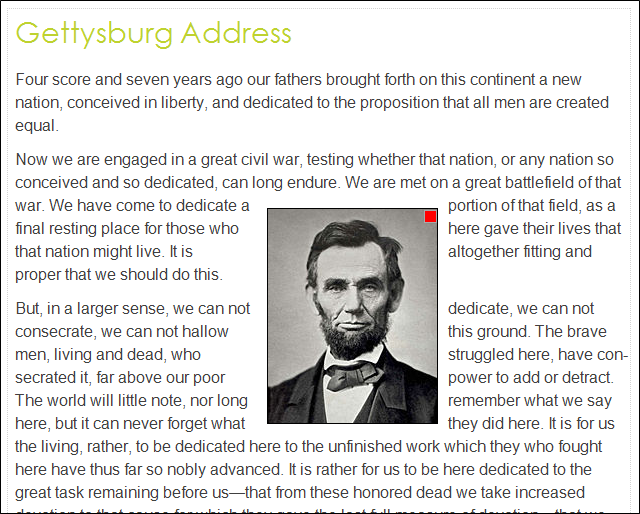
Note You can select this option when you are working in either Web Layout mode or Print Layout mode in the XML Editor. However, online output does not support content wrapping all around the element. Therefore, when you select this option in Web Layout mode, it actually floats the element to the left of content. And that is how it is displayed in the online output . So if you are generating both print and online output from the same topic where you've used this feature, the PDF output will display the element with content wrapping all around it, while the same topic in online output will display the element on the left side of content.
-
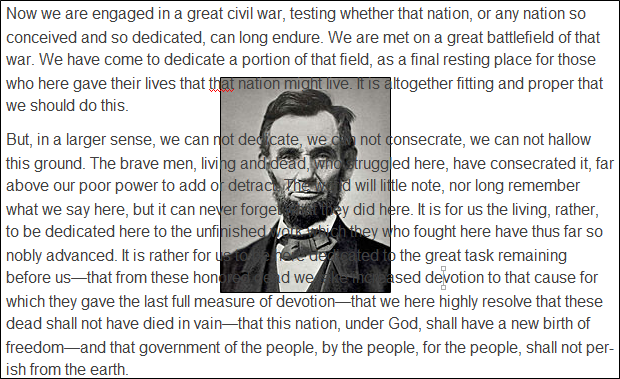
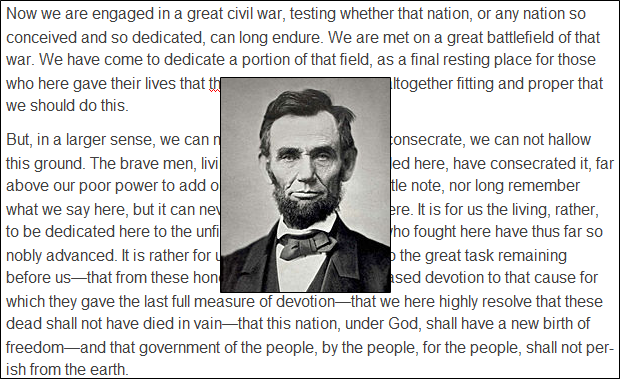
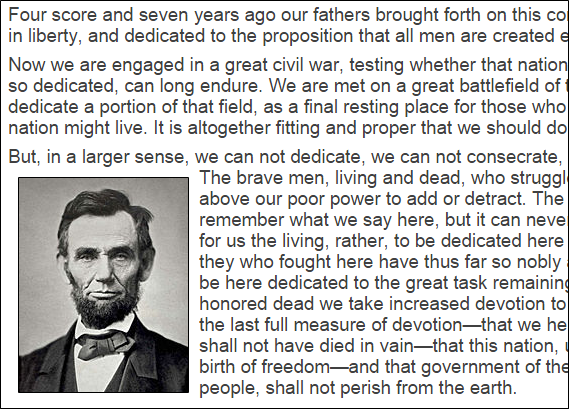
Behind Text Places the absolutely positioned element behind text.

By default, this effect uses a z-index of -1.

The tricky thing about this setting is that you might need a way to select the object, but it's behind text. You can try hovering the mouse over the object until the cursor changes to an arrow, then click it. But perhaps an easier method is to triple click on the content where the absolutely positioned object exists. This selects that block of content. Then click on the object twice slowly to select it.
-
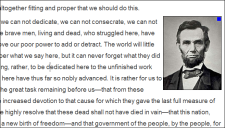
In Front of Text Places the absolutely positioned element in front of text.

By default, this effect uses a z-index of 1.
In addition, you might have situations where absolutely positioned elements overlap. You can adjust the z-index values to determine which element appears on top, in the middle, and on the bottom. A simple way to think about the z-index is that the higher number a style has on the z-index, the closer to the top it will appear in the order.
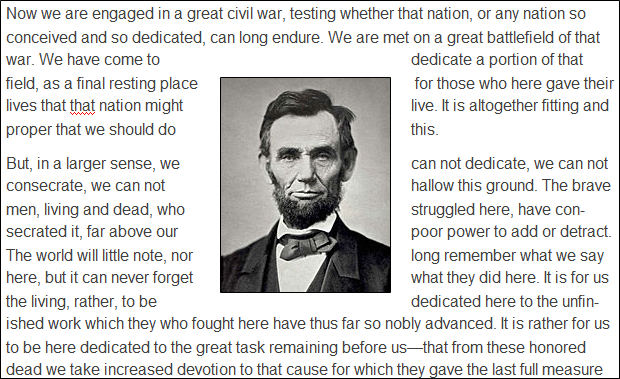
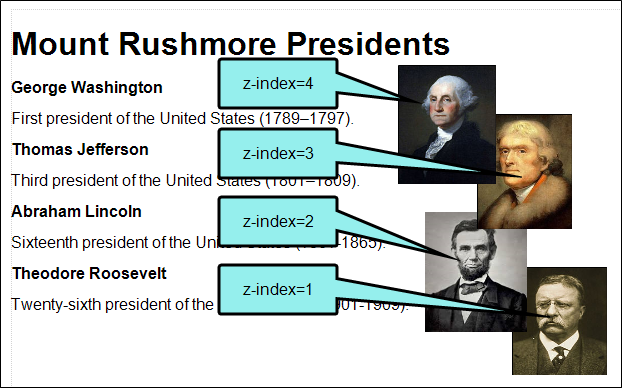
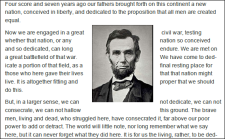
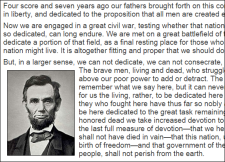
Example You have four different images, and you're using the "In Front of Text" text wrap option on each of them. Therefore, each one has a z-index of 1 by default. However, because they are overlapping, the one that appears first in the code (Washington) is in back, and the one that appears last in the code (Roosevelt) appears on top.
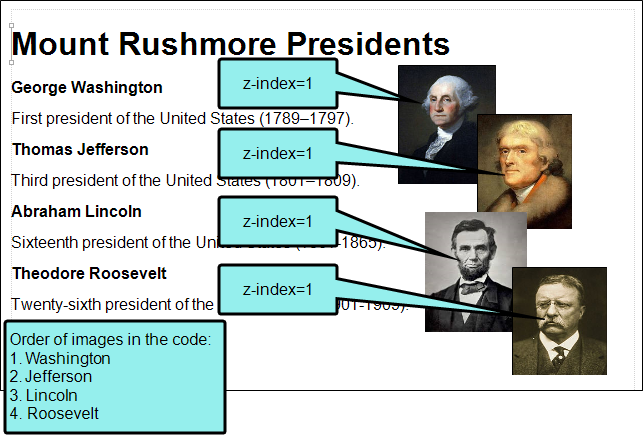
Suppose you want Washington to be on top, then Jefferson, then Lincoln, and finally Roosevelt on the bottom. To do this, you could either change the order that they occur in the code (Roosevelt first, followed in order by Lincoln, Jefferson, and Washington). Alternatively, you can change the z-index value in the HTML code (or in custom style classes) for the images (Washington=4, Jefferson=3, Lincoln=2, Roosevelt=1). This changes the order in which the images are stacked on one another.
However, there are other facets to the z-index that can make things a bit more complicated than that. For more information about this property, see:
http://www.w3.org/TR/CSS2/visuren.html#propdef-z-indexYou might have noticed that there is a fourth option available from the Text Wrap submenu when working locally in a topic.
-
In Line with Text This integrates the element into the text so that it becomes part of the line where it was inserted. If the element is taller than the line of text, this results in extra space between that line of text and the one above it. This option is actually the default method used when inserting an image. It does not have absolute positioning or a specific z-index setting applied to it. The option is included in the context submenu simply so that you can change from one of the absolute position options back to the default inline setting.

Left and Top
These properties control where the element is displayed in the document (i.e., distance from the left and top). You can set these on a style. Alternatively, if you drag an element around in a topic or snippet, these settings are automatically placed on the element locally.
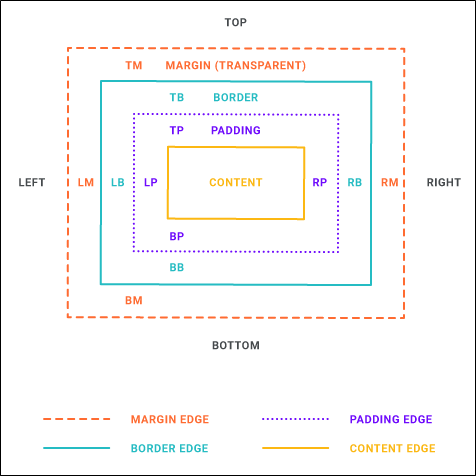
Margins or Padding
If you plan to use absolute positioning to wrap text around elements, you will likely want to adjust the margins or padding around the element in order to create space between it and the text.
Creating Absolute Positioning
Styles are almost always recommended over local formatting when controlling the look of content. In the case of absolute positioning for elements, there may be times when you will actually find local formatting preferable.
- Styles If you place absolute position settings on style classes, you can easily control the look of those kinds of elements from one place, your stylesheet.
- Local Formatting If absolute positioning is a rare occurrence
You might even end up using a hybrid of the two methods. For example, you might want to apply the absolute position, z-index, and margin in the style, but drag the inserted element in the topic to determine its final location.
How to Use a Style to Create Absolute Positioning
- From the Content Explorer, open the stylesheet that you want to modify.
-
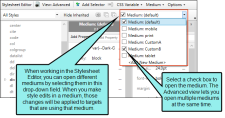
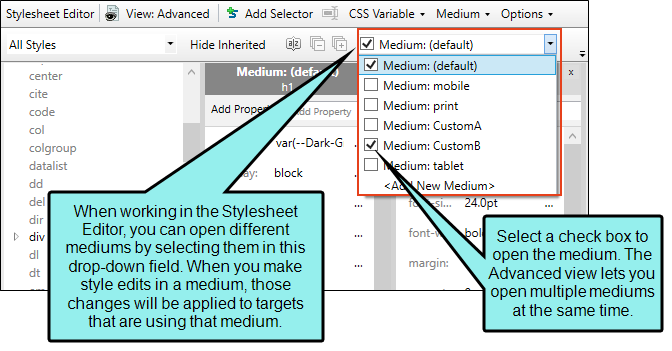
From the Medium drop-down in the Stylesheet Editor, make sure the proper medium is selected before you begin. In the Advanced view, you can open multiple mediums at once; you just need to look at the title at the top of the medium pane and make sure you are working in the correct one. If you are not using stylesheet mediums for your different outputs or if you want all mediums to have the same settings, just leave the medium set to default and continue.
Mediums can be used if you want to use one group of settings for online output types and another group of settings for print-based output types. For example, you might use the default medium for your online outputs and the print medium for your print outputs.
Please note that Flare remembers the last medium that you used when working in the stylesheet, so it may or may not be the one that you want to use the next time around.
- In the local toolbar, make sure the first button displays
 . If the button displays
  instead, then click it.
 - In the upper-left of the editor, make sure the drop-down field is set to
 .
. -
From the area below, select the appropriate style. If you want to use a class of the style, select it instead. For example:
For images, select the img style or a class below it.
For paragraphs, select the p style or a class below it.
For QR codes, select the MadCap|qrCode style or a class below it.
- From the Show drop-down list on the upper-right side of the editor, select
 .
. - (Optional) You can use the toggle button in the local toolbar to show properties below in a group view
 or an alphabetical view
  .
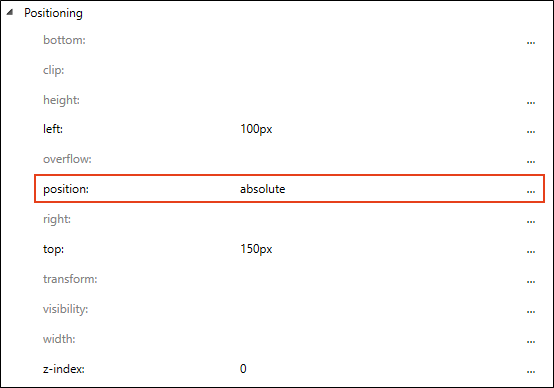
. - If you are using the grouped view, expand the Positioning group.
- To the right of position, click
 and select absolute.
 -
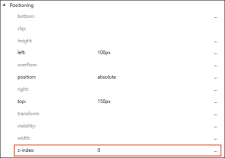
To the right of z-index, click
and and enter one of the following values, depending on the kind of effect you want:-
0 Wraps text around the absolutely positioned element on any or all sides.
Note This option is supported only in PDF outputs. In online outputs the element will float to the left of content.
-
-1 Places the absolutely positioned element behind text.
-
1 Places the absolutely positioned element in front of text.
-
-
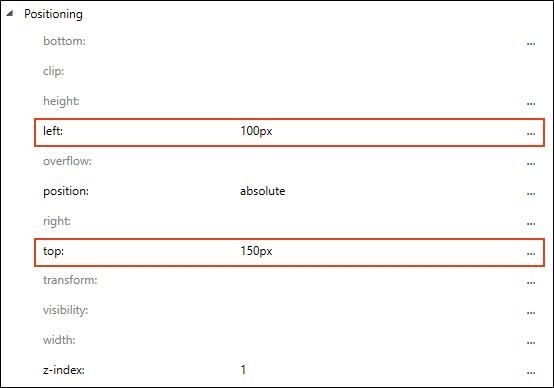
(Optional) To the right of left and top, click
and enter the amount of distance the element should be placed from the left and top. You might complete this step if you know you always want absolutely positioned elements to be positioned in the same spot in each topic. Otherwise, you can leave these fields blank and manually drag the element in the topic when you insert it, changing its location at that point.Note If you use these settings and apply the style to an element, that element will be positioned accordingly. If you then manually drag the element somewhere else, that will overrule the location set on the style. The easiest way to revert back to the style location is to select the element, then in the Home ribbon click
 to remove the local formatting.
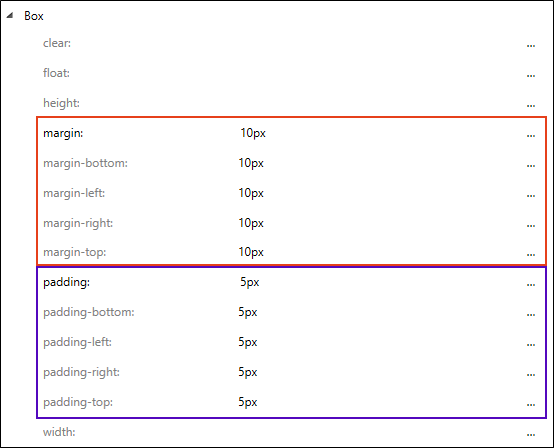
 - (Optional) If you want to provide extra space between the edges of the absolutely positioned element and the content around it, expand the Box property group. Then locate the margin or padding property that you want to change. Each side (bottom, left, right, top) has separate properties that you can set (e.g., margin-top, padding-bottom). If you plan to have the same settings for all four sides, you can simply use the margin or padding property.
- Click
") to save your work.
to save your work.
Whenever you apply the style to an element, it is absolutely positioned as you have specified. If you are working with an element such as an image or QR code, it is temporarily repositioned until you make further changes to it. Other elements, such as paragraphs, are placed into a container that has handles around the edges.
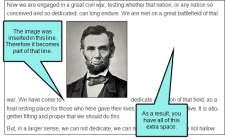
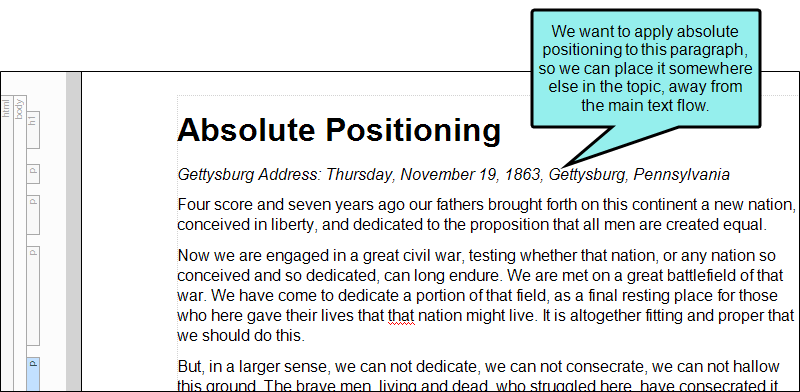
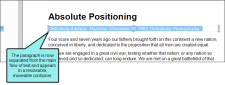
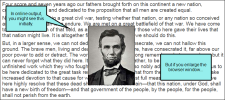
Example You want to apply absolute positioning to the italicized paragraph in this topic.
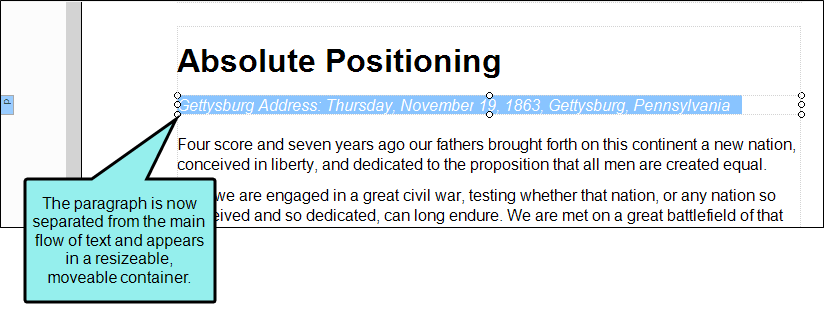
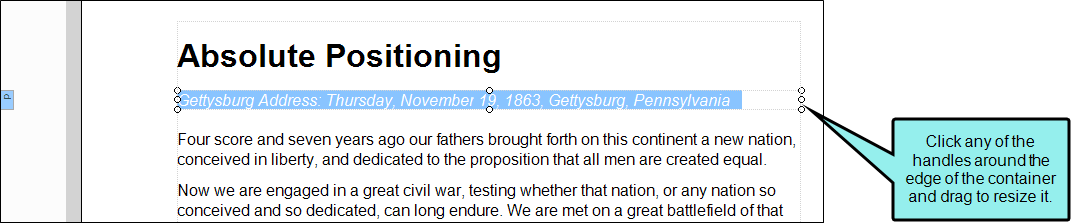
First, you apply your special paragraph style class to it. As a result, the paragraph changes, displaying inside a container with handles around the edges. That container can be resized and/or dragged where you want to place it.
How to Use Local Formatting to Create Absolute Positioning
- In a topic, right-click on the structure bar associated with the element
- From the context menu, select Text Wrap. Then choose one of the following three options:
Square Wraps text around the absolutely positioned element on any or all sides.
Note This option is supported only in PDF outputs. In online outputs the element will float to the left of content.
Behind Text Places the absolutely positioned element behind text.
In Front of Text Places the absolutely positioned element in front of text.
If you are working with an element such as an image or QR code, it is temporarily repositioned until you make further changes to it. Other elements, such as paragraphs, are placed into a container that has handles around the edges.
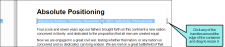
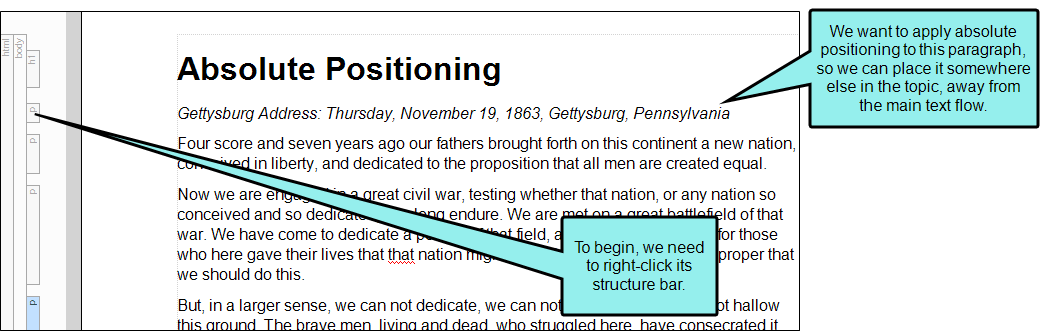
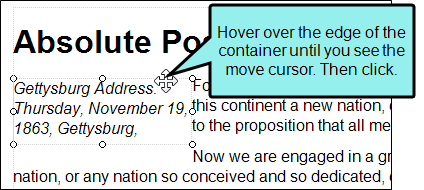
Example You want to apply absolute positioning to the italicized paragraph in this topic. Rather than right-clicking on the paragraph itself, you need to right-click on the paragraph structure bar associated with it.
From the context menu, you can select Text Wrap and then one of the options in the submenu.

As a result, the paragraph changes, displaying inside a container with handles around the edges. That container can be resized and/or dragged where you want to place it.
Note The option "In Line with Text" shown in the menu does not apply absolute positioning to the element. Rather, it is available if you want to return an element from one of the other options back to the standard inline mode that is used by default for inserting images and other objects into text.
- (Optional) You can perform any of the following common tasks to adjust the element:
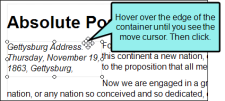
Move You can move an element where you want it in the topic. For elements such as images, you can click in the middle of the element, then drag and drop it. For absolutely positioned elements that are placed into containers (such as paragraphs), you need to hover over the edge of the container until you see a "move" cursor. Then click and drag the container.
Resize You can use the standard methods to resize images that have absolute positioning
Margins or Padding You can add margins or padding around the element to create extra space between it and the main flow of text. This is particularly useful if you've selected the "Square" text wrap option.
-
Click
to save your work.
Example
Following is an example where styles were used for most steps, but local formatting was also used to complete the process:
Example You want to use absolute positioning for many images
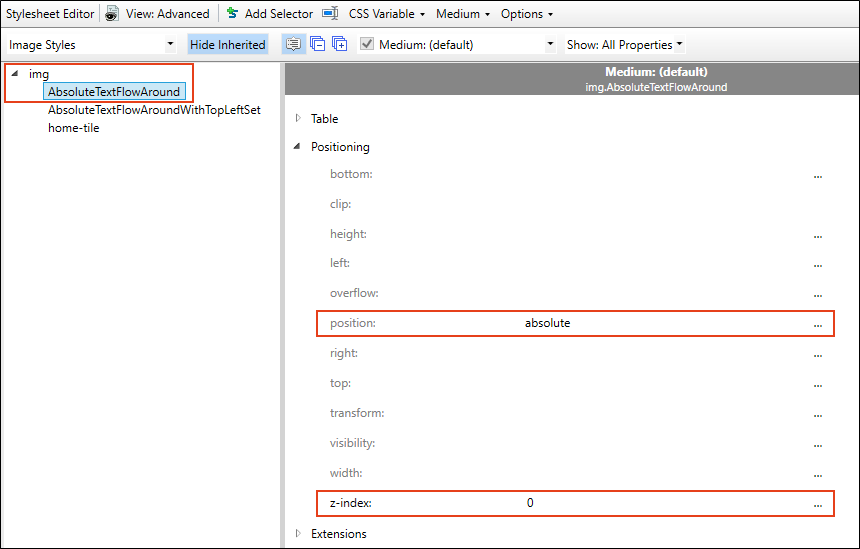
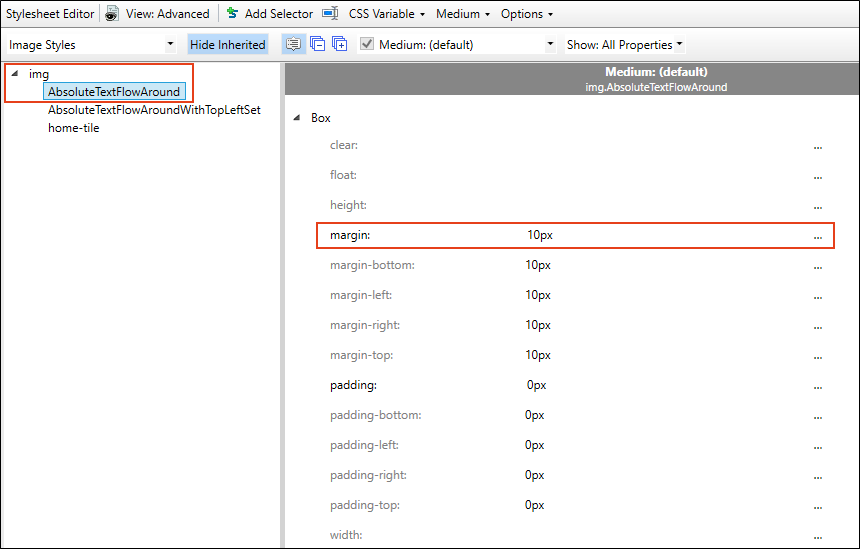
First, you ask yourself, Do I always want the same kind of effect on these images (i.e., Square, In Front of Text, Behind Text)? You decide that you usually want images to use the "Square" (text wraparound) effect, where text can flow around it on any side. In most situations, you decide you don't want to put images behind or in front of text. Therefore, you open your stylesheet and create a class of the img style. Maybe you name this class "AbsoluteTextFlowAround."
In the stylesheet you set the position property to absolute, and you set the z-index to 0.
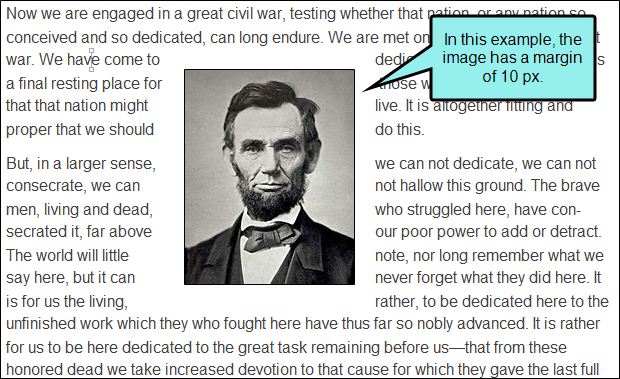
Next, you ask yourself, Do I want margins or padding around those images? You decide that you want to use some margins so that there is space around each of those images, separating it from the wraparound text. So you set the margin property to 10 px (you only need to set margin; the same value is automatically used for margin-bottom, margin-left, margin-right, and margin-top, unless you override one of those).
Finally, you ask yourself, Do I want the image to be placed at the same location everywhere it's used? If you wanted each image to be placed in the exact same location of each topic, you might decide to set the left and top properties on that style class. But in this case, you decide that the location of each image is going to be different in each topic. Therefore, you decide to set the location for each image locally after it is inserted in the topic, rather than setting it ahead of time in the stylesheet.
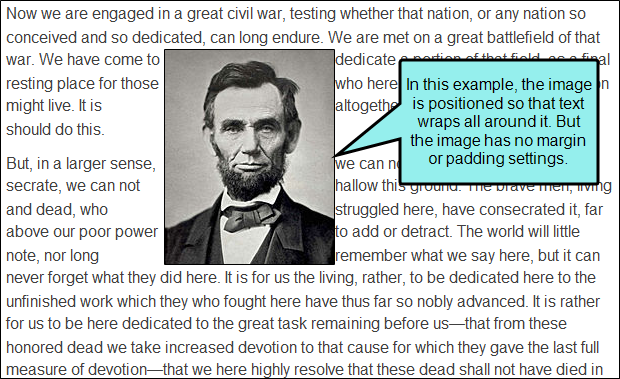
In the topic, you make sure the Print Layout mode is selected (because the Square wraparound effect is displayed only in print-based output). You click anywhere in the topic and insert the image. Then you apply the img.AbsoluteTextFlowAround style class to it. As soon as this style class is applied to the image, it is immediately separated from the main flow of content (because it has the absolute position setting), and it has a margin around it. Initially, the image is displayed in the upper-left corner of the topic (because you have not told Flare in the stylesheet where to locate this absolutely positioned image).
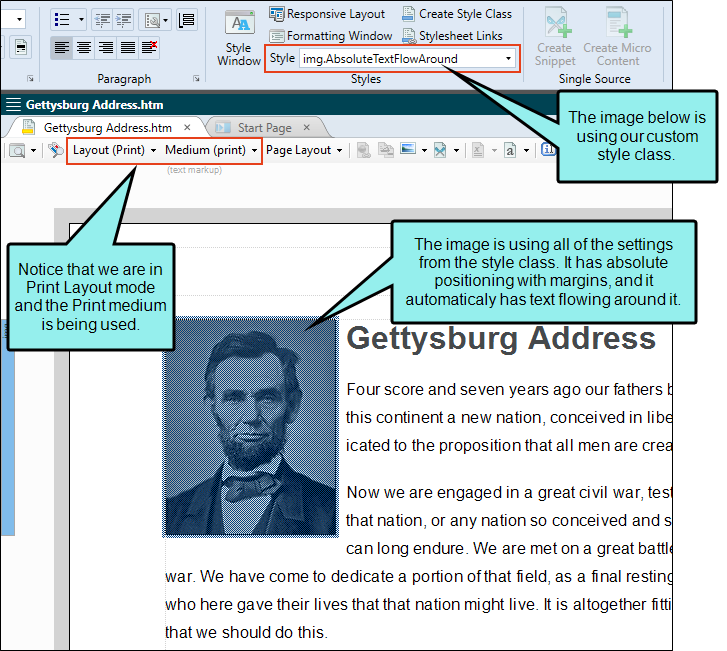
So you click in the middle of the image and drag it to the location in the topic where you want it. When you do this, the top and left values are automatically set locally on the image in the HTML code.

Online vs. Print-Based Output
Absolute positioning is supported in PDF and all online outputs. But due to some differences between these outputs and the viewing modes in the XML editor, there are some important things to consider.
-
No Square Text Wrap in Web Layout Mode and Online Outputs The Square wraparound text option is available only in PDF outputs. For online output, absolute positioning is limited to placing elements either in front of or behind content. Browsers require floats in order to position elements next to text
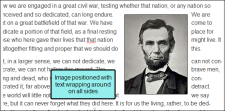
Example In Web Layout mode, you can do this:
But you can't do this:
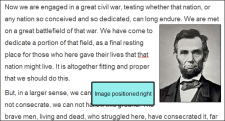
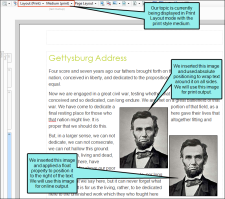
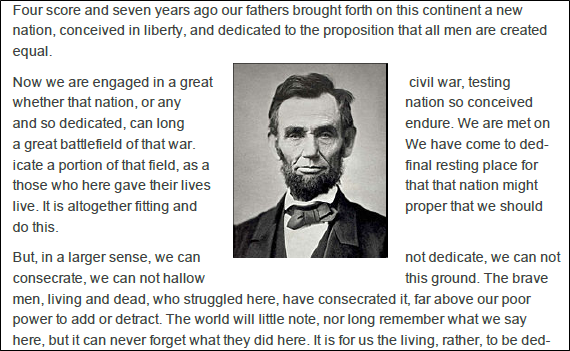
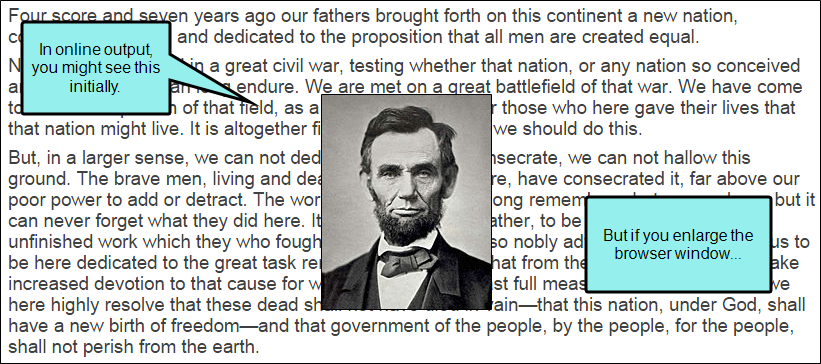
If you use the Square wraparound option to position an image, in print output it might look like this:
But when you generate online output, it would automatically be adjusted to look something like this:
-
Content May Shift in Output Third, you will notice that content can shift in output, but absolutely positioned elements do not move along with that content because they are not anchored to it. Rather, elements with absolute positioning are simply freed from the main flow of content, so if the main content shifts, the absolutely positioned element stays in place as the rest of the content is adjusted. This is especially noticeable in online outputs, where end users can resize the browser window.

Also, an absolutely positioned element in Print Layout mode will usually display in a different location than in Web Layout mode. That's because Print Layout mode is based on specific page sizes that do not change, so the positioned element doesn't shift when you resize the XML Editor in Flare, unlike Web Layout mode. However, if you use conditions to exclude some content, you might see content shifting in print output while absolutely positioned elements stay in place.
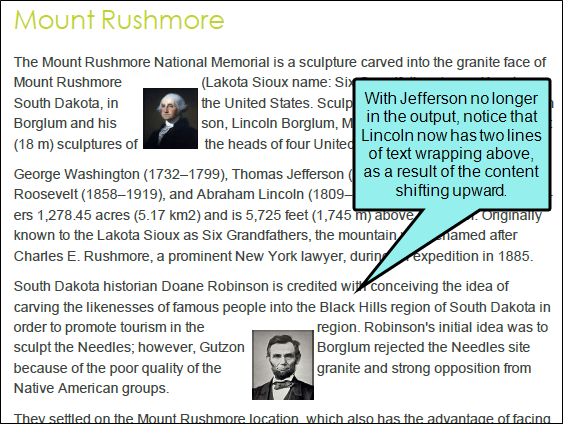
Example You have a topic with absolutely positioned images in three successive paragraphs.

If you decide to condition the second image so that it is excluded from the output, the text below shifts up to compensate for the space no longer used by that picture. But the image in the third paragraph does not move up with that text.

-
Use Conditions to Separate Online Elements from Print Elements If you want to position an element and have it look a certain way in online output and a different way in print-based outputs, we suggest you insert the element twice (one for online output and one for print output) and use conditions to separate them accordingly. In the XML Editor you can use the condition preview button
 in the upper-left corner to display only the appropriate one while you are editing, depending on the layout mode (Web or Print).
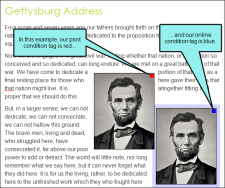
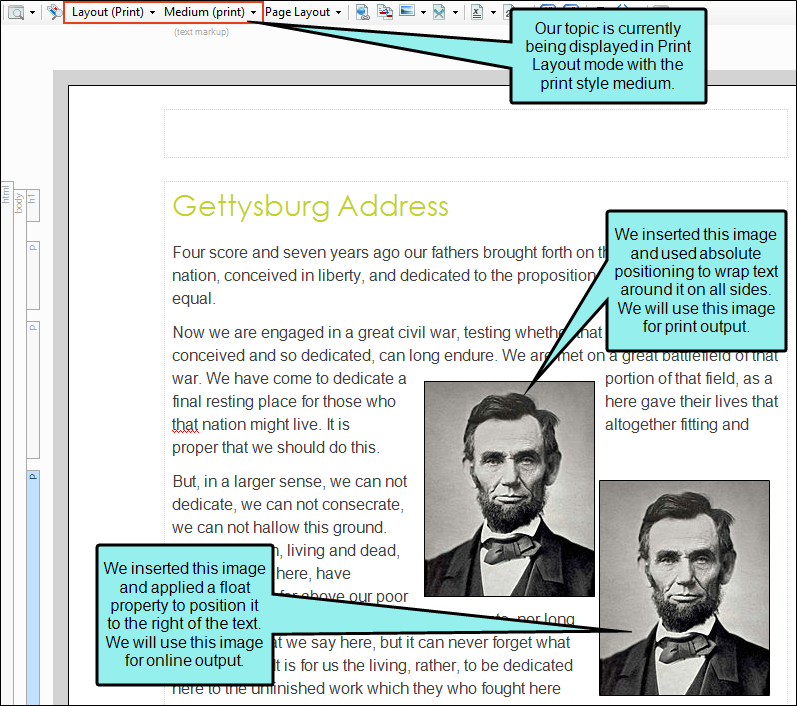
Example You want to position an image so that text flows all around it in PDF output. You realize that this same image will automatically be floated to the left of content in HTML5 output. But suppose you would prefer the image to be floated to the right in the HTML5 output. Therefore, you decide to have a second copy of the picture positioned to the right, with content flowing to the left of it. So you insert both images, using absolute positioning for the PDF version and a float for the HTML5 version.
Next, you apply an online condition tag to the image using the float and a print condition tag to the image using absolute positioning.
Because the topic is currently being displayed in Print Layout mode, you only want to see the image to be used for print outputs while you are editing. So on the left side of the top local toolbar, you click the condition preview button
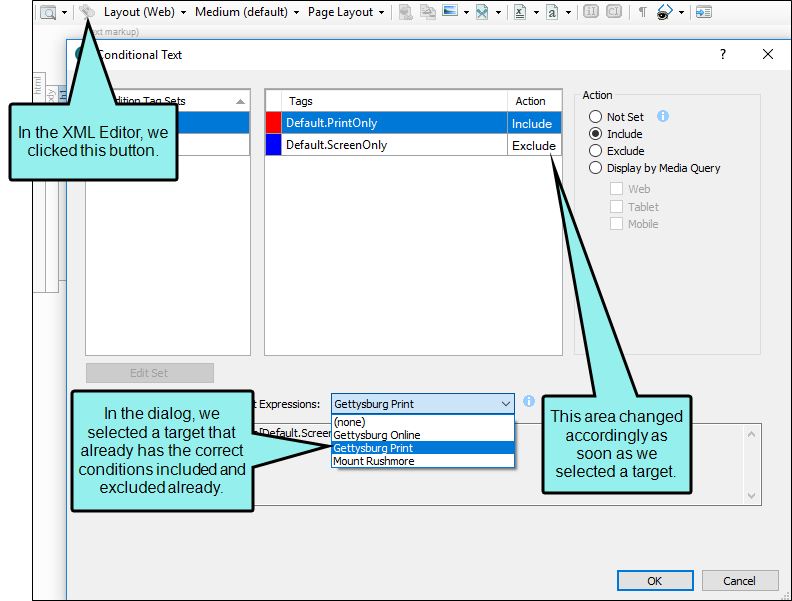
. This opens the Conditional Text dialog. In this dialog, you can select which conditions to include or exclude from view while you are editing. The quickest way to do this is to click the Target Expressions drop-down and select a target that already has these conditions properly set for inclusion and exclusion.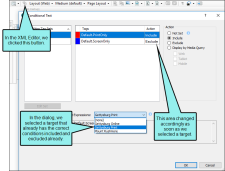
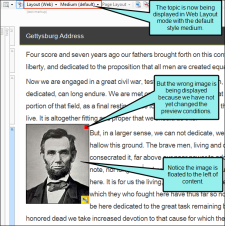
After clicking OK in the dialog, the correct image is shown in the XML Editor while the other one is hidden.

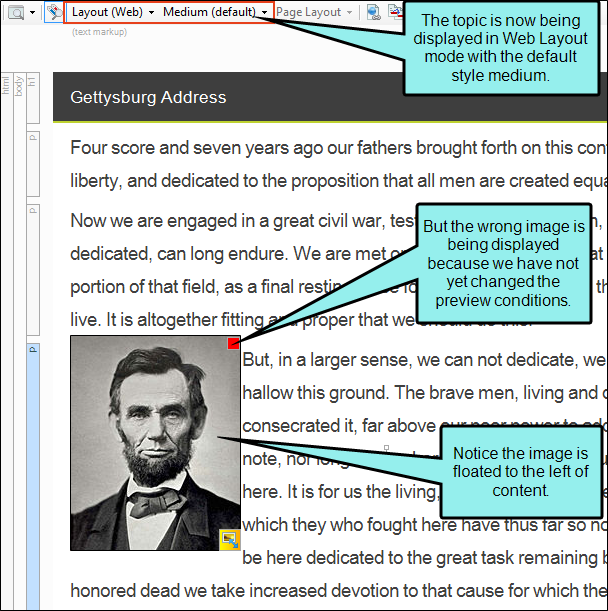
Now you click the toggle button to switch to Web Layout mode with the default style medium. But the preview conditions are still as you last set them, so the image for print is still shown. Also, because that image is set with the "Square" wraparound option, it is automatically floated left because that is the default behavior when that option is viewed for online outputs (and therefore in Web Layout mode).
So once again you click the condition preview button
. This time in the Conditional Text dialog, you select a target designed for online output.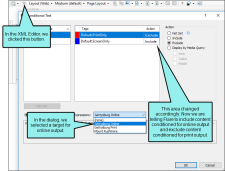
After clicking OK in the dialog, the image for online output is shown in the XML Editor, correctly floated to the right, while the image for print output is hidden.
Note As an alternative to the condition preview button, you can click the topic preview button
 to see how the topic will look with different condition and target settings.


What’s Noteworthy?
Note You can use absolute positioning across multiple columns of content


