To add basic formatting to your PowerPoint output, use a factory page layout template. It is recommended to use either Landscape4x3.flpgl or Landscape16x9.flpgl for PowerPoint. Of those two choices, the slide size differs (i.e., displaying with a standard 4:3 or widescreen 16:9 aspect ratio). The templates include landscape page orientation, and a default body frame size, but do not include headers or footers. These two page layout templates improve the initial output appearance and workflow between Flare and PowerPoint.
[Menu Proxy — Headings — Online — Depth3 ]
How to Add a Page Layout for PowerPoint
-
Do one of the following, depending on the part of the user interface you are using:
-
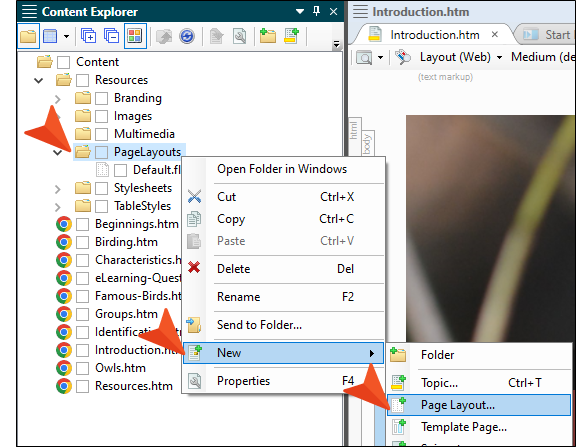
(Recommended) Right-Click In the Content Explorer, right-click a folder and from the context menu select New > Page Layout.
- Ribbon Select Project > New > Add Page Layout.
The Add File dialog opens.
Tip If your project does not include a folder for page layouts under the Content Explorer's Resources folder, it might be a good idea to create a new folder called PageLayouts.
-
-
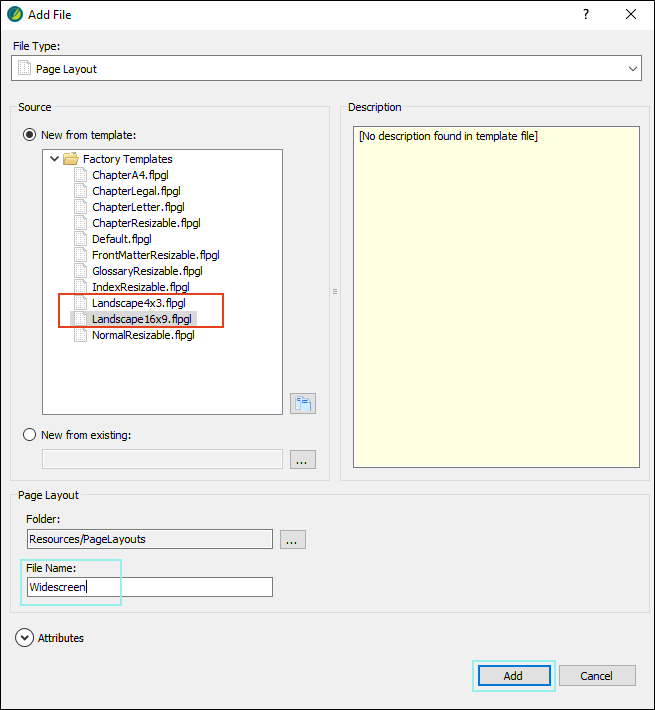
In the File Type field at the top, make sure Page Layout is selected.
-
In the Source area, under New from template, expand Factory Templates (if not already), and select the landscape template that will best fit the needs of your presentation (i.e., Landscape4x3.flpgl, or Landscape16x9.flpgl).
Note You can create other page layout templates for PowerPoint output. For example, most slide decks employ the landscape format with a standard (4:3) or widescreen (16:9) slide size, but you can create a presentation using the portrait format instead. Whatever the case, you can customize the page layout according to your intended design.
-
(Optional) The Folder field is automatically populated with the folder that has focus in the Content Explorer. If you want to place the file into a folder that you previously created in the Content Explorer, in the Folder field click
 and select the subfolder. Otherwise, keep the default location.
 -
In the File Name field, type a new name for the page layout.
- (Optional) If you want to apply condition tags to the file, expand the Attributes section at the bottom of the dialog. Next to the Condition Tags field, click and select the conditions you want to apply. Click OK.
- (Optional) If you want to apply file tags, expand the Attributes section at the bottom of the dialog. Next to the File Tags field, click and select the file tags you want to apply. Click OK.
- Click Add. The page layout is added to the Content Explorer. The Page Layout Editor opens to the right, displaying the page layout.
Tip Once you have a page layout template in your project that you want to use for PowerPoint you might want to build and view the output. It is likely that you will want to make page layout adjustments. Before you build it, you must first tie the page layout with the PowerPoint target, so Flare knows what layout to use. Do this in the Target Editor by selecting the General tab, and then a Primary Page Layout.
Example For a regional conference about birds, you have created a project using Flare and have added content to it. Knowing that you need to generate PowerPoint output, you plan for each topic to be a “slide” and use cascading stylesheets to design the content. Up until now, you have viewed your progress by building HTML5 output, but now you want to build and see it in PowerPoint.
First, add a page layout for PowerPoint. In the Content Explorer, right-click on a folder and from the context menu select New > Page Layout.
Then, in the Add File dialog, select a template, provide a name, and click Add. Note that 4x3 and 16x9 in the names of the two landscape template choices, refers to the aspect ratio of the slide.
The page layout is added to the designated folder in the Content Explorer.
Modifying a Layout in the Page Layout Editor
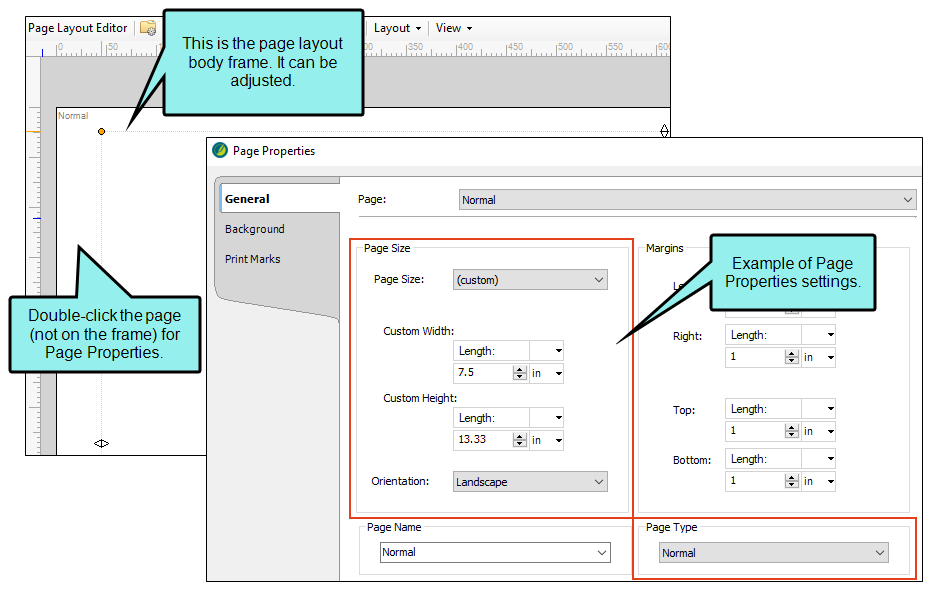
The advantage of using a factory page layout specifically for PowerPoint output is that a working template is set up for you. However, you can adjust properties such as page type, page size, page orientation, and body frame.
To edit the page properties, double-click the page in the Page Layout Editor and select Properties.
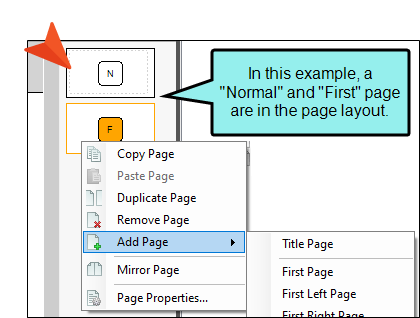
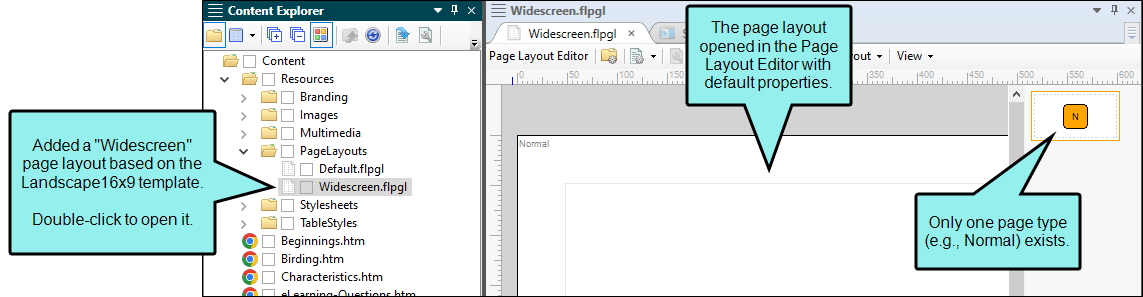
The landscape page layout templates include one page (i.e., a Normal page type) by default. Although you can generate PowerPoint output with a single page type in the page layout, you can add more pages. For example, you might want to add a First page for an introduction, or include a page with a different set of margins applied.
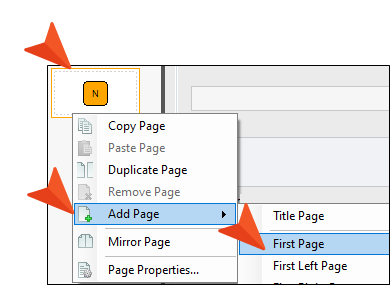
Right-click the small page graphic in the Page Layout Editor, and select an item from the context menu (e.g., Add Page > First Page).
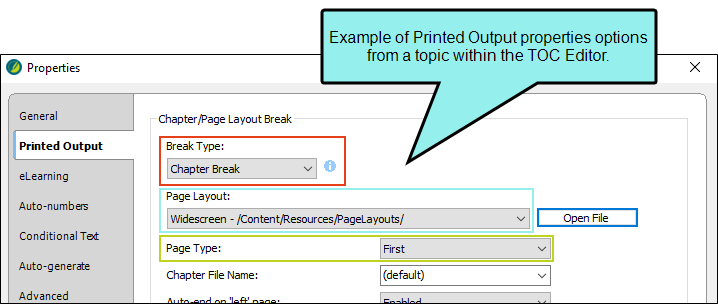
If your PowerPoint output design includes multiple page types (e.g., a First page, and a Normal page), you need to account for this using the TOC Editor's Printed Output options. For example, you might have a cover page or introduction using one page type, and then another page type starting with the next page. These options dictate how a page behaves in the output.
From each relevant topic in the TOC, select to display its properties. Select the appropriate Break Type, Page Layout, and Page Type.
Example When you add a page layout for PowerPoint to the project, a working template is set up for you. Once you build your target, you might realize you want to change page layout properties for customization.
View the page layout in the Page Layout Editor. In this case, it displays with default properties. No adjustments have been made to it yet.
You want to add a template page for the first slide in your presentation. Right-click the small page graphic, and select Add Page > First Page. You can keep the default page properties or update them if you have a special need.
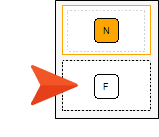
Notice another page type displays in the editor. Save the file.
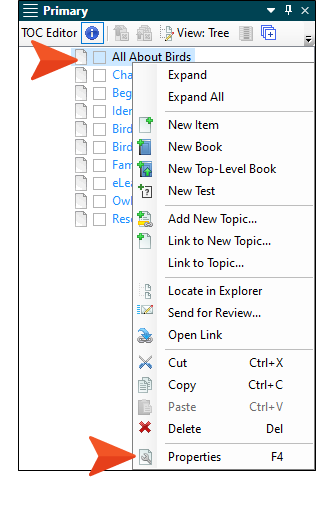
From the TOC, locate the first slide (or welcome topic), right-click and select Properties.
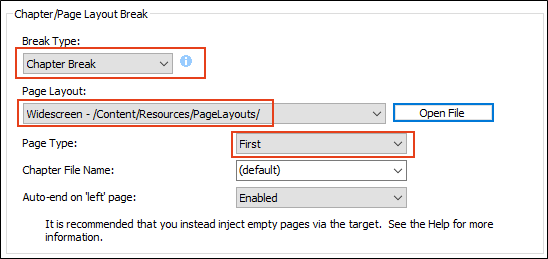
In the Printed Output tab select the appropriate Break Type (e.g., Chapter Break, Page Layout Break), Page Layout (e.g., Widescreen.flpgl), and Page Type (First). Click OK.
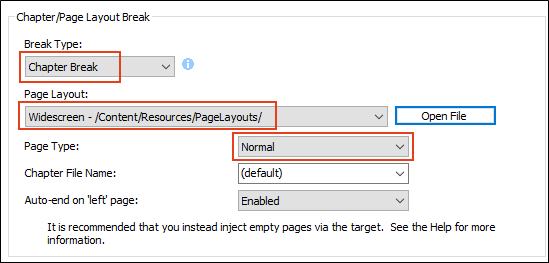
Locate the second slide, and select the Break Type (e.g., Chapter Break, Page Layout Break), Page Layout (e.g., Widescreen.flpgl), and Page Type (e.g., Normal). Click OK.
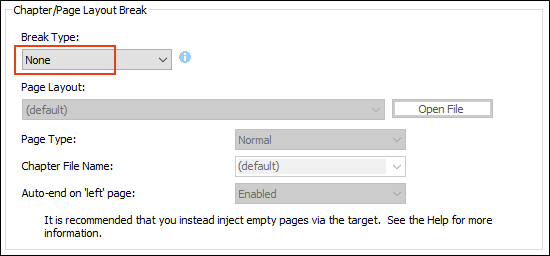
Then, for the third slide, confirm that the Break Type defaults to None. Any topics that occur after this slide will inherit its settings. Click OK.
Rebuild the PowerPoint output type. Notice how the page layout adjustments affected the format of the presentation.
What’s Noteworthy?
Note If you are not using a PowerPoint page layout (where landscape mode is already set in the template), the output can default to a portrait page orientation. You can change the orientation using the Page Layout Editor.
Note Do not mix and match landscape and portrait page orientations for PowerPoint output—use one or the other. Otherwise, problems with formatting can occur. The more common use case is to use landscape.
Note There is an order of precedence with the three levels where you can specify a page layout. Specific entries in an outline TOC have the highest precedence, followed by page layouts at the target level, followed by page layouts at the project level. If you have a page layout set at the project or target level and it does not seem to be working the way you think it should, you might check to see if you have any page layouts set on specific TOC entries that are overriding the target- or project-level setting.
Note There is a limitation when setting gradient options for a PowerPoint page layout template. The gradient color will always start from left to right—regardless of which setting is selected. These settings are in Page Properties, with the Background tab in focus.
What’s Next?
Once you add a page layout to the project, you need to add a PowerPoint target and associate the page layout with it.

