 GETTING STARTED TUTORIAL
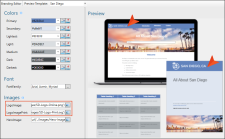
When you created the project using the Start New Project Wizard, recall the page with branding elements. In addition to changing the primary and secondary branding colors, you can specify more colors, logo, font, and a hero image. The branding you set customizes your project's look.
[Menu Proxy — Headings — Online — Depth3 ]
How to Change the Logo
One of the first things you will probably do is add your company or product logo. Note that setting the logo and other branding can easily be done when creating a new project with the Start New Project Wizard, but in this case, we skipped updating the logo. Let's update the logo now.
-
In the Content Explorer, expand Resources > Branding.
-
Double-click Branding.css. The Branding Editor opens.
The Branding Editor is essentially the same thing as the Start New Project Wizard's branding page. You can open the Branding Editor anytime as a standalone editor after a project is created.
During project creation a branding stylesheet (e.g., Branding.css) is added that identifies values for branding elements. The values are associated with those CSS variables in the project.
-
In the Images section, let's update the generic "Your Logo" image to one that says "San Diego, CA" for both online and print output.

-
From the LogoImage field, click
 to select an image. The Insert Image dialog opens.
 -
In the Select File section, expand Resources > Images (if it is not already), and select SD-Logo-Online.png. Click OK.
-
From the LogoImagePrint field, click
to select an image. -
In the Insert Image dialog, select SD-Logo-Print.svg, and click OK.
Note Templates that include a PDF allow you to select a vector image (e.g., EPS, SVG), which is made up of geometric elements and provides more clarity for printed output.
Notice in the Branding Editor that the logo fields update and the Preview area dynamically changes to show the selected images.
-
Click
") to save your work.
to save your work.Note If you start your project with the wizard, the CSS variables are automatically linked to various places throughout the project where they point to the branding stylesheet. Because of this, the home template page which controls the look of the Home page for online output is automatically updated with the new logo. You can view this in the Content Explorer. Expand Resources > TemplatePages, and double-click Home-Page.flmsp.
And the page layout template that is used for the PDF output is updated as well. You can view this in the Content Explorer. Expand Resources > PageLayouts, and double-click Frontmatter.flpgl.
Online Output and Skins
With online output, skins are another way to provide structure and style to a page with a pre-designed look and feel for the container displaying the final result. They let you select a logo and colors that are defined from the branding page, as well as set fonts and more for the area that surrounds the main topic content.
We could have discussed skins earlier in Styles, but skins need to be linked to an online target and we hadn't created our HTML5 target yet. So we'll take a look at skins now.
-
In the Project Organizer, expand the Skins folder.
-
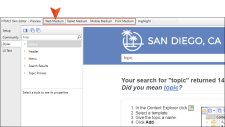
Double-click the Top-Navigation skin. The HTML5 Skin Editor opens to the right.
-
Select the Styles tab. The skin style groups and properties are on the left side and a dynamic preview area is shown on the right side. By dynamic, we mean that you can actually click in the preview area and navigate to different parts of the skin. Notice the branding elements are evident in skins.
Also notice the mediums at the top of the editor (Web, Tablet, Mobile, and Print). These let you provide different style settings for the skin, depending on the size of the device. In this tutorial, we're only going to concern ourselves with the Web medium.
-
Let's look at the Logo style group in the skin. It is pretty easy to spot on the left side of the editor. But sometimes it can be a bit more difficult to find the style you need to change. So here's a little trick. In the local toolbar of the editor, click Highlight.
This button synchronizes the styles on the left with whatever you click in the preview area. Let's try it. In the preview, click the logo.
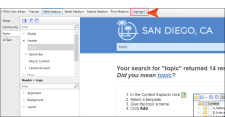
The Logo style group on the left is selected and its properties are expanded.
-
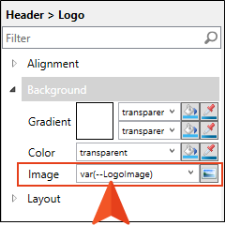
Under the Logo properties, expand the Background section. You can see the Image field is referencing the CSS variable from the branding stylesheet.
How to Assign a Skin to a Target
Now that we've created the skin, we can assign it to the HTML5 target we created.
- From the tab at the top of the editor area, or from the Project Organizer, open the All-About-San-Diego-HTML5 target. The Target Editor opens to the right.
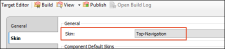
- Select the Skin tab.
-
In the Skin field, select Top-Navigation.
-
Click
to save your work.


