 ELEARNING TUTORIAL—ADVANCED
One of Flare Desktop's greatest strengths is its ability to single-source content. This simply means that you create the content once and reuse it in different ways, rather than doing a lot of rewriting, or copying and pasting. Single-sourcing content can save you a great deal of time and energy, and help to maintain consistency.
Two of the most essential features for single-sourcing are snippets and conditions. We're going to use both of these types of features in the following steps in order to reuse some content. Variables are also commonly used for single-sourcing; we'll work with variables later in this tutorial.
[Menu Proxy — Headings — Online — Depth3 ]
How to Create a Snippet From Existing Content
-
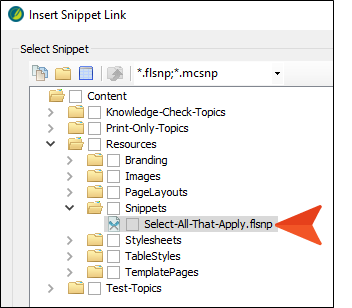
First, let's create a subfolder to store any snippets that we create. In the Content Explorer, right-click the Resources folder and select New > Folder. Type Snippets as the name for the folder and press ENTER.
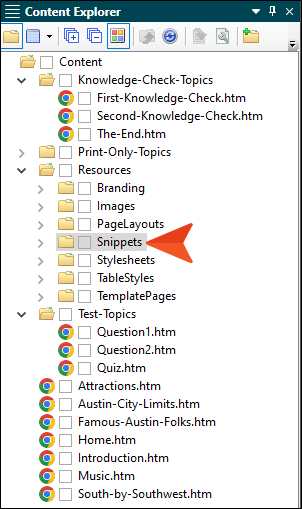
Note Resources > Snippets is the recommended location for your snippet files, but you can actually add them anywhere in the Content Explorer that you like. The same is true of any other resource files (they can be placed anywhere in the Content Explorer). You can also created nested folders under the Resources folder if you have many files that you need to organize.
-
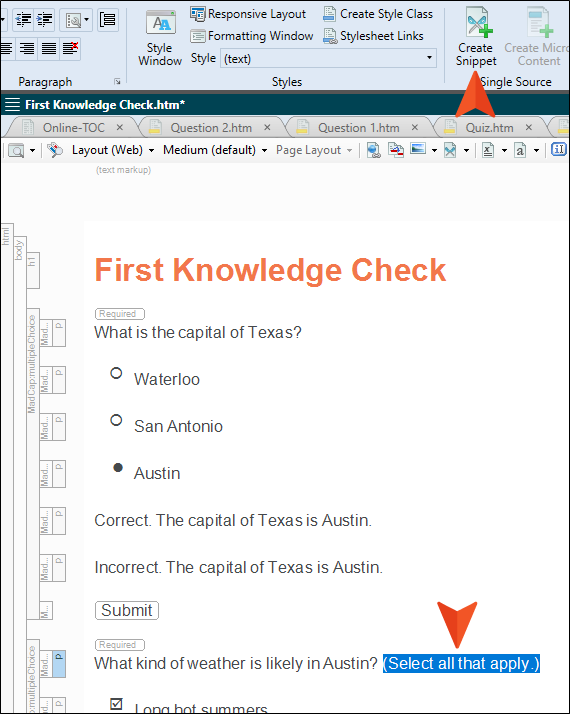
Open the First Knowledge Check.htm topic.
-
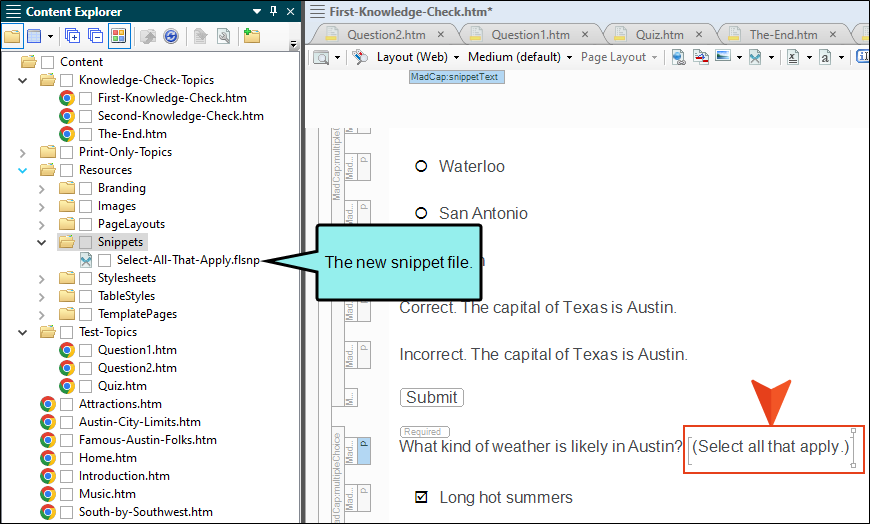
After the second question, highlight the text (Select all that apply.). Then, from the Home ribbon at the top of Flare Desktop, click Create Snippet.
-
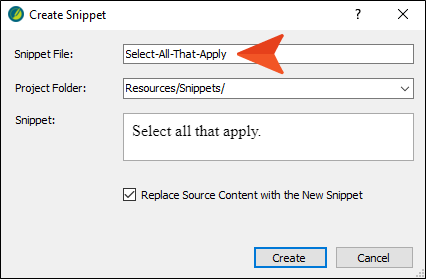
In the Create Snippet dialog, enter Select-All-That-Apply as the file name for the new snippet.
-
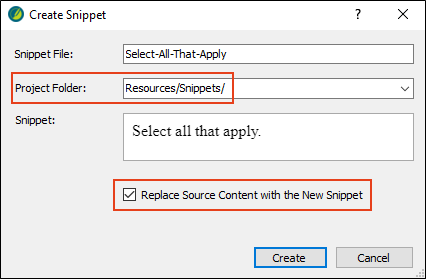
The rest of the fields are set just as we want. (It's pointing to the correct folder, and we are replacing the selected content with the new snippet file.) So click Create.
You should now see brackets (markers) around that text. This signifies that the content is actually contained in a separate file, located in the new folder you created in the Content Explorer. Therefore, you cannot edit that text in the topic file anymore; you need to open the separate snippet file to edit it.
Note You can create snippets for any content that is repeated in multiple places. Use your best judgment for the content where you create snippets. For example, in this same topic, you can see the words Correct and Incorrect, which are repeated throughout the course. You can also see that the correct and incorrect text next to the first instance of these ("The capital of Texas is Austin.") is repeated. Perhaps you want to turn any of these into snippets. In this tutorial, we're just going to focus on the one sentence that we've already turned into a snippet. Just know that there are all kinds of possibilities for creating snippets from content, whether it is just text or collections of any other types of content (e.g., tables, images, lists).
-
Click
") to save your work.
to save your work.
Warning You can create snippets for entire question sections and reuse them. However, use caution when doing so, because each question has its own question ID associated with it, and you do not want the ID to end up inside the snippet. The question ID is necessary for eLearning tracking.
How to Find Text and Insert Snippets
Now that we have our snippet, we just need to insert it anywhere that the same content should be used. In this tutorial, we've already entered that text manually, so we just need to find all the places where it occurs. We'll use the Find and Replace feature to do that.
-
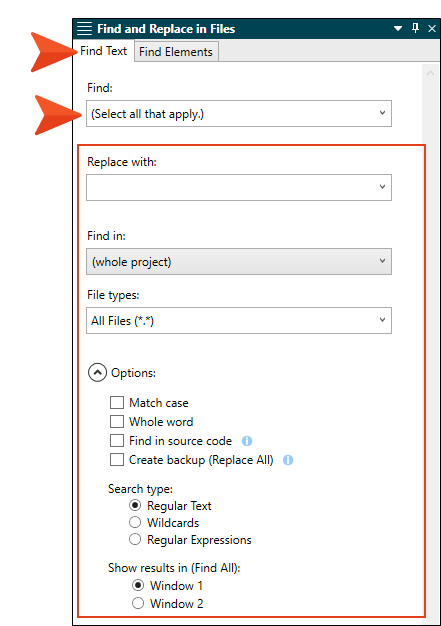
From the Home ribbon, click Find and Replace.
-
Make sure the Find Text tab is selected at the top of the window pane, and in the Find field enter (Select all that apply.). And make sure the rest of the options match those in the following image.
-
At the bottom of the window pane, click Find All.
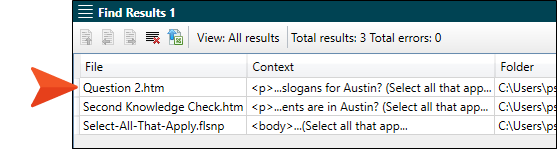
The window pane that opens at the bottom of the interface displays three files where the text is found. One of these is our new snippet, so we don't need to worry about that one. But we want to open the other two files to replace the text with the snippet.
-
Double-click the row in the Find Results window pane for the Question 2.htm topic.
This opens that topic and highlights the text.
-
In the local toolbar of the XML Editor, click
 (the face of the button, not the down arrow).
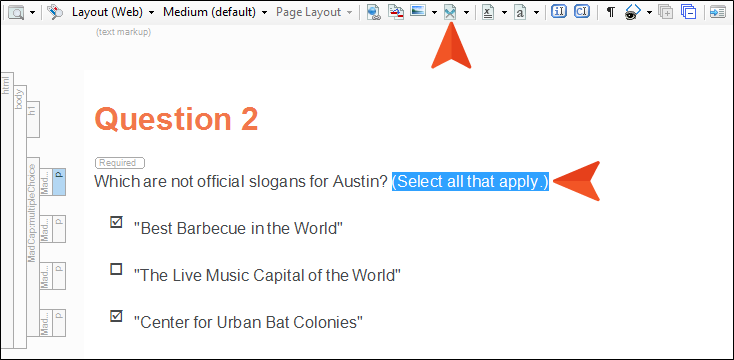
-
In the dialog, find and select the new snippet that you created, and click OK.
The text is now replaced with the snippet.
-
Click
to save your work. -
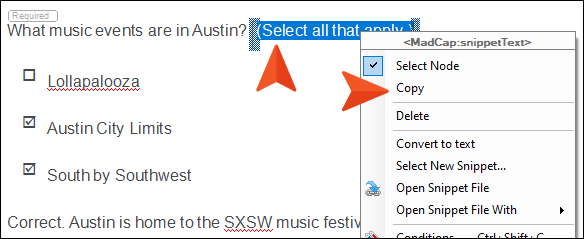
Right-click the snippet in the XML Editor, and from the context menu select Copy.
-
In the Find Results window pane at the bottom of Flare Desktop, double-click the row for the Second Knowledge Check.htm topic.
-
Right-click the highlighted text and select Paste. Now all instances of that text have been replaced with the snippet. In the future, you can simply insert the snippet wherever you need to use the same text.
-
Click
to save your work. -
And just to underscore the power of snippets, let's edit the text a little bit. Right-click the snippet at its location where you inserted it into the Second Knowledge Check topic, and from the context menu select Open Snippet File.
-
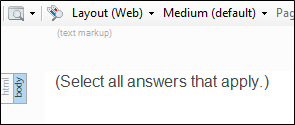
In the snippet file that opens, add the word answers so that it now reads "(Select all answers that apply.)"
-
Click
to save your work. -
Now open any of the topics where the snippet is inserted, and notice the edited text.
How to Add Conditions
A condition is a feature that you can apply to certain content or a file so that you can include or exclude it from a particular output. To start using conditions, the first thing you need to do is add them to a condition set file.
-
Open the Project Organizer on the left side of Flare Desktop.
-
Expand the Conditional Text folder, which is where all condition tags are stored.
-
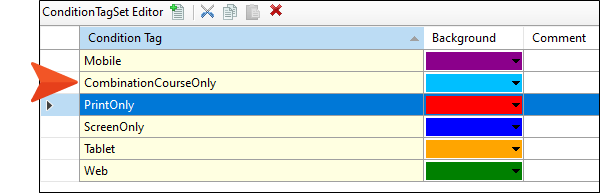
Double-click Default to open that condition tag set. This type of file can hold many conditions. And you can create as many condition tag sets as you need in order to organize all of your conditions. In this tutorial, we're just going to work with the Default condition tag set that is provided.
-
There are already a handful of conditions in this tag set. You may or may not end up using some of these, or you can rename them for other purposes if you want. Let's create some new conditions that we will use specifically for our eLearning content. In the local toolbar, click
 .
. -
This adds a new row to the condition tag set. Click NewTag so that the text is highlighted, type CombinationCourseOnly for the name of the tag, and press ENTER. Notice a color is automatically assigned for that row, but you can click the down arrow and choose a different color if you want.
-
Follow these steps again to create new condition rows with the following names:
KnowledgeCheck
KnowledgeCheckOnly
Test
TestOnly
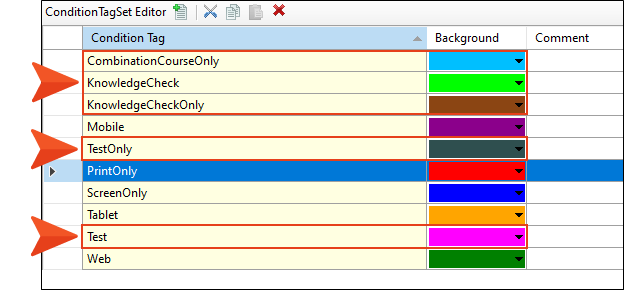
Note Instead of "Test" and "TestOnly," you could name the conditions "Quiz" and "QuizOnly." In fact, in your actual project, you can name conditions anything you want. Just make sure they're descriptive enough so any writers on your team can quickly identify the purpose of each condition. You can also use the Comment cell in the grid to provide information about each condition.
-
Click
to save your work.
How to Apply Conditions to Text
Now let's apply our new conditions to some content areas in the project. Conditions can be applied to all kinds of content and files, but in this tutorial we're just going to focus on some text, and then we'll also apply them to some entries in our table of contents (TOC).
-
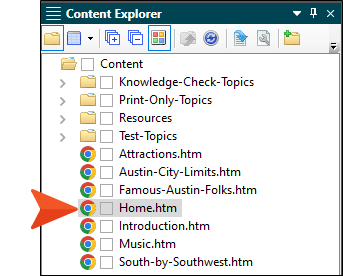
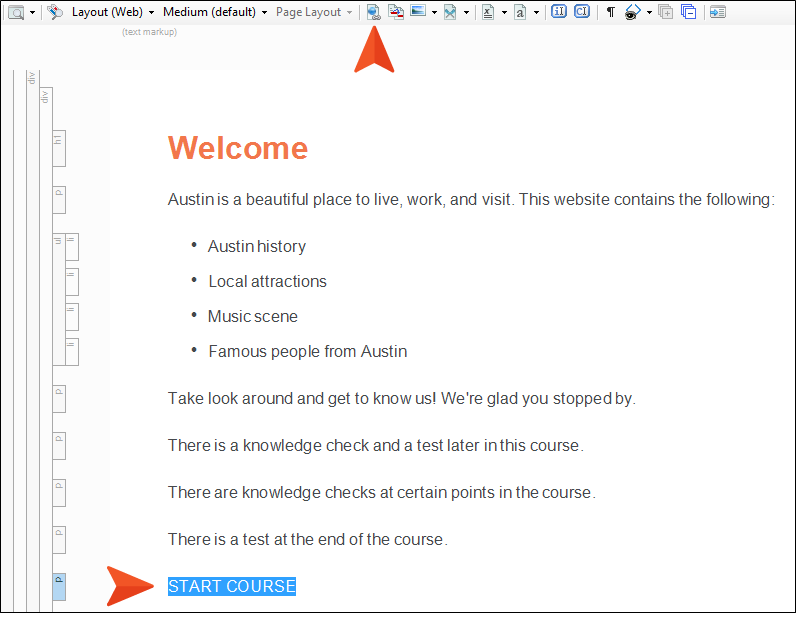
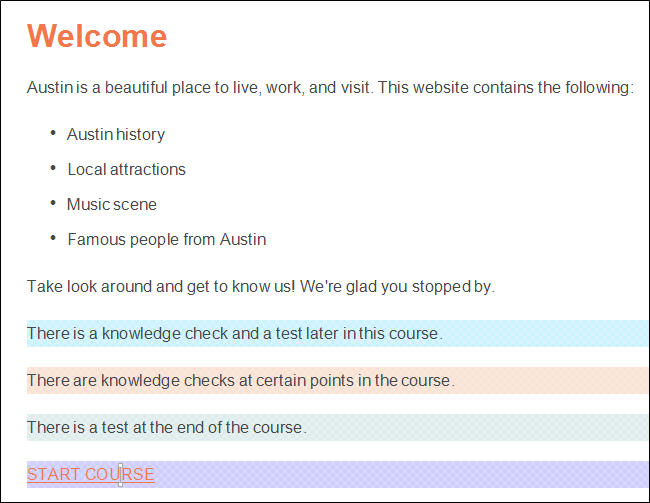
From the Content Explorer, double-click the Home.htm topic to open it.
-
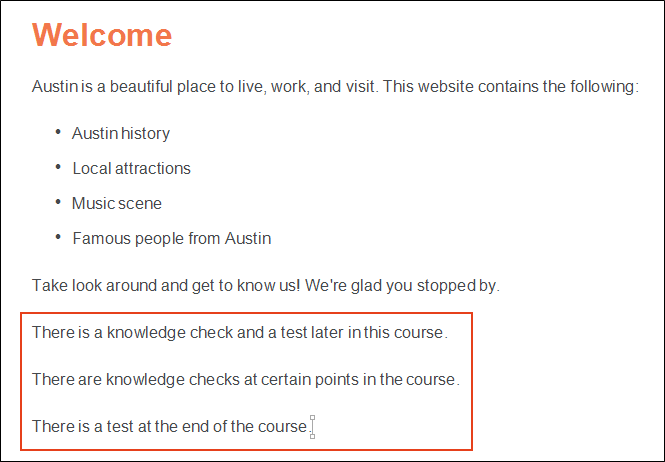
At the end of the topic, add the following three paragraphs.
There is a knowledge check and a test later in this course.
There are knowledge checks at certain points in the course.
There is a test at the end of the course.
-
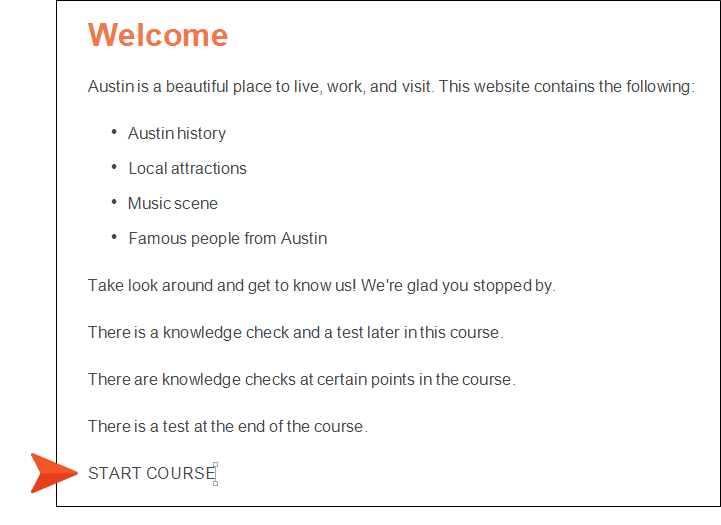
Let's add one more line of text at the end, which we'll use to begin the course in the online output. Type START COURSE.
-
We want to turn this text into a link, so highlight it, and in the local toolbar click
 .
.
Note In most cases, cross-references are recommended over hyperlinks when creating links between files in the same project. However, because we want our link to have some specific text (START COURSE) as opposed to using an automated formula, we're going to use a hyperlink in this tutorial.
-
In the dialog that opens, make sure the Link to field at the top is set to File in Project. Then, select the Introduction.htm topic in the area below, and click OK. Now the text is a link, which is displayed in an orange, underlined format.
-
Now back to our conditions. We want to mark each of our new four lines of text to be associated with a different condition. The idea is that the conditioned text will only show up in certain output. To start, click anywhere in the line of the first paragraph that you added, and in the Home ribbon click Conditions.
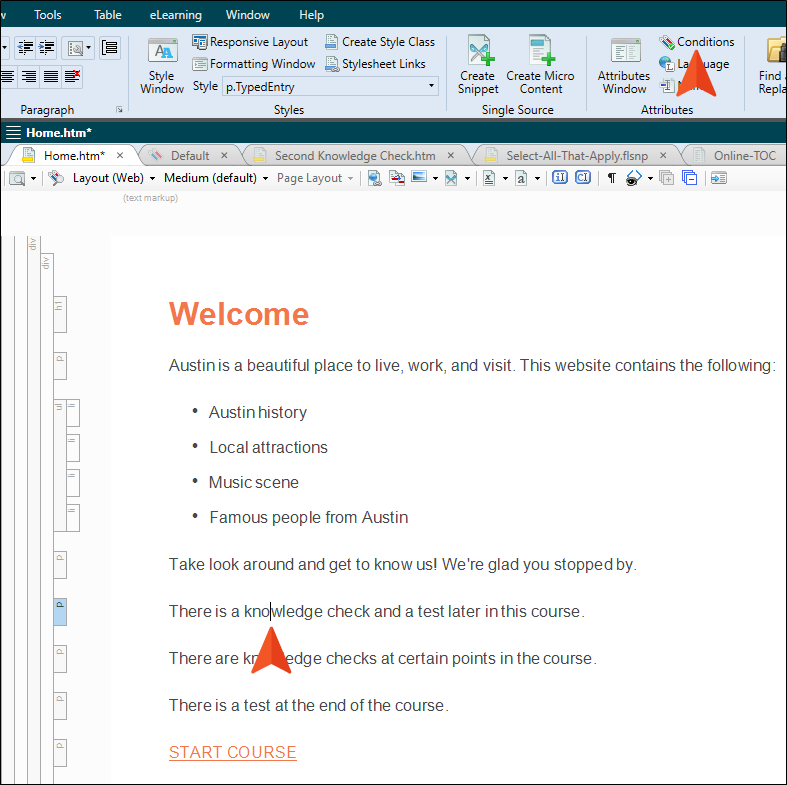
Note You do not need to select all of the text, since we want to apply the condition to the entire paragraph. If you were to select only a portion of the sentence, the condition would be applied only that selected text, and not to the whole paragraph.
-
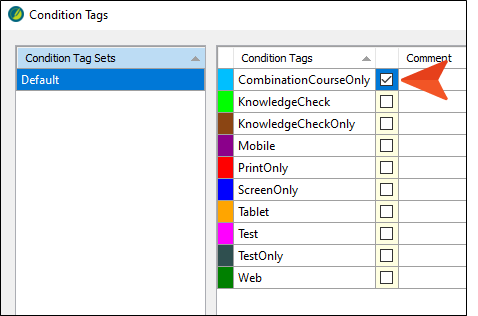
In the Condition Tags dialog, click the check box next to CombinationCourseOnly. Then, click OK.
As long as you have markers enabled, you should now see that paragraph shaded in color. This color won't display in the output; it's simply there in the XML Editor to let you know that a condition has been applied to the paragraph.
-
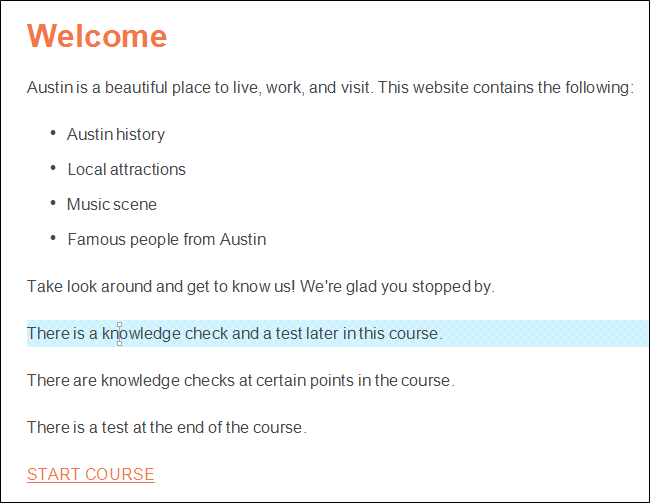
Repeat these steps to apply the following conditions to the other three lines:
Second line: Apply the KnowledgeCheckOnly condition.
Third line: Apply the TestOnly condition.
Fourth line: Apply the ScreenOnly condition.
When you are finished, it should look something like this.
-
Click
to save your work.
How to Apply Conditions to TOC Entries
Currently, our project has two TOCs—one dedicated to online output, and another for print-based output. However, there is a lot of flexibility when it comes to TOCs in Flare Desktop. You could choose to create a separate TOC for each output that you generate, including a unique TOC for many different online outputs. Alternatively, you could create a single TOC to be used for multiple outputs, and apply conditions to certain entries in the TOC that should be reserved for only some outputs. That's what we're going to do in this tutorial. In the end, we want to create three different kinds of online outputs, but we'll use the same TOC for each of those outputs.
So the first thing we need to do is open the TOC and apply some conditions to a few entries within it.
-
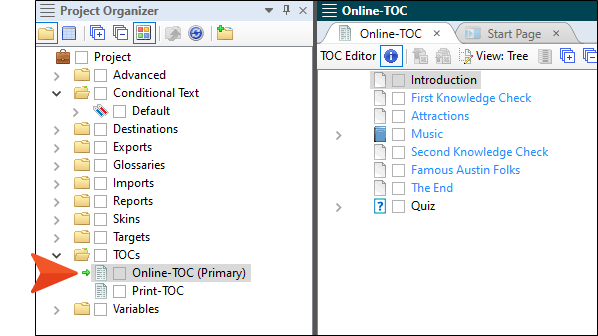
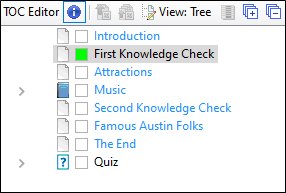
If the TOC is not still open, from the Project Organizer double-click Online-TOC to open it in the TOC Editor to the right.
-
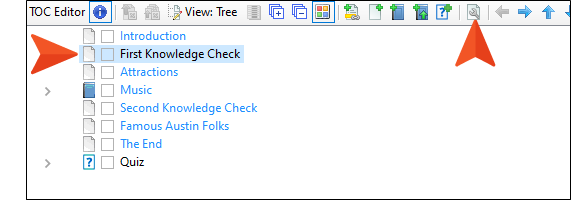
Select the First Knowledge Check entry, and in the local toolbar click
 .
.
-
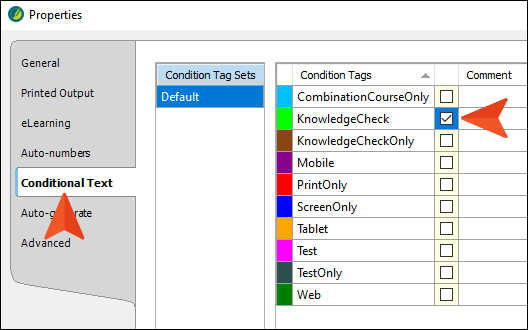
In the Properties dialog, select the Conditional Text tab.
-
Click the check box next to KnowledgeCheck. Then, click OK.
In the TOC Editor, the square next to that entry shows the color of the condition.
-
Apply that same condition to the Second Knowledge Check entry.
-
Apply the KnowledgeCheckOnly condition to the entry labeled The End.
-
Apply the Test condition to the Quiz test node.
When you're finished, it should look something like this.

-
Click
to save your work.
To this point, we've created the conditions and applied them to some areas. But that doesn't mean we're done yet. We'll finish up our tasks related to conditions later when we create and develop our targets.


