
Up to this point, any published updates from Flare Desktop would affect live articles in ServiceNow. Flare Desktop now supports the capability to keep updates in a draft state before pushing an article live.
Flare Desktop uses a REST API to communicate with ServiceNow instances. However, if you are using versioning in ServiceNow, the standard REST API does not work due to the JavaScript that is necessary for such functionality. Instead, you must add a custom scripted REST API in ServiceNow.
[Menu Proxy — Headings — Online — Depth3 ]
Destination Editor Update
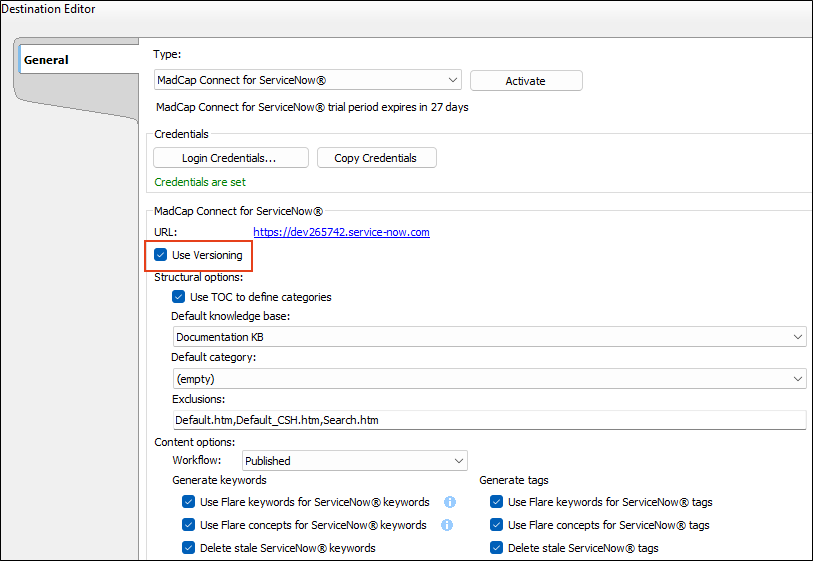
In the Destination Editor, when you connect to MadCap Connect for ServiceNow, there is a new Use Versioning check box. This option is only available in the editor if the ServiceNow server supports versioning, and if Flare Desktop has found the endpoint with a predefined name on the server. If the option is enabled and it is selected, you can use the versioning feature.
Enable Versioning
To enable the Use Versioning option, there is a little set up on the ServiceNow side having to do with a custom scripted REST API. Consult with your ServiceNow administrator to help you, particularly for the step that inserts JavaScript code to create a custom endpoint.
Note Since the following instructions take place on the ServiceNow side, they are intended to be a guide in getting you started. Be aware that the user interface and items such as labels, links, and options are subject to change over time. Please see ServiceNow documentation.
ServiceNow Side
-
Install the Knowledge Management Advanced plugin.
Note This plugin is installed by default since the Xanadu ServiceNow instance. For older instances you will have to install the plugin for article versioning to work.
-
In the ServiceNow application, navigate to Knowledge > Administration > Properties, and from Knowledge Management Properties, select Enable article versioning feature (set it to Yes).
Note This option in ServiceNow properties will not display unless the Knowledge Management Advanced plugin is installed.
-
Create a custom endpoint with the name “MadCap Connect API” in a new REST API.
Note This step is required for the Flare Desktop side to support article versioning. As the Flare Desktop user, you need to provide the JavaScript code to your ServiceNow administrator to complete on the ServiceNow side.
-
From System Web Services, click REST, and Scripted REST APIs.
-
Click New.
-
Provide a name for the REST API. It must be MadCap Connect API.
-
In the new REST API, navigate to Resources related list, and click New.
-
Ensure the following fields are set:
- Name MadCap Connect API
Note This will associate the custom endpoint with the JavaScript function.
-
Relative Path /{action}/{sys_id}
-
HTTP Method POST
- Name MadCap Connect API
-
In the Script field of the resource, paste the following code. (Provide this code to your administrator.)
Copy(function process(request, response) {
var action = request.pathParams.action;
if (!action)
return new sn_ws_err.BadRequestError('Missing action parameter');
action = action.toLowerCase();
if (action === 'status') {
var plugin = new GlideRecord('v_plugin');
var pluginFound = plugin.get('id', 'com.snc.knowledge_advanced');
// {plugin_active: active|inactive|unknown, feature_enabled: true|false|unknown}
return {
plugin_active: pluginFound ? plugin.getValue('active') : 'unknown',
feature_enabled: gs.getProperty('glide.knowman.versioning.enabled', 'unknown')
};
}
var sysId = request.pathParams.sys_id;
if (!sysId)
return new sn_ws_err.BadRequestError('Missing sys_id parameter');
var topic = new GlideRecord('kb_knowledge');
if (!topic.get(sysId))
return new sn_ws_err.NotFoundError('No record found');
var kbVersioning = new KBVersioningSNC();
var result;
switch (action) {
case 'checkout':
result = kbVersioning.checkout(topic, false);
if (result)
return { "sys_id": result.sys_id.toString() };
return new sn_ws_err.ServiceError('Checkout operation failed');
case 'recall':
kbVersioning.recall(topic);
return { "sys_id": topic.sys_id.toString() };
default:
return new sn_ws_err.BadRequestError('Invalid action. Supported methods are: status, checkout and recall');
}
})(request, response); -
Save.
-
Flare Desktop Side
Once the custom endpoint is set in ServiceNow with the plugin (depending on your instance), the article versioning property is enabled, and the JavaScript code is associated with the new REST API, then the Use Versioning option can be enabled in Flare Desktop’s Destination Editor. (Behind the scenes, Flare Desktop and ServiceNow communicate via ping and response to confirm the endpoint is properly configured.)
Note You might see a warning icon next to Use Versioning if something in the setup is wrong. Click it for dynamic information specific to your case.
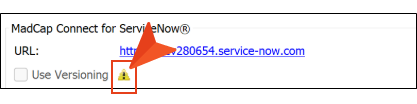
The information is intended for your administrator. A check mark indicates a successful element while an "X" indicates a failed one.
Do the following in the Destination Editor.
-
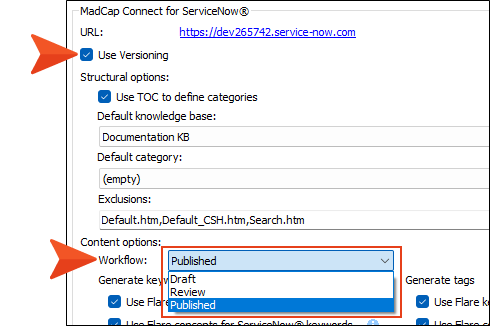
(Optional) Select the Use Versioning check box. This is optional because you do not have to use the versioning feature to publish to ServiceNow.
-
Select a workflow for your content (e.g., Draft, Review, Published).
Workflow Selections Affect Versioning
The Destination Editor Content options allow you to select a workflow for the output files uploaded to ServiceNow. Although this drop-down is nothing new, you can achieve different versioning results in ServiceNow if you switch between workflow options.
Example With Use Versioning enabled, this illustrates how versioning might work when publishing from Flare Desktop to ServiceNow.
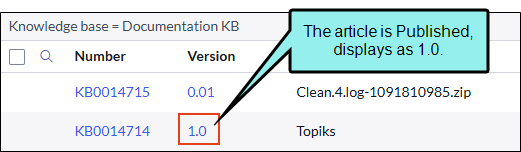
Workflow option: Draft. This shows the first draft of an article, unpublished. In addition a log file is created.
Workflow option: Published. You decide the article is fine, so you want to select Published.
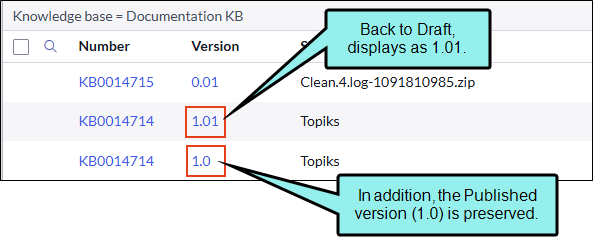
Workflow option: Draft. You need to make the published version a draft again. With versioning, a "copy" is created, while the published version is preserved (and live, available to the public).
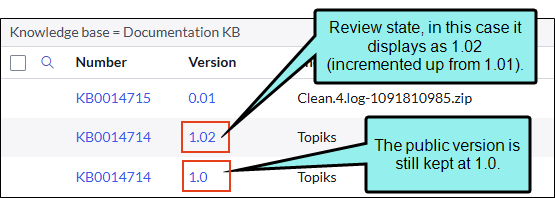
Workflow option: Review. You want the article reviewed, so you publish from a Draft state to Review. A new version of the article is created while incrementing the version number up.
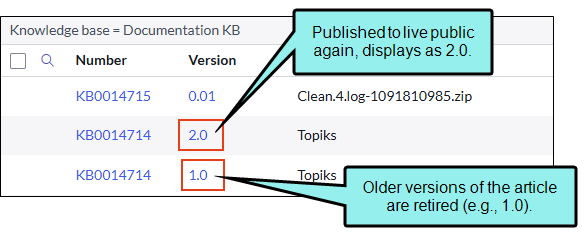
Workflow option: Published. You decide it is time to publish your article again. You select Published. This publishes a new public version, and it retires the older articles.
Note If you use versioning an article is automatically uploaded that is specific to the target and the project. It will remain as Draft in ServiceNow, regardless if you change the workflow drop-down (e.g., Draft, Review, Published). The purpose of this article is to hold a log file (for all articles in the project).

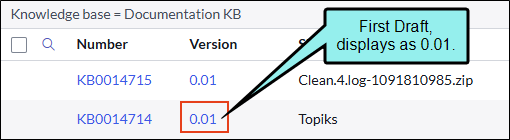
Note When an article is first created from Flare Desktop or in ServiceNow it displays as 0.01. This is an "unpublished" version.
Note If the Use Versioning option is not enabled, it behaves as it did prior to the ServiceNow refactor. It does not care about versioning. It does not create extra articles when switching from Draft to Published or Published to Draft. For example, if you publish as Draft for the first time, the article is 0.01. If you publish again as Published that article will be 1.0. But, if you publish again as Draft, the article is going to change to 1.01—and it does not create a "copy," meaning it does not keep it as Published and create a new Draft article. Instead it alters the same article, and it will affect the article that is live because it will be switched to a Draft state and will be unavailable to the public.
Minor Updates to Access Controls
Publishing User Roles
The Knowledge Admin role does not need to be assigned to a publishing user. Instead, use a MadCap Connect role. Initially, this role does not have access to anything, but you can give it access to certain tables as needed.
Creating Roles With a Script
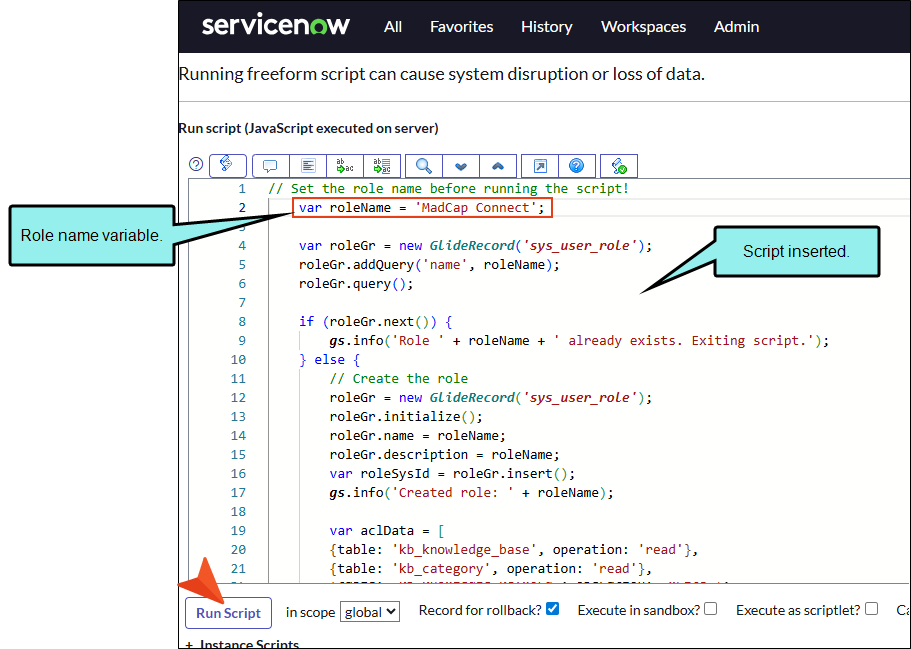
If you have multiple roles to set up and need to create different access controls it can be time-consuming to do that manually for each one. You can optionally run a JavaScript to 1) create a role with your specified name, 2) generate all required access control lists (ACLs) for the role, and 3) easily identify the ACL with an added description.
Since the following instructions take place on the ServiceNow side, they are intended to be a guide in getting you started. Be aware that the user interface and items such as labels, links, and options are subject to change over time. Please see ServiceNow documentation.
-
In the ServiceNow application, navigate to All > Scripts (i.e., System Definition - Scripts - Background).
-
In the Script field, paste the following code. Be sure to edit role name variable with the correct name (e.g., MadCap Connect).
Copy// Set the role name before running the script!
var roleName = 'MadCap Connect';
var roleGr = new GlideRecord('sys_user_role');
roleGr.addQuery('name', roleName);
roleGr.query();
if (roleGr.next()) {
gs.info('Role ' + roleName + ' already exists. Exiting script.');
} else {
// Create the role
roleGr = new GlideRecord('sys_user_role');
roleGr.initialize();
roleGr.name = roleName;
roleGr.description = roleName;
var roleSysId = roleGr.insert();
gs.info('Created role: ' + roleName);
var aclData = [
{table: 'kb_knowledge_base', operation: 'read'},
{table: 'kb_category', operation: 'read'},
{table: 'kb_category', operation: 'create'},
{table: 'kb_category', operation: 'write'},
{table: 'kb_category', field: 'parent_table', operation: 'write'},
{table: 'kb_category', field: 'parent_id', operation: 'write'},
{table: 'kb_knowledge', operation: 'read'},
{table: 'kb_knowledge', operation: 'create'},
{table: 'kb_knowledge', operation: 'write'},
{table: 'kb_knowledge', operation: 'delete'},
{table: 'kb_knowledge', field: 'workflow_state', operation: 'write'},
{table: 'kb_keyword', operation: 'read'},
{table: 'kb_keyword', operation: 'create'},
{table: 'kb_keyword', operation: 'write'},
{table: 'kb_keyword', operation: 'delete'},
{table: 'kb_knowledge_keyword', operation: 'read'},
{table: 'kb_knowledge_keyword', operation: 'create'},
{table: 'kb_knowledge_keyword', operation: 'write'},
{table: 'kb_knowledge_keyword', operation: 'delete'},
{table: 'label', operation: 'read'},
{table: 'label', operation: 'create'},
{table: 'label', operation: 'delete'},
{table: 'label_entry', operation: 'read'},
{table: 'label_entry', operation: 'create'},
{table: 'label_entry', operation: 'write'},
{table: 'label_entry', operation: 'delete'},
{table: 'label_entry', field: 'table', operation: 'write'},
{table: 'label_entry', field: 'table_key', operation: 'write'},
{table: 'v_plugin', operation: 'read'},
{table: 'sys_ws_definition', operation: 'read'},
{table: 'sys_translated_text', operation: 'read'},
{table: 'sys_translated_text', operation: 'create'},
{table: 'sys_translated_text', operation: 'write'}
];
// Create ACLs
aclData.forEach(function(acl) {
var gr = new GlideRecord('sys_security_acl');
gr.initialize();
gr.name = acl.table + (acl.field ? '.' + acl.field : '');
gr.operation = acl.operation;
gr.type = 'record';
gr.description = roleName;
var aclId = gr.insert();
gs.info('Created ACL: ' + gr.name + ' (' + gr.operation + ')');
// Add role to ACL
var aclRoleGr = new GlideRecord('sys_security_acl_role');
aclRoleGr.initialize();
aclRoleGr.sys_security_acl = aclId;
aclRoleGr.sys_user_role = roleSysId;
aclRoleGr.insert();
});
gs.info('Completed creating role and ' + aclData.length + ' ACL records');
} -
Click Run Script.
If you run the above script, it replaces two "manual" steps:
-
Creating a user role.
-
Creating required access records in different tables and assigning a user role to them.
