Aligning Files
When you create an alignment project, the original and translated files are matched and aligned by name. Although it might not be a common occurrence, there are a variety of reasons that a file from the original project might not be aligned with the same file in the translated project. The important thing is that you identify any misalignment and then correct it. You can do this by using the File Map window pane in MadCap Align.
The File Map window pane groups files found in both projects by file type. For each type, you can match the files together when necessary. There are a few operations for aligning files; you can shift the selected cells up and down, or swap two selected cells. After the files are aligned, you can manually upload them to your translation memory database.
[Menu Proxy — Headings — Online — Depth3 ]
How to Align Files
- Select Tools > MadCap Align.
-
In MadCap Align, open the aligned project. Unless you specify otherwise, these types of projects are stored in the Documents\My Aligned Projects folder on your computer. (Lingo creates the My Aligned Projects folder when you install the program).
- The File Map window pane should already be open. If it is not, do one of the following, depending on the part of the interface you are using.
Ribbon Select Home > File Map.
- Keyboard Shortcut Press CTRL+SHIFT+R.
- (Optional) In the File Map window pane, you can use the Filter field in the local toolbar to choose the types of files to see in the window pane.
-
Select the appropriate cell(s) on either the source language side or the target language side. You can hold down your SHIFT or CTRL key to click and select multiple cells.
-
In the local toolbar, click one of the buttons to perform an alignment action (so that the source files on the left are aligned with the proper target files on the right).

If you have selected two cells (one above and one below) and click this button, the positions of those two cells will be swapped.

Click this button if you want to swap the selected cell(s) with those below it.

Click this button if you want to swap the selected cell(s) with those above it.
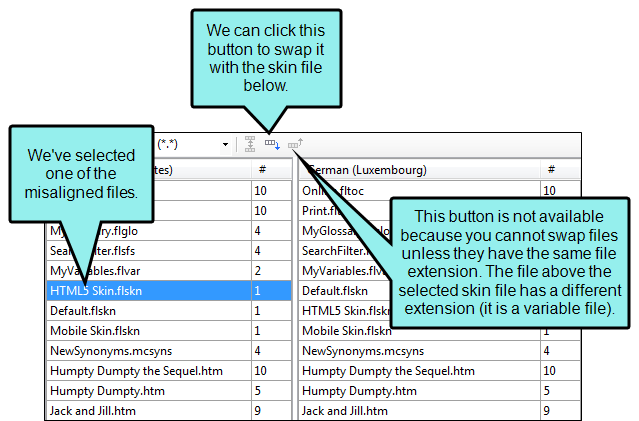
Note You can only swap a cell with the cell above or below it if the files have the same extension. If you cannot swap a cell, one or more alignment buttons will be grayed out.
- Click
") to save your work.
to save your work.
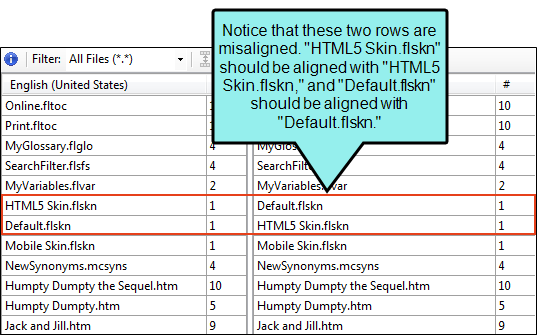
Example After creating an alignment project, let's say you open the File Map window pane and notice that all of the file rows are aligned with identical names, except for two skin files—"HTML5.flskn" and "Default.flskn."
To fix this you can select one of the misaligned cells (say, the "HTML5.flskn" file in the first column) and click the appropriate swap button.
The files become aligned, like this:
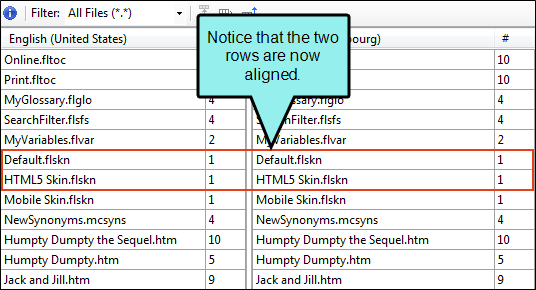
You can then upload the aligned files to the translation memory database.
You also might encounter situations where one file should actually align with two or more files.
Example During the original translation, the topic "Topic.htm" was translated into Spanish and the resulting topic file name was also "Topic.htm." Later, however, an author split the topic in the original version into two separate files—Topic.htm and Topic2.htm. In the File Map window pane of an alignment project, the results might look like this (notice that about half of the segments are in the source Topic.htm file and the other half are in the source Topic2.htm file):

You can align and upload the files in order to store all of the translated data in translation memory. To do this, you would begin by aligning the first topic with the translated file. In the image above, this is already done (Topic.htm is aligned with Topic.htm on the right). Then you would double-click the row with the aligned files (Topic.htm and Topic2.htm). In the Alignment Tool, you would make sure the aligned segments are translated properly and use one of the buttons in the local toolbar to upload the file or selected segments to translation memory.
After this, you would close the Alignment Tool. Then, in the File Map window pane, you would align the Topic2.htm source file with the Topic.htm target file. For example, with the Topic.htm source cell selected, you can click ![]() . This will swap that cell with the Topic2.htm cell, like this:
. This will swap that cell with the Topic2.htm cell, like this:

Once this is done, you would double-click the row with the aligned files (i.e., Topic2.htm and Topic.htm). In the Alignment Tool, you would make sure the aligned segments are translated properly and use one of the buttons in the local toolbar to upload the file or selected segments to translation memory.
What’s Next?
After you align files, you may need to double-click a particular file and align segments within it.
You will also want to upload the aligned files to your translation memory database. To do this, you can double-click any of the aligned files in the File Map window pane. Then, in the Alignment Tool, you can select specific segments and click  in the local toolbar, or you can click
  to upload all of the segments in the file.
