Whereas the File Map window pane can be used to perform alignment at the file level, the Alignment Tool can be used to do the same at the segment level. In most cases, you probably will not need to align segments. However, there may be situations when it is necessary.
To open the Alignment Tool, first open the File Map window pane in the MadCap Align utility (View > File Map). Then double-click on the associated pair of files. Like the File Map window pane, the Alignment Tool lets you shift selected cells up and down, or swap two selected cells. In addition, you can split and join segments.
[Menu Proxy — Headings — Online — Depth3 ]
How to Align Segments
- Select Tools > MadCap Align.
- Open the aligned project. Unless you specify otherwise, these types of projects are stored in the Documents\My Aligned Projects folder on your computer. Lingo creates the My Aligned Projects folder when you install the program.
-
In the File Map window pane, double-click on a row with aligned files. The Alignment Tool opens, displaying all of the segments from those aligned files.
If the File Map window pane is not already open, select Home > File Map or press CTRL+SHIFT+R on your keyboard.
- Select the appropriate cell(s) on either the source language side or the target language side. You can hold down your SHIFT or CTRL key to click and select multiple cells.
-

If you have selected two cells (one above and one below) and click this button, the positions of those two cells will be swapped.

Click this button if you want to swap the selected cell(s) with those below it.

Click this button if you want to swap the selected cell(s) with those above it.

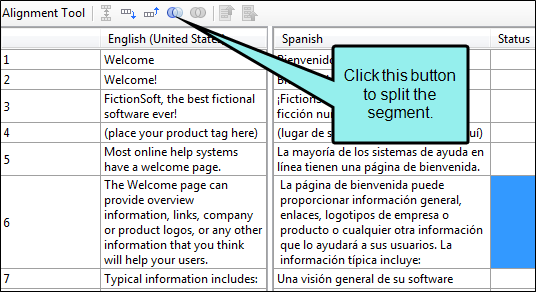
Click this button if you have selected one cell and want to split its content into two cells. This button is disabled until you double-click in the cell that you want to split. After double-clicking the cell, place your cursor where you want the split to occur in the segment. Then click this button.

Click this button if you have selected multiple cells (above and below one another) and you want to join the content within them into a single cell.
Note Rather than using split and join, you can alternatively use segmentation rules.
- Click
") to save your work.
to save your work.
If the animation below is cut off, you can see the complete animation by clicking the link under it to open the full topic.
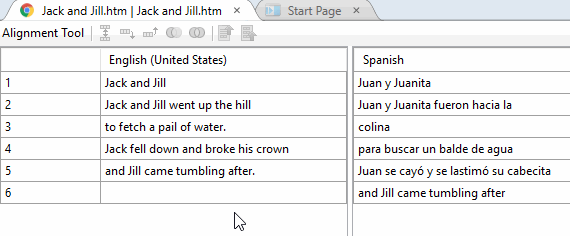
Example After creating an alignment project, let's say you double-click on a pair of files in the File Map window pane and notice the following in the Alignment Tool.
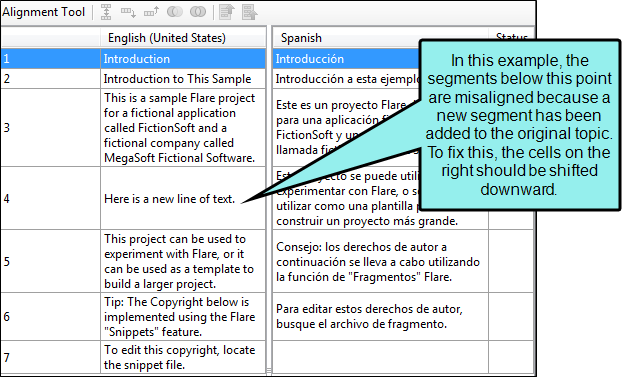
The segments are not completely aligned. Therefore, you correct the situation, like this.

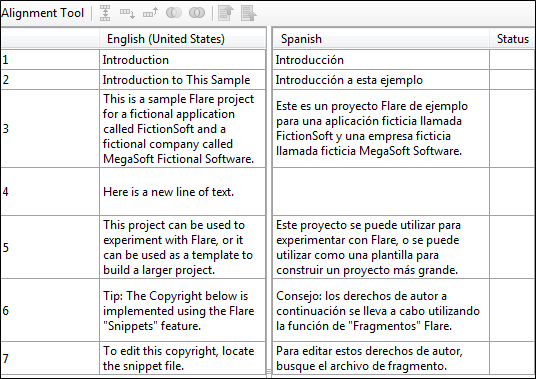
Now the cells are correctly aligned with their counterparts on the left, so you can upload them to translation memory.
Example — Splitting a Segment Into Two
Here is a situation where two segments are stuck together:
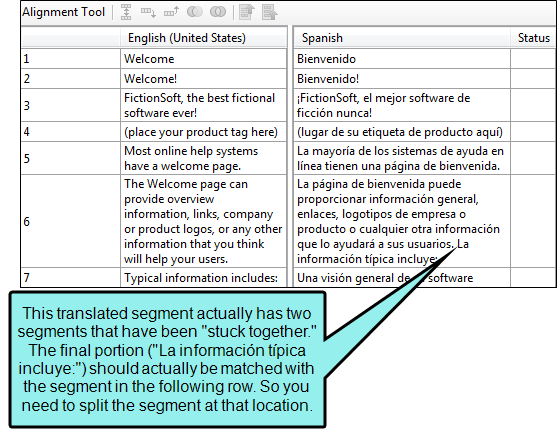
To split the segments apart, double-click in that cell. Then place your cursor where you want the split to occur.

When finished, you can upload the aligned segment(s) to your translation memory database.
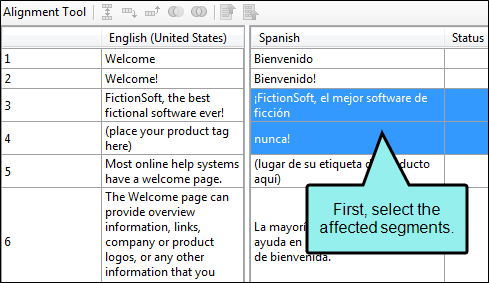
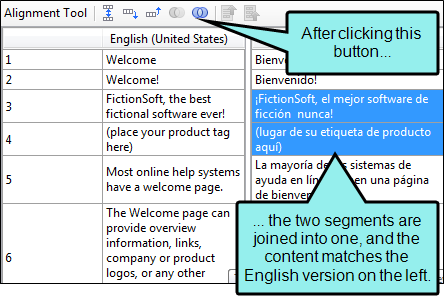
Example — Joining a Segment That is Split
Here is an example where one segment has been broken into two:
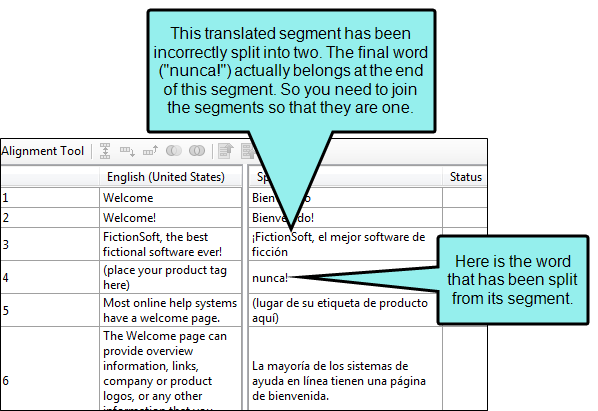
You can join that segment, like this.
When finished, you can upload the aligned segment(s) to your translation memory database.
What’s Next?
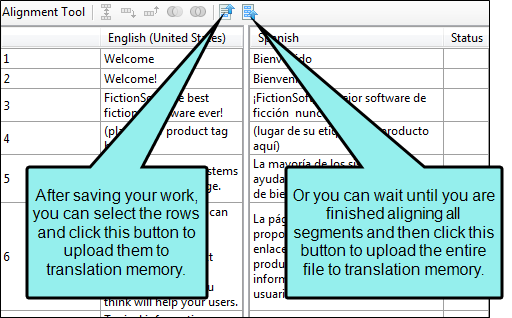
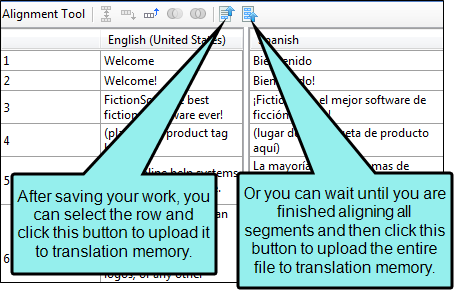
After you align segments, you should upload them to your translation memory database. If you select specific segments and click  in the local toolbar, only those translations will be uploaded. If you click
  in the local toolbar, all translations in the file will be uploaded.
