Using Segmentation Rules
Sometimes you may have segments in the Translation Editor that you need to join together or split apart. You can do this in a couple of ways in Lingo—automatically by using segmentation rules or manually by using the split and join features.
If you want to control segment breaks automatically, you can create segmentation rules. Lingo follows the format specified by Segmentation Rules eXchange (SRX). Therefore, after you create segmentation rules, you can export them to an SRX file. You can also import SRX files that have been generated in Lingo.
[Menu Proxy — Headings — Online — Depth3 ]
Regular Expressions
Lingo's segmentation rules are based on regular expressions. Therefore, you can use regular expressions in the Segmentation Rules dialog when creating segmentation rules. However, this is purely optional; it is not required that you enter regular expressions in your segmentation rules.
|
[a-z] |
Matches any lowercase letter |
|
[A-Z] |
Matches any uppercase letter |
|
\d |
Matches any decimal digit |
|
\D |
Matches any non-digit |
|
\s |
Matches any white-space character |
|
{…} |
Explicit quantifier For example, a{3} finds "aaa" |
|
| |
Alternation For example, gray|grey finds "gray" or "grey" |
|
(…) |
Logical grouping |
|
? |
0 or 1 of previous expression; forces minimal matching when expression might match several strings within a search string For example, reg(ular expressions?|ex(p|es?) finds "regular expression," "regular expressions," regex, regexp, or "regexes" |
For more examples and information about regular expressions, see the following:
http://www.regular-expressions.info/
http://regexlib.com/CheatSheet.aspx
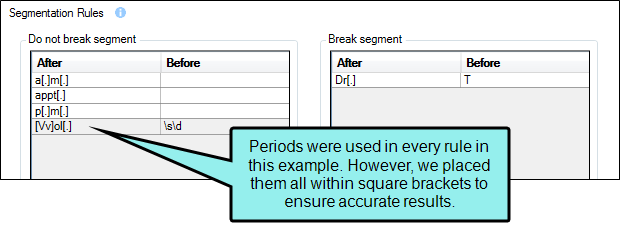
Note When using regular expressions in segmentation rules, keep in mind that a period in a rule (e.g., "break after St."; "do not break after St. and before Augustine") may cause unexpected results. This might occur because in regular expressions a period is used to match any character. You can avoid this by always placing a period within square brackets (e.g., "break after St[.]"; "do not break after St[.] and before Augustine") to ensure only the specific character for the period is used.
Note The following MadCap Flare project files are only segmented based on their units from Flare and not based on regular segmentation rules (periods and other punctuation rules): .liindexmap, .liconceptmap, .flaix, and .flixl files. Therefore, rules from the Segmentation Editor are not applied to these files.
Note Lingo only supports .NET regular expressions.
Creating Basic Segmentation Rules
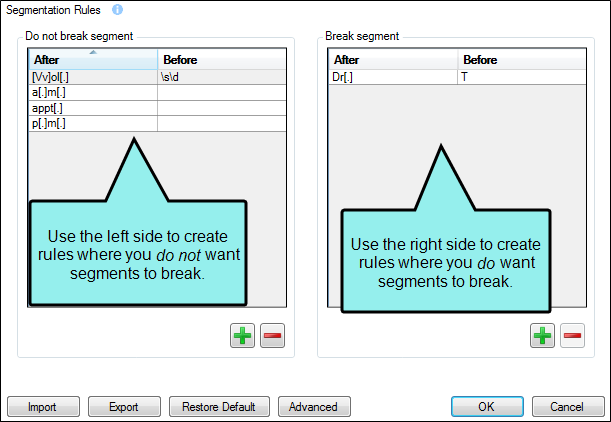
To create basic segmentation rules, start by selecting the Tools ribbon and clicking Segmentation Rules. In the Segmentation Rules dialog, there are two sections where you can add terms. The section on the left lets you tell Lingo the cases where you do not want segments to break. The section on the right lets you tell Lingo the cases where you do want segments to break.
Segmentation rules can be especially useful for abbreviations and other terms that may contain periods (or other punctuation) that Lingo usually recognizes as the end of a sentence.
Creating Advanced Segmentation Rules
You can also create advanced segmentation rules. Advanced segmentation rules allow you to override or edit Lingo's default segmentation rules and to set segmentation rules for specific languages.
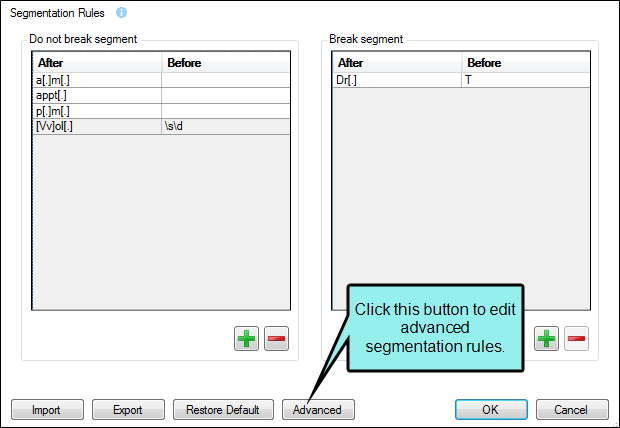
To create advanced segmentation rules, start by selecting the Tools ribbon and clicking Segmentation Rules, then click Advanced. Two new tabs appear in the editor: Rules and Languages.
Note Advanced segmentation rules influence the handling of source language segments, not target language segments.
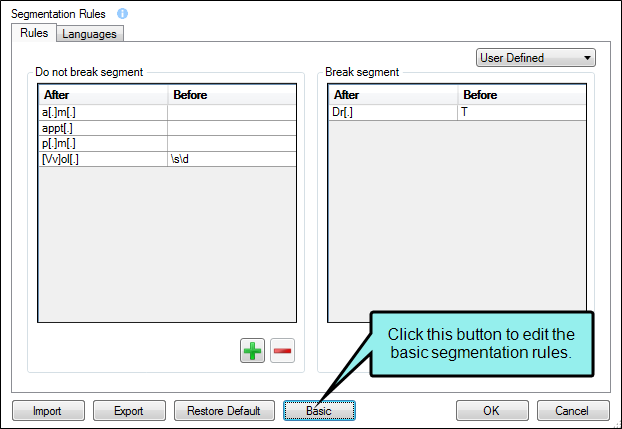
Rules Tab
This tab lets you add, edit, or remove segmentation rules using regular expressions.
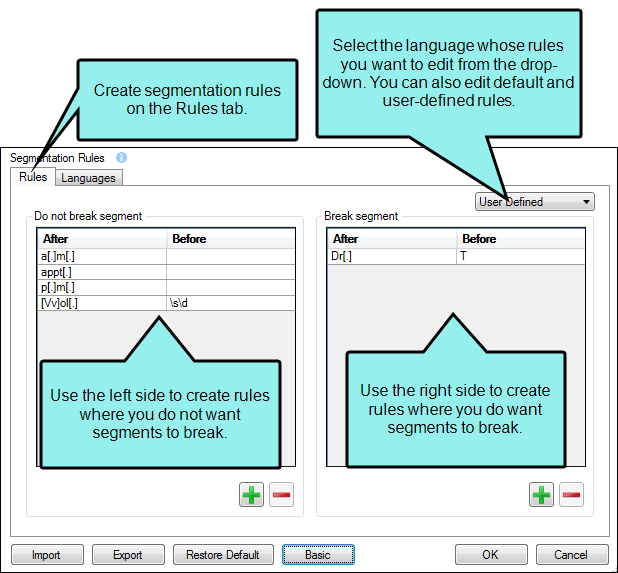
- Select a language from the drop-down list. Use the Languages tab to set the languages that appear in this list. After you select a language, you can add, edit, or remove rules associated with that language.
- You can also edit user-defined rules and default rules.
Languages Tab
This tab lets you select the languages for which you need to create segmentation rules.
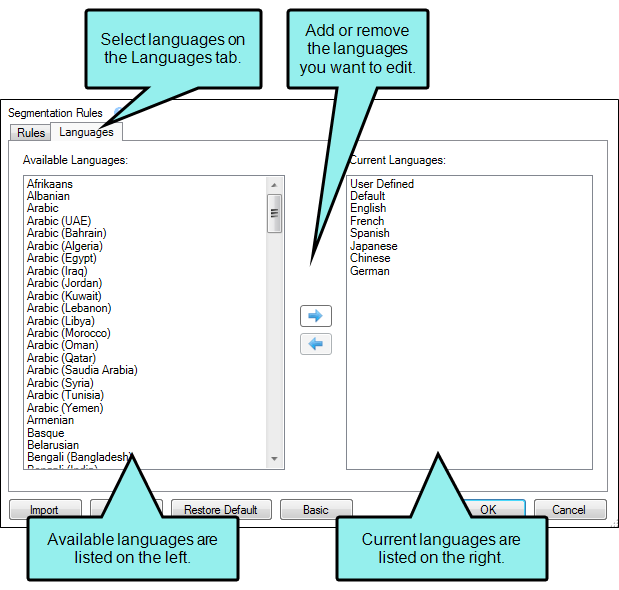
- To add a language, select it in the Available Languages list. Click
 to add it to the Current Languages list.
 - To remove a language, select it in the Current Languages list. Click
 to remove it from the Current Languages list.
Languages in the Current Languages list appear in a drop-down on the Rules tab.
If you want to return to the basic editor, click Basic.
Note If you return to the basic editor, the rules you created in the advanced editor remain active but are hidden. If you create new rules in the basic editor, they are added to the user-defined rule set the next time you open the advanced editor.
More About Segmentation Rules
Following are some additional points to keep in mind when working with segmentation rules:
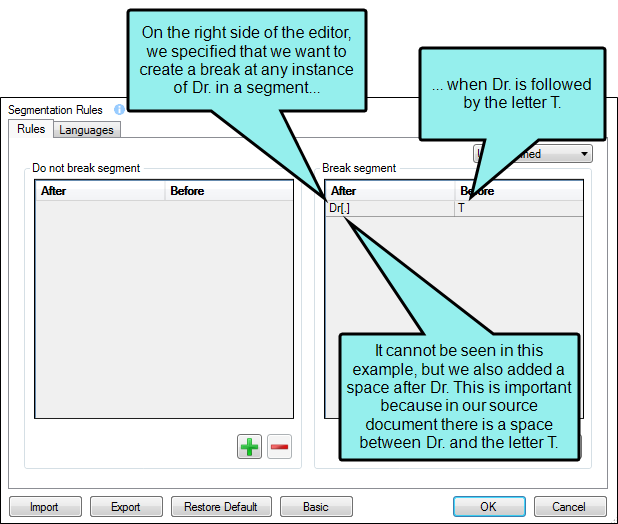
- When creating segmentation rules, keep in mind that you may need to enter spaces (or you can enter \s if using a regular expression) where necessary (see examples below). Depending on the circumstance, a space may need to be added after the last word in the After column, or it may need to be added before the first word in the Before column. The reason for this is that content structures and languages are different. An expert knowledge of regular expressions may help to remove the guessing from this task.
- There may be times when you create a rule on the left side of the editor (do not break) that conflicts with another rule on the right side (break). In that case, the do not break rule overrides the break rule.
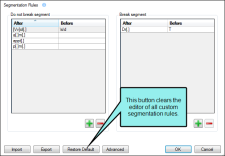
-
You can restore Lingo's segmentation rules to their default settings (i.e., clear all custom rules). To do this, click Restore Default.
- Segmentation rules are not tied to the project. They are external and are stored in Documents\LingoSRX. Therefore, all Lingo projects that you create can use the same rules.
- There are certain default segmentation rules in place (e.g., when Lingo comes across Dr., it does not break the segment). However, you can create custom rules, which will overwrite the default rules when conflicts exist.
- User-defined rules are applied to all languages.
- When working in the advanced editor, if you add a rule to a language that has multiple language dialects (e.g., English has dialects for countries such as the United States and the United Kingdom), the rule will be applied to each dialect in that language. However, if you add a rule to a language's dialect, the rule is not applied to any other dialect in that language or to the top-level language (e.g., if you add a rule to English (Ireland), it is not applied to English (Jamaica) or English).
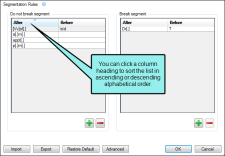
-
You can sort the rules by clicking the column headings.
-
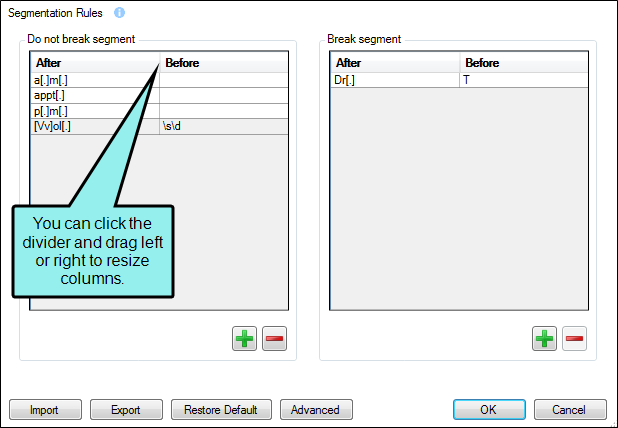
You can resize the columns by clicking the divider between the column headings and dragging to the left or right.

- Custom segmentation rules do not work on SDLXLIFF, TTX, and TXML files, because these files should be segmented already by other tools before they are imported.


Examples
Following are some examples of how you might create segmentation rules:
Example — Do Not Break
Let's say you import a Word document and the segments look like this in the Translation Editor:
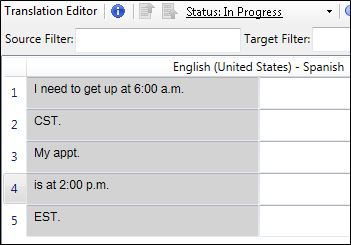
Notice that the first two rows should be joined into a single segment, and the final three rows should be joined together as well.
To accomplish this with segmentation rules, you can do the following:
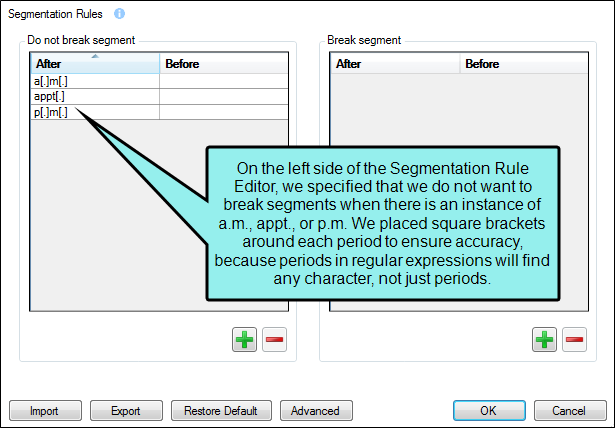
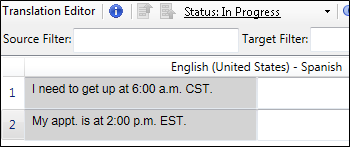
With these rules in place, you can update the project and the segments will look like this:
Example — Break
Let's say you import a Word document and the segments look like this in the Translation Editor:
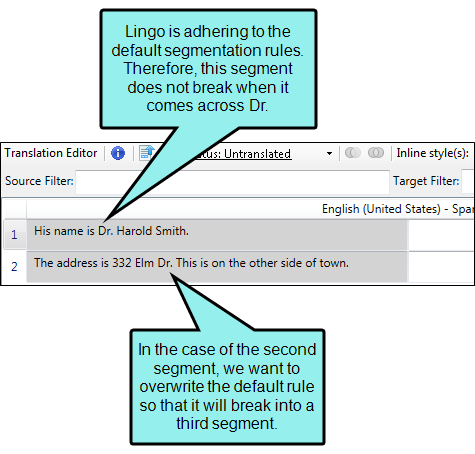
This is a situation where you want the first segment to remain as it is, but you need the second segment to break after Dr. You can do this manually by splitting the segment, or you can do it automatically by creating a segmentation rule like the following:
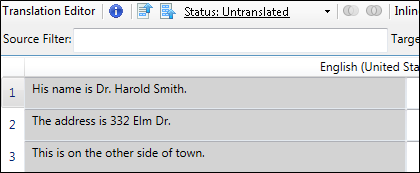
With this rule in place, you can update the project and the segments will look like this:
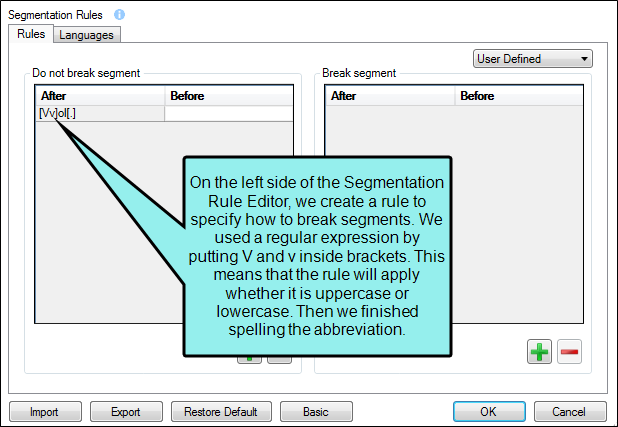
Example — Do Not Break (Using Regular Expressions)
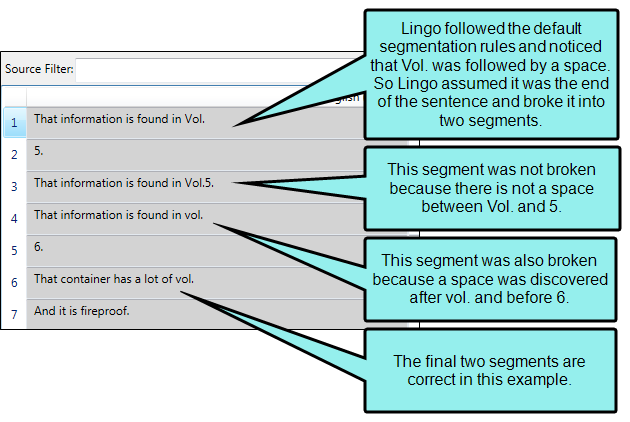
Let's say you import a Word document and the segments look like this in the Translation Editor:
To correct these breaks, you can create a segmentation rule like this:
With this rule in place, you can update the project and the segments will look like this:
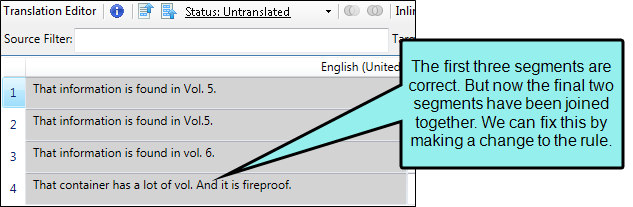
We can edit the rule so that Lingo does not break segments when Vol. or vol. is followed by a number. But if it is followed by a character, it will break. To accomplish this, we can edit the segmentation rule as shown here:
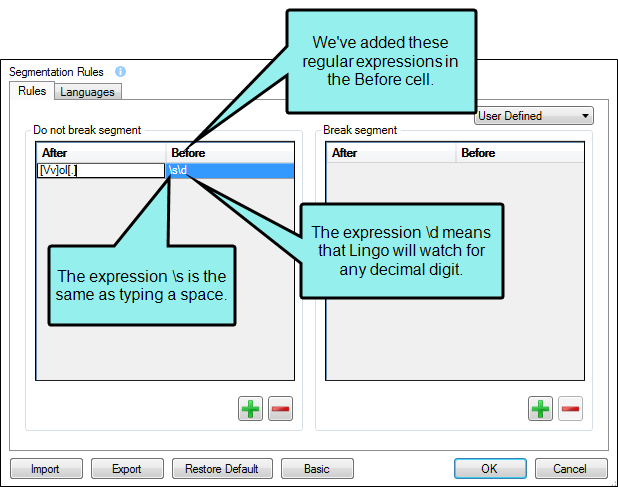
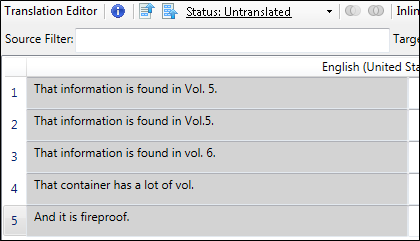
The modified rule tells Lingo to avoid breaking a segment when it finds Vol. or vol. followed by a number, including occasions when a space exists before the number. With this rule altered, you can
Note You can use regular expressions with either basic or advanced segmentation rules. However, you may choose to use an advanced segmentation rule if you want to set a rule for a specific language to match the source language.
Importing and Exporting Segmentation Rules
You can use buttons at the bottom of the segmentation rule dialog to import or export SRX files.
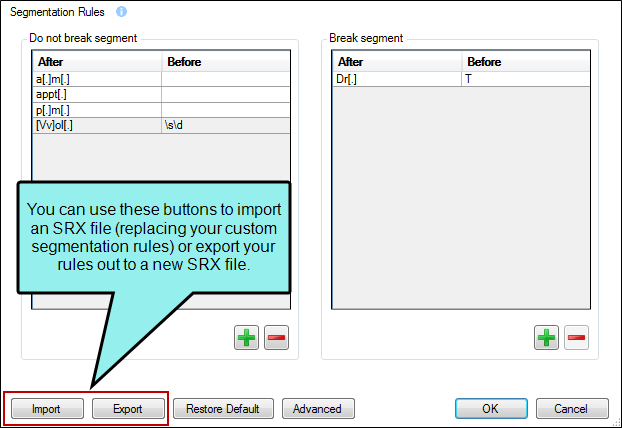
After exporting an SRX file, another Lingo user can import it into a project. Only SRX files generated from Lingo can be imported into Lingo.
Note When you import an SRX file, it replaces your current SRX file, including any custom rules in it.
Applying Segmentation Rules
After you create segmentation rules, you must make an edit to the file or create an entirely new project. Then you can update the project to apply rules to the segments.