Simply because a window pane is attached to the left or right side of the program window by default, this does not mean it has to stay there.
-
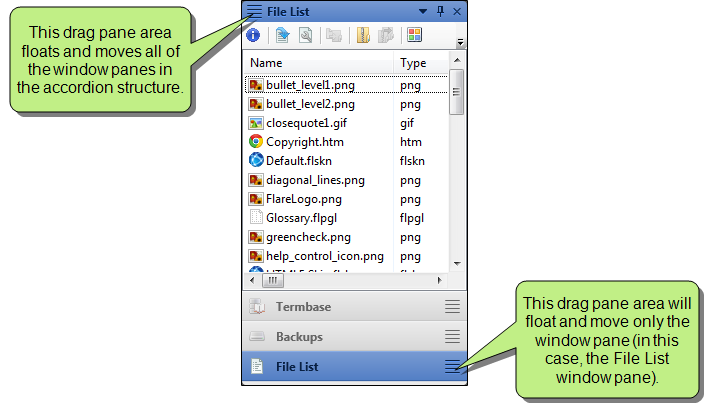
Moving Window Panes You can move window panes displayed in accordion view by clicking the "Drag Pane" section
 . If you want to drag all of the window panes grouped together, click this button in the upper-left corner of the window pane on top. If you want to drag a single window pane, click this button in the accordion bar for that window pane. Hold down your mouse and drag the window pane(s) where you want it/them.
- Floating Window Panes If you drop the window pane at a random location in the program window, it becomes a "floating" window. (You can also create a floating window by clicking in the element and selecting Window>Float.)
-
Docking Window Panes Docking a window pane means to attach it to a particular part of the program window. To do this, move the floating window pane by clicking in the title bar of the window pane, drag it to the edge where you want to dock it, and drop it onto one of the small squares that appear in the interface. The portion of the square that has color indicates where the window pane will be docked.

Dock in center of workspace

Dock on left side of workspace

Dock on right side of workspace

Dock on top side of workspace

Dock on bottom side of workspace
 . If you click this button, the window pane is hidden (or "pinned" to the edge of the program window). However, you can still see the title of the window pane along the edge of the program window. When you hover over the title, the window pane temporarily displays again until you move the mouse off the window pane. Click the button again to "un-pin" the window pane.