Creating Profiles
When you capture an image, you do so using a profile, which is a collection of settings that are applied to the image in advance. Among other things, a profile lets you select a location for a captured image file, apply a specific kind of border to it, set the DPI (dots per inch), and even resize it automatically.
You can use the default profile provided for you ("MyProfile"), but you can also create additional profiles as necessary.
[Menu Proxy — Headings — Online — Depth3 ]
How to Create a New Profile
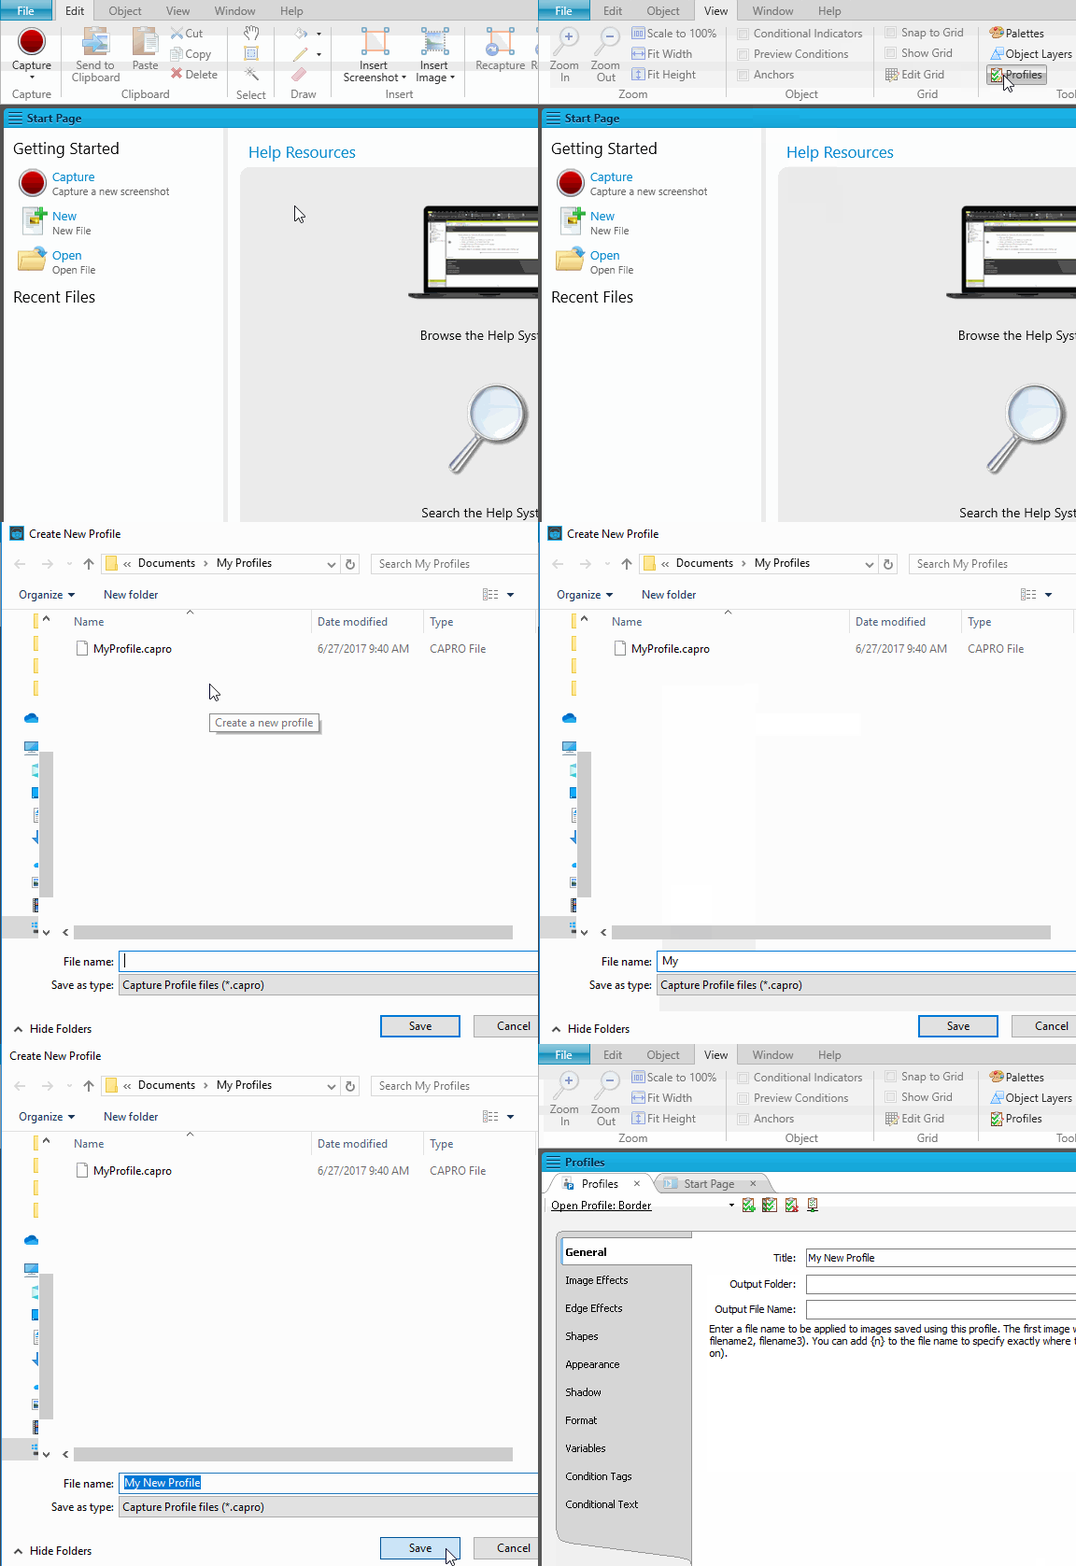
- Select View > Profiles.
- In the local toolbar of the Profiles Editor, click
 .
. - In the dialog, navigate to the folder where you want to save the profile.
- In the File name field, enter a name for the profile.
- Click Save. The new profile opens in the Profile Editor.
What’s Next?
After you create a profile, you can edit the settings within it. See Editing Profiles.

