After creating and applying condition tags, you need to tell Flare what your target should do with the condition tags that you have created and applied. Should content with a particular condition tag be included in or excluded from that target, or should it display only when viewed on a certain device or screen size?
How to Associate Conditions With a Target
- Open the Project Organizer.
- Expand the Targets folder.
- Double-click a target. The Target Editor opens to the right.
- Click the Conditional Text tab.
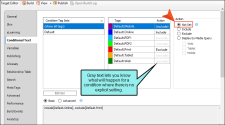
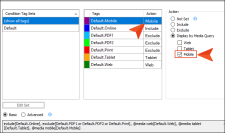
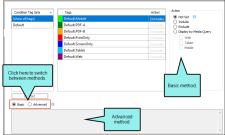
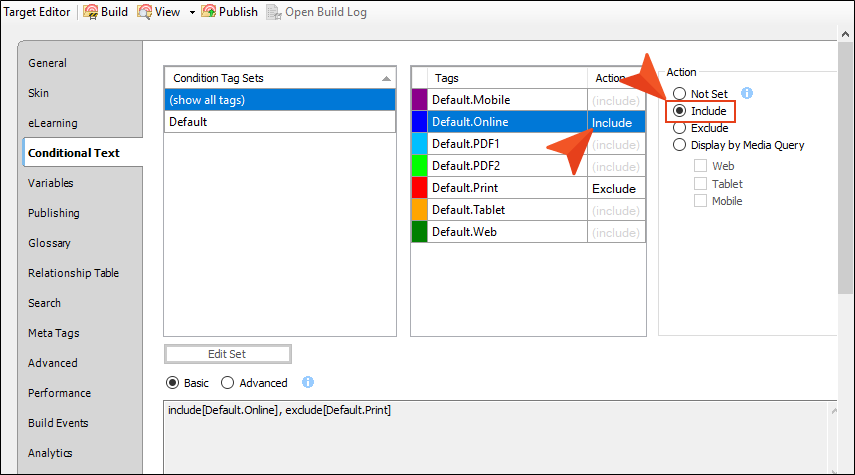
- In the Condition Tag Sets area, you can choose to view tags for all condition tag sets or you can select a specific set. The tags associated with the selected set are shown to the right, with their associated colors. An Action cell appears next to each condition tag. When Basic is selected, the Action cell is shown and the Advanced section below is disabled. In the Tags area, select a condition tag in the grid to set its action. (You can also hold down the SHIFT or CTRL key and choose multiple rows to set the same action on all of them at once.)
-
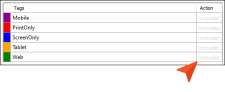
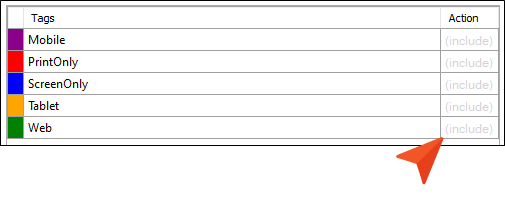
The Action cell in the grid indicates the current setting for the condition. The text is gray if you have not explicitly chosen an option. To change the setting, choose one of the options in the area to the right.
Action Options
-
Not Set If an action is not set on a condition, its behavior may vary (i.e., it might be included or excluded). This depends on whether or how you have set other conditions.
-
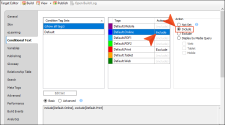
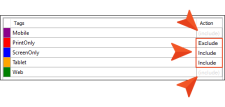
Include Select this if you want the content associated with the condition to always display in the target’s output.
-
Exclude Select this if you want the content associated with the condition to never display in the target’s output.

-
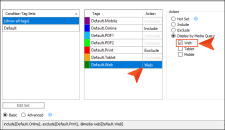
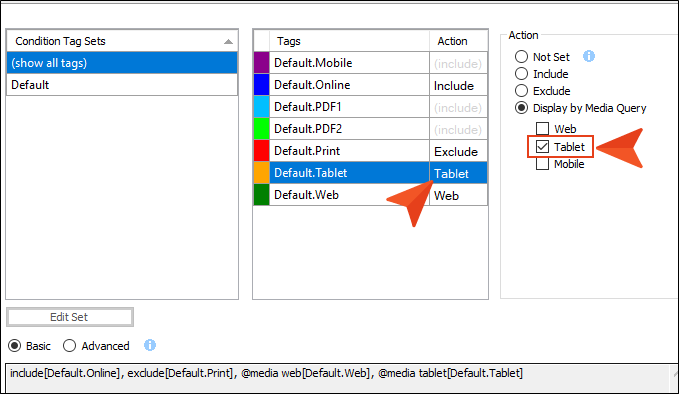
Display by Media Query Select this if you are working in an HTML5 target and want the content associated with the condition to display only when the user is viewing the output on a particular device or screen size (according to the responsive output breakpoints that are set in the target or skin).
After selecting this option, choose one or more of the media query check boxes. The Active cell in the grid updates accordingly.
-
Web The content will display if the user is viewing it on a large screen.
-
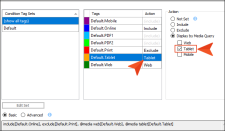
Tablet The content will display if the user is viewing it on a medium screen, such as an iPad.
-
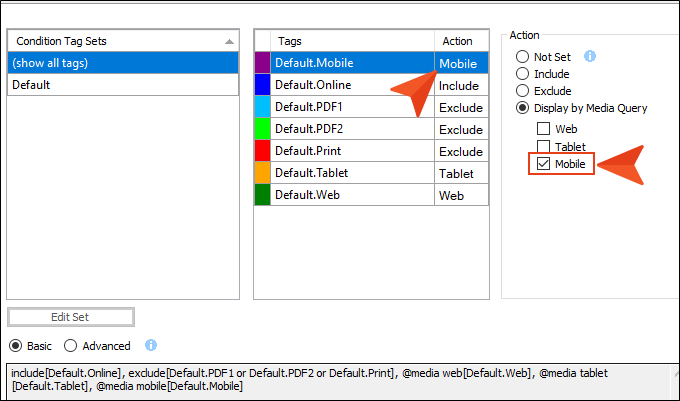
Mobile The content will display if the user is viewing it on a small screen, such as an iPhone.
-
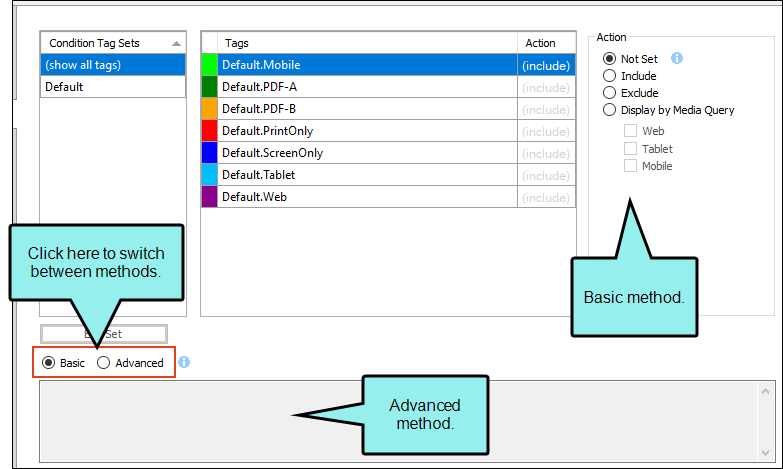
When you create condition tag expressions, you have the choice of working with conditions in Basic or Advanced mode. You can switch between the two modes by clicking Basic or Advanced toward the bottom of the interface. You can use Basic if you are newer to condition tag expressions, or you can use the Advanced mode if you are experienced at writing condition tag expressions by hand. While the Basic section is easier for most people to use, it is also more limited in the type of expressions it can create.
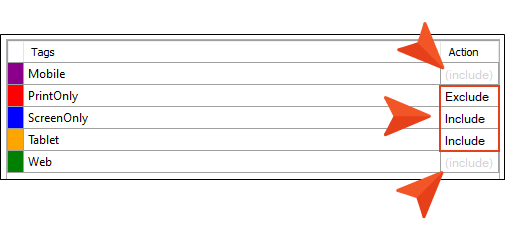
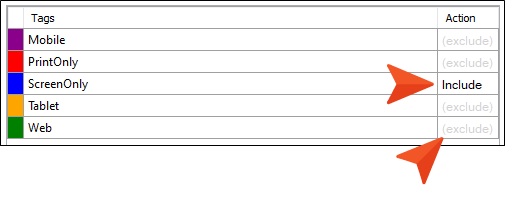
Warning The condition feature is an inclusive system. If you do not select any options, all of the tags will automatically be included, as indicated by the gray text in the Action cell. If you include only some tags and exclude others, any remaining tags without options specifically set will automatically be included. However, if you select Include for any of the tags (even just one) and do not select Exclude for any tags, all of the other tags that do not have the Include option set explicitly will automatically be excluded. If you have not explicitly set an option for a condition tag, make sure you look at the gray text in the Action cell to know what will happen for that tag in the output.

-
- Click
") to save your work.
to save your work.


If the animation below is cut off, you can see the complete animation by clicking the link under it to open the full topic.
Note When you generate the target, Flare uses the expression from the section that is selected—Basic or Advanced.
Note Condition tags are not supported if you are generating a target using the DITA output type, in the sense that you cannot include or exclude condition tags for that DITA output. Therefore, when you open a DITA target, the options in the Conditional Text tab are disabled. However, DITA-specific condition tag attributes are preserved in Flare when you import from DITA; the DITA attributes are converted to condition tag sets in Flare. In fact, you can create custom condition tag sets in Flare that can be useful when you generate DITA output from Flare. You simply need to make sure that the condition tag sets follow the established DITA naming conventions for those attributes: condition tag sets can be named "audience," "product," "platform," "props," and "otherprops." When you generate the output, the condition tag sets are converted to the appropriate DITA attributes.


