

Note This feature is supported in HTML5 skinless output, but not in HTML5 Side Navigation, Top Navigation, or Tripane outputs.
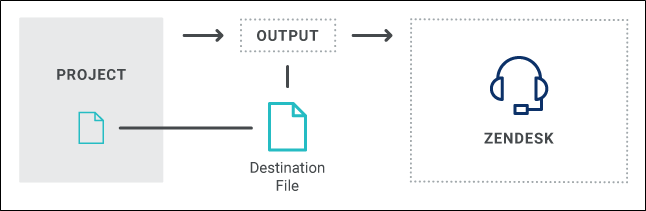
After you have completed the other tasks for publishing to Zendesk (i.e., reviewing best practices, installing MadCap Connect for Zendesk, and configuring the TOC), you can create a destination file.
[Menu Proxy — Headings — Online — Depth3 ]
How to Create a Destination File for Zendesk
- Open the Project Organizer.
- Open an existing destination file or add a new one.
- In the Destination Editor, click in the Type drop-down field, and select MadCap Connect for Zendesk.
-
Activate your Zendesk license.
- Click Activate. A wizard opens.
- Enter the license key, then click Next.
- Enter the name and email of the user associated with the license key. Then click Next.
- Select either Internet Activation or Manual Activation. Then click Next.
- If you choose Internet Activation, a confirmation displays to indicate that your license has been activated. Click Finish.
- If you choose Manual Activation, follow the instructions on-screen to copy and paste the information in an email to customerservice@madcapsoftware.com.
Note A message displays below the Type field indicating the status of your MadCap Connect plug-in for Zendesk license key. You can click the Deactivate button to disconnect your license key for this plug-in.
-
In the Destination Editor, click Login Credentials.
Note If you encounter a blank window when attempting to log in to Zendesk, it might be caused by your company using a proxy server.
If this is the case, you can open the Options dialog (File > Options), select the Proxy Server tab, and complete the fields. You might need to consult your network administrator to obtain the necessary credentials.
After completing the fields on this tab, close and restart Flare for the changes to take effect.
- Enter the Zendesk subdomain. Then click Next.
- Enter your Email and Password. Then click Sign in.
-
Complete the
See the full topic for details.
- URL Displays the name of the domain used for publishing on zendesk.com. This field is populated by the subdomain field that is entered when you login to Zendesk.
- Structural options
-
Use TOC to define Select this to structure your content by Categories and Sections, or just Sections.
If included in your Zendesk subscription plan, you can select Create Sub-sections. With this option enabled it allows for nesting multiple levels (based on the table of contents book levels).
- Default category Select a category that has been created in your Zendesk dashboard to be used for publishing.
- Default section Select a section that has been created under the category you selected to be used for publishing.
- Exclusions List any files to be excluded from the published content. This might include files such as Default.htm that are generated by Flare during the build and publish processes.
-
- Content options
- User visibility Select a group of users on Zendesk who are allowed to view published content. The selections available in this drop-down correspond to those that have been set up on Zendesk.
- Management permissions Select a group of users on Zendesk who are allowed to edit and publish content. The selections available in this drop-down correspond to those that have been set up on Zendesk. Administrators and Team Leaders are always included and cannot be removed.
-
Preserve unsafe HTML Select this to include unsafe HTML attributes and tags in published articles. This setting is required if you want to include multimedia files, or any other files that contain attributes that Zendesk might label as unsafe. For more information on what Zendesk considers safe HTML tags, see the following:
Copyhttps://support.zendesk.com/hc/en-us/articles/115015895948-Allowing-unsafe-HTML-in-articles - Publish articles Select this to publish your articles in Zendesk. If this option is not checked, the articles will be published in draft mode in Zendesk. When this setting is enabled, the following publishing options become available:
- Use keywords for labels Use existing index keywords as labels on your published content.
- Use concepts for labels Use existing concepts as labels on your published content.
Delete stale labels Select this if you want outdated labels to be deleted from Zendesk automatically.
Example If you have enabled the option to Use keywords for labels, and then you delete a keyword in the Flare project, that corresponding label will be removed when you re-publish to Zendesk.
- Default labels Provide keywords to be used as default labels on all published content.
Note The use of concept and index keywords as labels are currently not supported in Clean XHTML targets, only HTML5 targets.
- (Optional) In the View URL field, you can enter an address corresponding to your publish destination. This field is for your own internal purposes, and is simply a quick way for you to open the output associated with the destination by clicking the button to the right.
-
(Optional) Select the upload options when you publish to Zendesk. The Upload Log File option is automatically selected for Zendesk.
-
Upload Only Changed Files Select this option if you want Flare to republish only the files that have changed. This can save significant time.
Note When this option is unchecked for Zendesk, the Flare build log displays both the changed and unchanged files being republished. However, no new time stamp is displayed for the unchanged files in Zendesk Help Center.
- Remove Outdated Published Files Select this option if you want Flare to identify files that were previously published to the destination but are no longer in the source files. Flare removes such files from the destination.
-
- Click
") to save your work.
to save your work.

