Files
Important Pulse is deprecated in Flare, which means that it is slated to be removed in a future version.
AVAILABLE TO: Administrators and Employees
There are two ways to share files in Pulse:
- Files App The Files app works like a file sharing service within Pulse. Administrators and Employees can use the Files app to share files in either their personal user feeds or in a group feeds.
- Files in Status Updates You can upload files when you post a status update. Anyone viewing the status can click on the file to download it.
The following activities are supported in the Files app.
[Menu Proxy — Headings — Online — Depth3 ]
How to Access the Files App
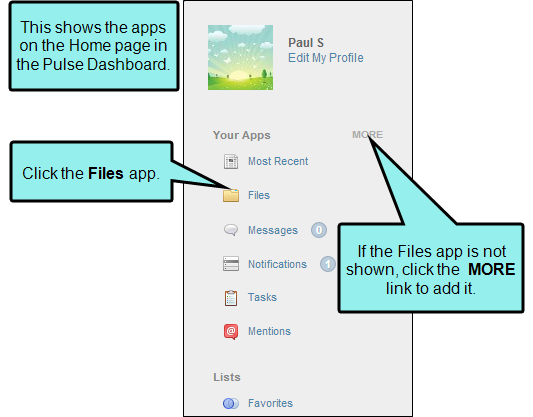
- Log in with an Administrator or Employee account.
- Do one of the following:
Access Your Own User Feed This lets you manage folders and upload files on your own feed. Others can then go to your page to download files.
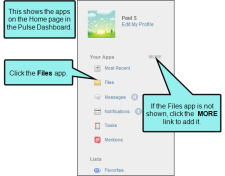
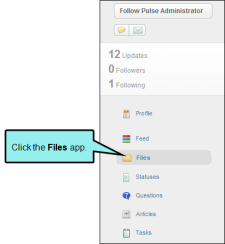
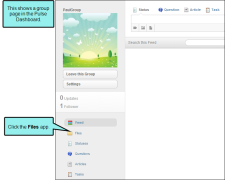
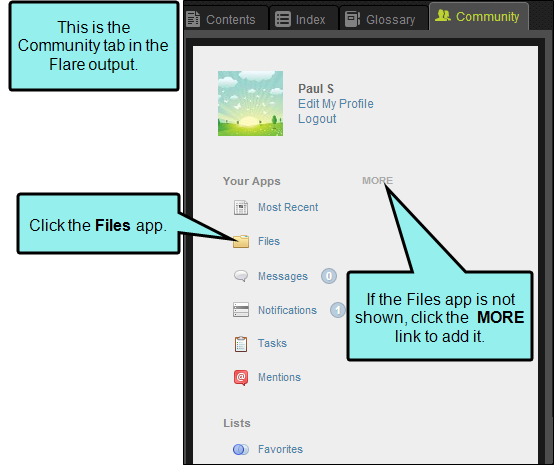
On the Community tab of the Flare output, or on your Home page in the Pulse dashboard, click the Files app. If the Files app is not displayed, you can add it by clicking the MORE link.

Access Another User's Feed This lets you view and download files another user has uploaded.
In the Pulse dashboard, use the People menu to locate and select a particular user's feed
Access a Group Feed This lets you open the page for a group and then upload or download files within it.
In the Pulse Dashboard, use the Groups menu to locate and select a group


How to Create Folders
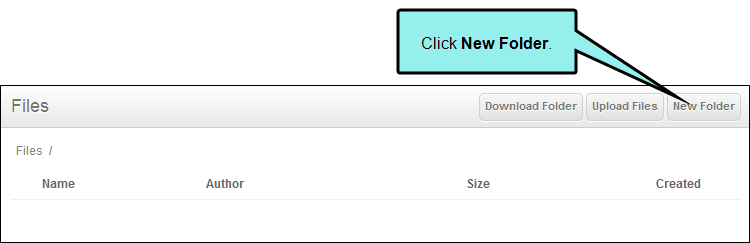
- Access the Files app where you want to create a folder. See How to Access the Files App.
-
In the upper-right corner of the Files page, click New Folder.

- In the dialog that opens, type a name for the folder and click Create Folder.
- After the folder is added, you can click it and add other folders or files in it.
How to Upload Files
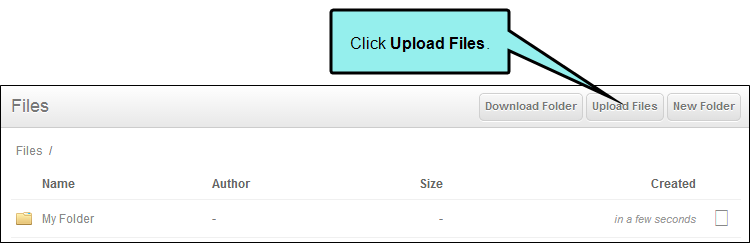
- Access the Files app where you want to upload files. See How to Access the Files App.
- If you want to place the file in a subfolder, click that folder to open it.
-
In the upper-right corner of the Files page, click Upload Files.

- In the dialog that opens, click Choose Files.
- In the dialog that opens, find and select the file(s) that you want to upload, and click Open.
- Click Upload Files.
How to Download a Folder and All of Its Files
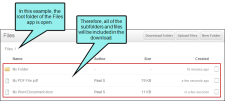
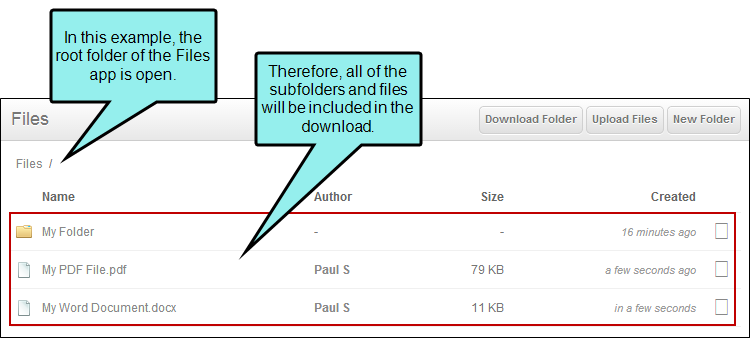
- Access the Files app where you want to download a folder and its files. See How to Access the Files App.
-
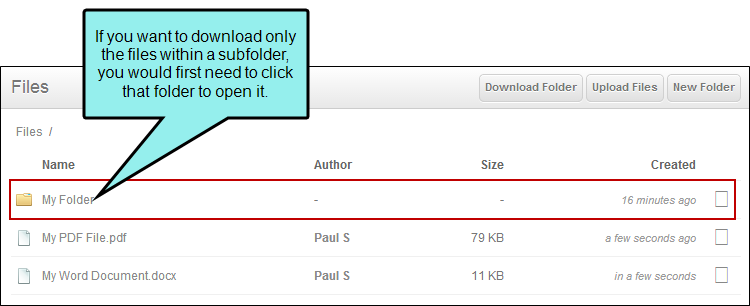
If you stay at the root folder of the Files app all of the subfolders and files will be included in the download. If necessary, you can open a subfolder to download all files within it.

-
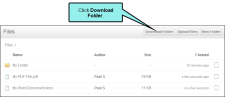
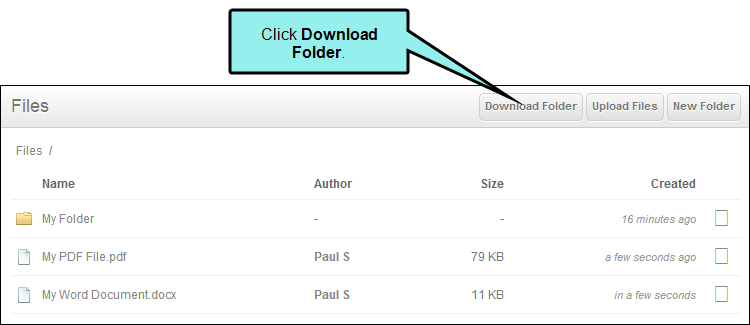
In the upper-right corner of the Files page, click Download Folder.
All of the subfolders and files are compressed into a ZIP file and downloaded.
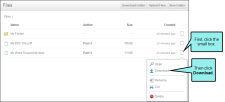
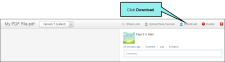
How to Download an Individual File
- Access the Files app where you want to download a file. See How to Access the Files App.
- If necessary, open a subfolder to see the files within it.
- Do one of the following:
Click the small box at the right end of the file row, and from the context menu click Download.
OR
Click the name of the file. A new page opens, just for that file. In the upper-right corner of the page, click Download.


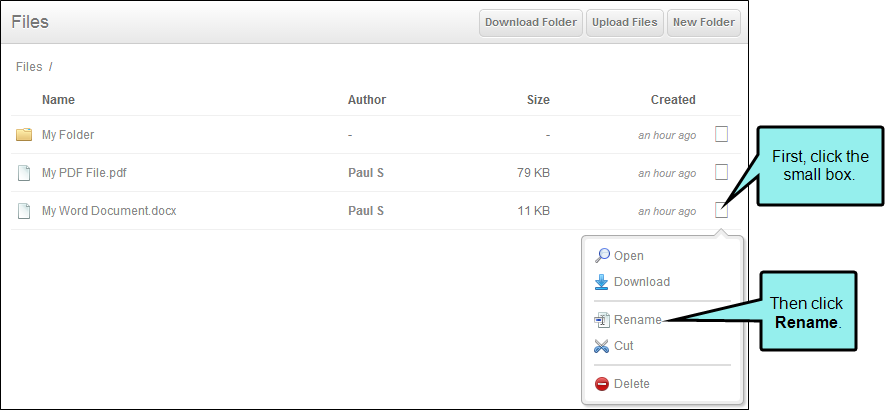
How to Rename a Folder or File
- Access the Files app where you want to rename a folder or file. See How to Access the Files App.
- If necessary, open a subfolder to see the files within it.
-
Click the small box at the right end of the folder or file row, and from the context menu click Rename.

- In the dialog that opens, edit the name of the folder or file, and click Save.
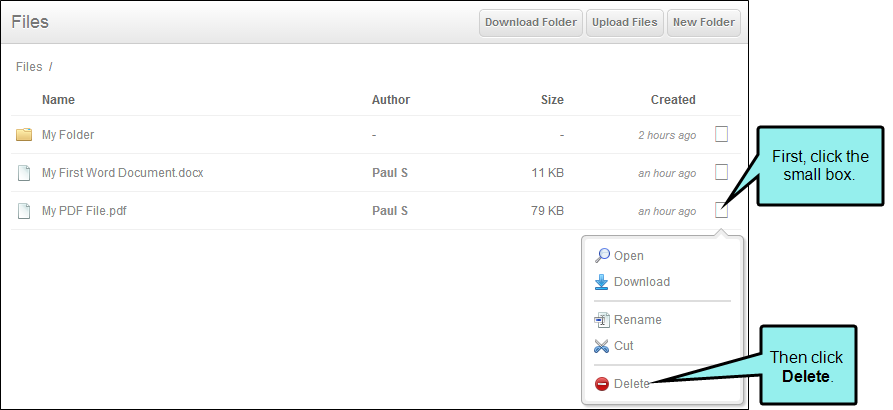
How to Delete a Folder or File
- Access the Files app where you want to delete a folder or file. See How to Access the Files App.
- If necessary, open a subfolder to see the files within it.
-
Click the small box at the right end of the folder or file row, and from the context menu click Delete.
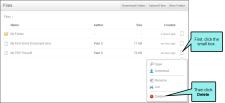
- In the dialog that opens, click Delete Folder and Contents (if deleting a folder) or Delete Activity (if deleting an individual file).
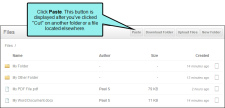
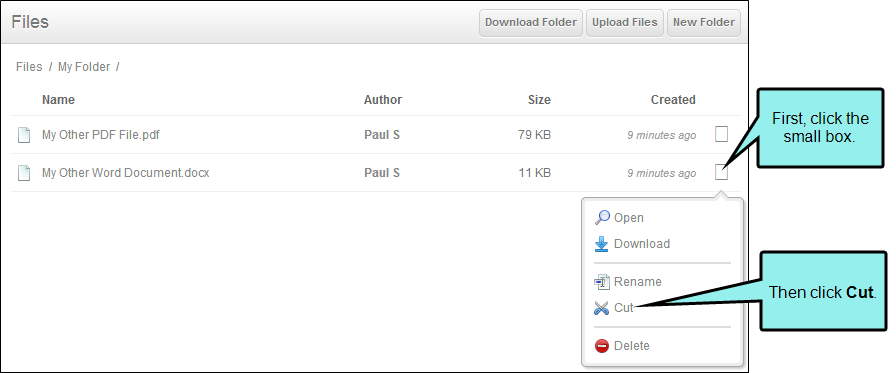
How to Move a Folder and File
These steps let you cut and paste a folder or file from one folder to another.
- Access the Files app where you want to move a folder or file. See How to Access the Files App.
- If necessary, open a subfolder to see the files within it.
-
Click the small box at the right end of the folder or file row, and from the context menu click Cut.

-
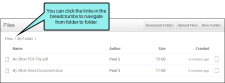
Navigate to the folder where you want to move the other folder or file. You can use the breadcrumb links in the upper-left corner of the page to navigate.
-
After you navigate to another folder, at the top of the page click the Paste button.


How to Set Security Access for a Folder
- Access the Files app where you want to set security access for a folder that you've created. See How to Access the Files App.
-
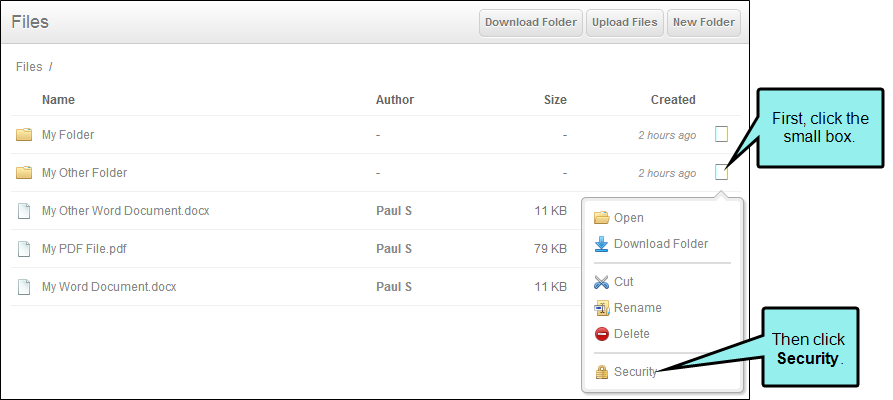
Click the small box at the right end of the folder row, and from the context menu click Security.

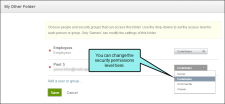
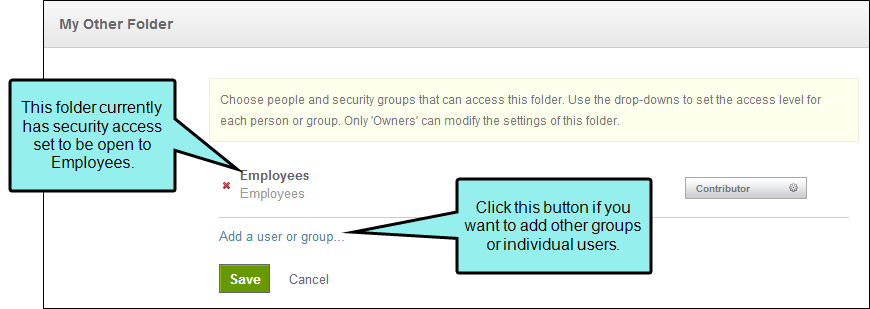
The page that opens displays which users or groups have access to the folder.
-
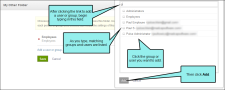
You can click Add a user or group to add others to the security access.

-
You can also click the drop-down to the right to adjust the security permissions level of each user or group.
Following are the different security permission levels. These can also be configured on a system.
Role
Description
Owner
Provides full access to the system and its feeds. They can comment, post, add and remove content, adjust system settings, and add feeds.
Moderator
Provides users in the group with the ability to moderate (approve or reject) new posts in the community.
Contributor
Provides users and group members with the ability to post content to the system and its feeds.
Commenter
Provides users and groups members with the ability to comment on system post and its feeds. This setting does not allow individuals to post content themselves.
Viewer
Provides users and group members with read-only access to the system and its feeds.


How to Share a Link to a File
These steps let you create a link to a file you've uploaded. You can then copy and send that link to someone. This allows the file to be opened by anyone who has access to your server, whether they are registered in your Pulse community or not.
- Access the Files app where you want to share a file link. See How to Access the Files App.
- If necessary, open a subfolder to see the files within it.
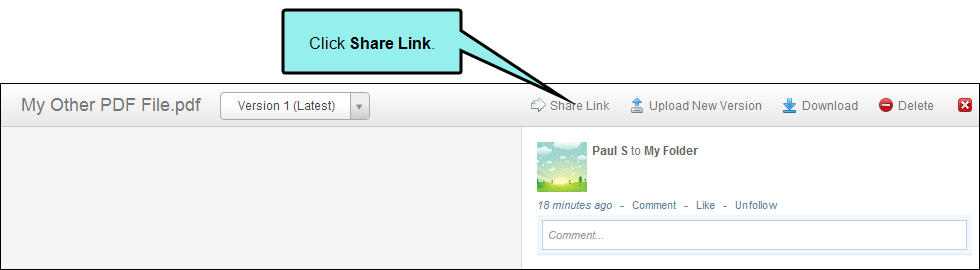
- Click the name of the file. A new page opens, just for that file.
-
At the top of the page, click Share Link.

- In the dialog that opens, click Get Link. A URL is generated.
-
Copy the link that is generated and send it to an individual. When you are finished with the dialog, either click the small red x in the upper-right corner or click Share Link again.
Warning Do not click "Delete Link"; that button will erase the generated link, and once you do that, the other person will not be able to access the file.
How to Upload a New Version of a File
You can use the following steps if you've already uploaded a file but want to replace it with a newer version.
- Access the Files app where you want to upload a newer version of a file. See How to Access the Files App.
- If necessary, open a subfolder to see the files within it.
- Click the name of the file. A new page opens, just for that file.
-
At the top of the page, click Upload New Version.

- In the dialog that opens, select the new version of the file and click Open.

How to View the Activity Log for a File
You can use the following steps to see the activity for a file that has been uploaded.
- Access the Files app where you want to upload a newer version of a file. See How to Access the Files App.
- If necessary, open a subfolder to see the files within it.
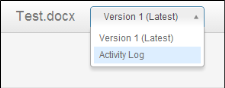
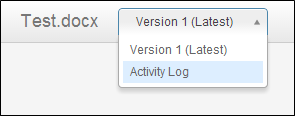
- Click the name of the file. A new page opens, just for that file.
-
At the top-left of the page, click the drop-down and select Activity Log.
What’s Noteworthy?
Note On the General Settings page of the Pulse dashboard, Administrators can control whether file sharing is available for users only or for groups as well. At the bottom of this page is a Files drop-down that lets you make a selection.