All of your file preparation is going to pay off in the import process. This
[Menu Proxy — Headings — Online — Depth3 ]
Pay Attention and Be Patient
If you rush into opening the Import FrameMaker Wizard, specify a FrameMaker file, and click Finish, you're likely to hate the results.
The import process requires that you make decisions about what you want, based on what you have. Because the structure of the information in FrameMaker files can vary wildly, pay attention to the decisions you're being asked to make and take the time to make them.
Try It Several Ways
Because Flare offers you a lot of options on import, you may be uncertain what you need to select and why. At the end of the import process, we show you a preview of what your files look like. Take the time to scroll through the results and look at what happened.
If what you see is not what you wanted, click Cancel and try other options. Rinse and repeat until what you see in the preview looks like what you want. We provide the preview so you can make an informed decision about your content before you bring it into Flare. Use that option and don't be afraid to cancel many times if needed to get what you want.
Slice Your Information Into Reasonable Chunks
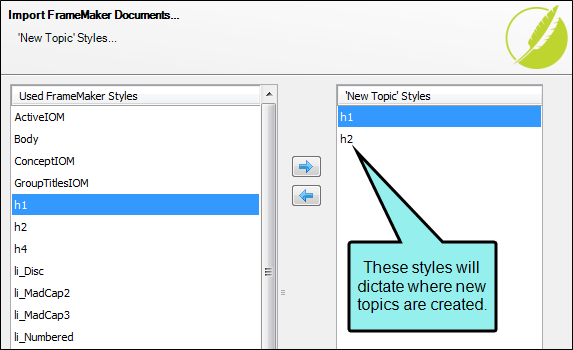
The New Topics Styles page in the Import FrameMaker Wizard is one of the most important places to stop and think when you are importing FrameMaker files into Flare.
What you're doing is telling Flare that you want your FrameMaker files chopped into topics, based on the paragraph formats you move to the right side of the screen. This is where the logically structured documents that you prepared will pay off.
Example In the example below, Flare will make topics out of sections that start with BookTitle, ChapterTitle, Heading1, and Heading2. No other formats will be used to create topics.
At the end of the import process, carefully review the topics to see if the formats you selected are the information chunks you want. If they are too large or too small, cancel and select other formats to see if you like those better.
Use Special Settings When Importing Graphics
Technical manuals typically use many graphics. It’s important these come through the conversion process as clean as possible, and you can use special settings on the Options page of the Import FrameMaker Wizard to help things along.
When you import, you have a few options for graphics. What you select depends on what you want to do and how your FrameMaker files are set up. The result also depends on settings in the Adobe Distiller. See Before You Import.
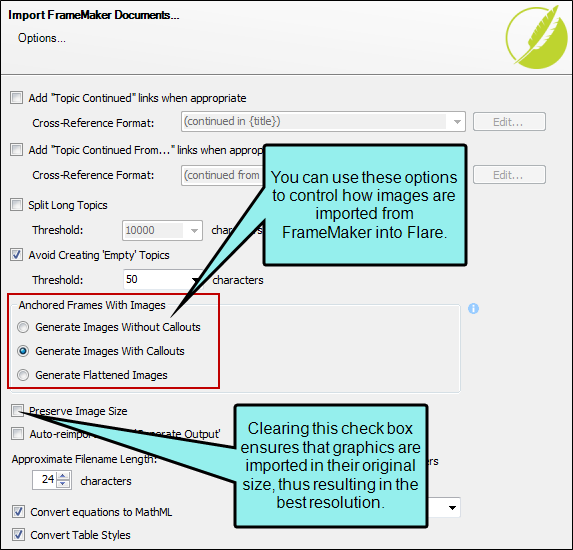
- If your document contains graphics with callouts, you can select one of three options to determine how the images are imported.
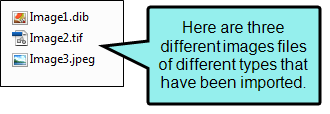
- Generate Images Without Callouts If the anchored frame contains an image along with callout text, the original image is imported without the callout text. You might select this option if you have resized the image in FrameMaker. With this option, the imported image is likely to be of a higher quality than it would be otherwise. You can then add a callout to the image once it is inside Flare.
-
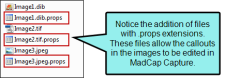
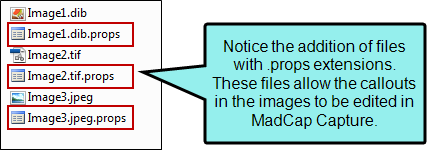
Generate Images With Callouts If the anchored frame contains an image along with callout text, Flare creates a PROPS (i.e., properties) file along with the image file when that document is imported. This means that you can open those image files in MadCap Capture to edit those callouts after the import process is completed.
Example If you import anchored frame images and tell Flare not to include the callouts, your imported image files will look something like this in Windows Explorer.

On the other hand, if you import the same images and tell Flare to include the callouts, it will look something like this in Windows Explorer.
Note Some FrameMaker elements—such as arcs and nested frames—are not supported with this option.
- Generate Flattened Images If the anchored frame contains an image along with callout text, a new flattened image will be created as a result. The callout is included, but you cannot edit it.
- To get the best resolution in the graphics after the import, clear the Preserve Image Size check box. If you select this option, the original image is imported. However, the <img> tag is modified in the imported file to closely reflect the height and width of the image in the FrameMaker document. If you do not select this option, the <img> tag is not modified in the imported file. Instead, the image is referenced at 100% of its original value. You might then need to manually resize the image in Flare. But this will give you the cleanest looking graphic because it wasn’t reduced in size in the import process. For more information about resizing your graphics in Flare, see Resizing Images.
Like so many options when you import, review the graphics in the Preview before you commit to the import. Make sure the graphics look the way you want. If not, click Cancel and change the options. Also understand that some cleanup may be required, so factor that into your time estimates.
Preserve FrameMaker Styles
If you have a robustly styled FrameMaker file that you like, and this is your first FrameMaker import, you probably want to preserve FrameMaker styles on import.
This serves two functions: (1) It makes your Flare documents look very similar to your FrameMaker documents, and (2) it creates a template that you can easily reuse in future projects. While it may be some work up front, it results in less work down the line—always a good practice.
Note If you select this import option, you will get a lot of "child" formats in your eventual stylesheet. The names look like h1.Heading1 or h2.Heading2, where the part after the period comes from the style names in your FrameMaker files. These formats inherit some or all of their formatting from the parent (h1, h2, and so on) style.
Define Your Styles If You are Not Using an Existing Stylesheet
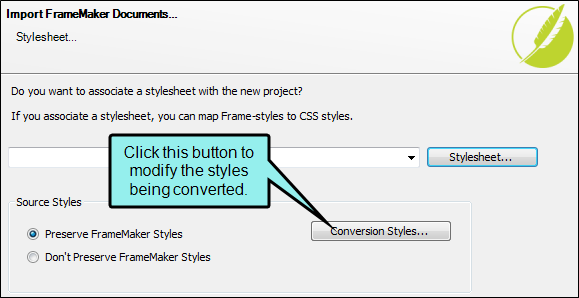
If you opted to preserve FrameMaker styles, you can edit the styles to look as you want them before you finish the import. Click the Conversion Styles button if you want to change the formats.
You do not have to make the changes to the formats here—you can always do it after you import using the Stylesheet Editor, but it will seem easier to do it now. Your content will come through looking more like you expect.
Map and Create Cross-Reference Formats
Most technical material includes a lot of cross-references. This is a great practice because it helps the reader know where related information is in the manual. Flare has a fairly robust cross-reference feature set.
You have two ways of managing cross-references: standard mapping and preservation styles conversion.
Using the Standard Mapping During Import
This is in the Import FrameMaker Wizard, on the Cross-References page. This setting overrides any other settings you may use. The downside to using this area is that you have little control over the exact cross-reference structure. It’s best if your cross-references are heading and page style references. You can always change them later.

Using the Frame Styles Conversion Settings
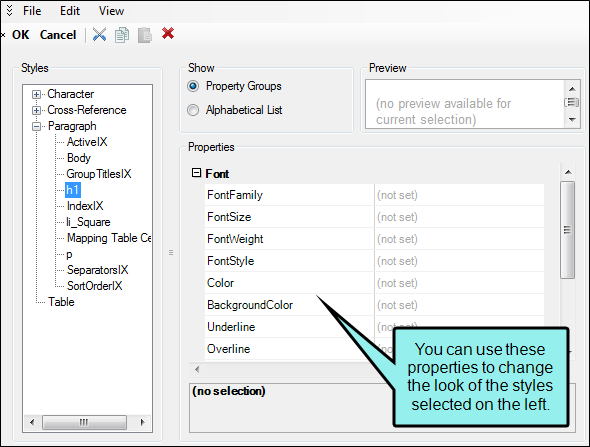
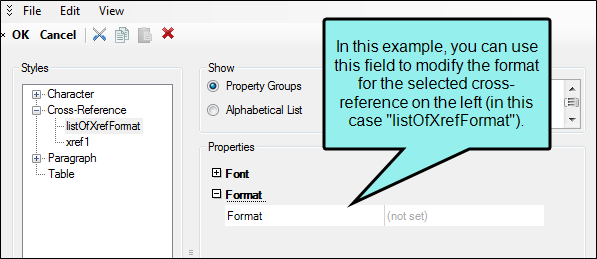
On the Stylesheet page of the Import FrameMaker Wizard, you can click the Conversion Styles button if you are preserving FrameMaker styles. This opens the Import Styles Editor, which you can use to change the cross-reference formats in your FrameMaker files, mapping them to exactly what you want in Flare. This is a better method if you have a lot of unique cross-reference formats, such as Step # or other references.
When you expand the Cross-Reference node, you see the cross-reference formats in your FrameMaker document(s). You can specify how these look when they come through the conversion.
Conversion Table
The following table will help you understand how and what you are converting.
|
Command |
Description |
Similar to FrameMaker’s Format |
|---|---|---|
|
{b} |
Start bold text |
Managed in Character formats |
|
{/b} |
End bold text |
Managed in Character formats |
|
{bg} |
Start new background color |
None |
|
{/bg} |
End background color |
None |
|
{color} |
Start new text color |
Managed in Character formats |
|
{/color} |
End text color |
Managed in Character formats |
|
{default} |
Reset all font changes |
[default] |
|
{ext} |
File extension |
None |
|
{family} |
Start new font family |
None |
|
{/family} |
End font family |
None |
|
{file} |
File name, including extension |
[fullfilename] |
|
{filename} |
File name, without extension |
[filename] |
|
{h1} |
Text of first heading 1 paragraph in topic |
None, although the running header/footer system variable comes close |
|
{h2} |
Text of first heading 2 paragraph in topic |
None, although the running header/footer system variable comes close |
|
{h3} |
Text of first heading 3 paragraph in topic |
None, although the running header/footer system variable comes close |
|
{h4} |
Text of first heading 4 paragraph in topic |
None, although the running header/footer system variable comes close |
|
{h5} |
Text of first heading 5 paragraph in topic |
None, although the running header/footer system variable comes close |
|
{h6} |
Text of first heading 6 paragraph in topic |
None, although the running header/footer system variable comes close |
|
{i} |
Start italic text |
Managed in Character formats |
|
{/i} |
End italic text |
Managed in Character formats |
|
{page} |
Page number |
[pagenumonly] |
|
{pagecount} |
Page count |
|
|
{pageref} |
Context-sensitive page reference automatically adjusts from a page number to "above," "below," "next," or "previous." |
None |
|
{paranum} |
The autonumber text of bookmarked paragraph The bookmark is automatically added to the heading when you insert the cross-reference. |
[paranum] |
|
{paranumonly} |
The autonumber only of bookmarked paragraph The bookmark is automatically added to the heading when you insert the cross-reference. |
[paranumonly] |
|
{paratext} |
Text of bookmarked paragraph The bookmark is automatically added to the heading when you insert the cross-reference. |
[paratext] |
|
{paraxml} |
Text and markup of bookmarked paragraph The bookmark is automatically added to the heading when you insert the cross-reference. |
None |
|
{path} |
File path |
None |
|
{size} |
Start new font size |
Managed in Character formats |
|
{/size} |
End font size |
Managed in Character formats |
|
{sub} |
Start subscript text |
Managed in Character formats |
|
{/sub} |
End subscript text |
Managed in Character formats |
|
{sup} |
Start superscript text |
Managed in Character formats |
|
{/sup} |
End superscript text |
Managed in Character formats |
|
{title} |
Title of document |
None |
|
{u} |
Start underlined text |
Managed in Character formats |
|
{/u} |
End underlined text |
Managed in Character formats |
|
{url} |
File path, URL syntax |
None, but HTML marker is close |
Remember, when you import cross-references, they show the page number from FrameMaker. Until you put the topics together into a TOC and create a target in Flare, the topics know nothing about pages and page numbering, except within a single topic.
Map All Your FrameMaker Styles to Those in Your Stylesheet
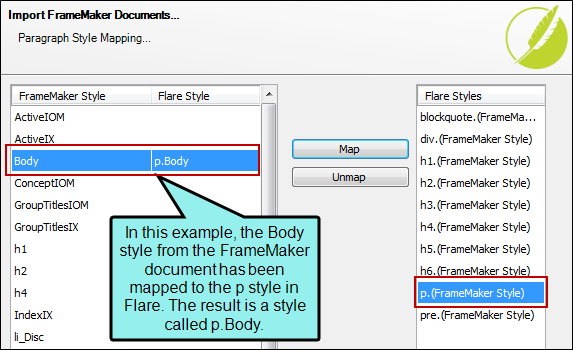
When you reach the import pages for mapping your existing FrameMaker styles to Flare styles, make sure you map all of them. You can map paragraph styles, character styles, and cross-reference styles.
Unmapped paragraph styles come through as p.whateverthestylenamewas, unmapped character styles come through as span.whateverthestylenamewas, and unmapped cross-reference styles come through as MadCap|xref.whateverthenamewas. This may result in lots of formats you did not actually want in the stylesheet and can take a lot to clean up. It is better to control the mapping up front and reduce the cleanup afterwards.
Example You might have a paragraph style called "ChapterTitle." When you import this style, you might want it to be mapped to an h1 style in Flare. Therefore, if you map it to h1, the result will be a style called h1.ChapterTitle. If you do not map it, the result will be a style called p.ChapterTitle.