After you create a glossary, you may need to edit the terms or the definitions. The steps below explain how to do this, as well as how to change the way terms are converted in online output.
If you want to modify the look of glossaries for print-based output, see Editing the Look of a Glossary. If you want to change the look of glossaries in online output, you can do so by modifying styles within your skin. See Editing Skin Settings, Standard Skin Styles, and HTML5 Skin Styles.
How to Edit Glossary Terms and Definitions
- Open the glossary that you want to edit.
- In the Glossary Editor, double-click the glossary entry that you want to edit. The Properties dialog for the glossary term opens.
-
In the Terms section, you can replace the text for the term. If you want to insert a variable in a field, you can click
 . The variable will appear as syntax in the field, but in the output the variable definition will be shown.
Note If you want to see the variable syntax replaced by the variable definition, click
 in the local toolbar of the editor. This shows you the "Evaluated
 -
(Optional) If you want add or change a "Sort As" term for a glossary entry, in the Sort As field, enter the term you want to use for sorting. "Sort As" terms appear in the Sort As column of the glossary. See Sorting Glossaries.
Tip Use a "Sort As" term if you want to sort a glossary term as something else. This can be useful when a term begins with a symbol (e.g., place <html> in the "h" section, instead of at the top of the glossary), or if you are using character sets that need to be sorted phonetically.
- (Optional) If you want the glossary term to include variants (e.g., plurals, other tenses), select Stem words to include term variants in automatic link creation. This is useful because you do not have to create multiple glossary terms if you frequently use different forms of a term.
- (Optional) If you want the glossary term to include both upper- and lowercase variants, select Ignore case in automatic link creation. This is automatically checked if you stem the glossary term.
- In the Definition section, select either Text (if you want to provide a simple text definition for the term) or Topic (if you have created a topic for the definition and want the term to link to it).
-
If you selected "Text," replace the text or type a new definition in the space next to that option. If you want to insert a variable in a field, you can click
. The variable will appear as syntax in the field, but in the output the variable definition will be shown. If you selected "Topic," click  , then find and select a topic.
 -
(Optional) If you want to update glossary term links, click Update matching glossary term links and save glossary. This will find glossary term links in your content files where the text exactly matches what is in the old version of the glossary (before you made changes). It will update those glossary term links with your changes from the new version of the glossary and save that glossary file. If you do not select this option, the glossary term links will not be updated in the content files.
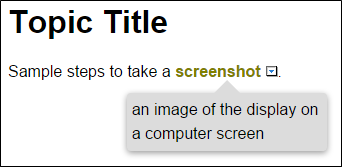
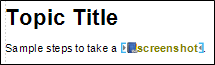
Example You have a glossary term link for the term "screenshot." In a topic it might look like this:
The link points to the "screenshot" term in your glossary file.

Suppose you want to change the term from "screenshot" to "snapshot."
Option Enabled
In your glossary, you double-click the screenshot term. The Properties dialog opens. You change the term to snapshot. And at the bottom of the dialog, you make sure that Update matching glossary term links and save glossary has a check mark.

A message lets you know that the files with related glossary term links have been updated.
Your glossary now looks like this:

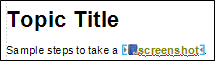
And a topic containing the glossary term link looks like this:
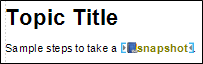
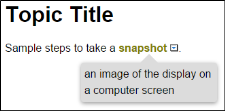
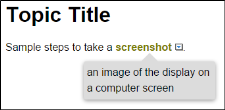
In the output it might look like this:
Option Disabled
Using this same scenario, you might disable the option if you are fine with existing topics keeping the term "screenshot," while changing the term in the glossary to "snapshot."
So after you change the term from "screenshot" to "snapshot" in your glossary, you disable the Update matching glossary term links and save glossary check box.

Your glossary looks like this:
But a topic containing the glossary term link looks like this (with "screenshot" instead of "snapshot"):
And the output looks like this:
Warning Use caution with this option, because if you alternate checking it and unchecking it, you can get into a state where the glossary term link text in the content files does not match the old glossary text in the glossary file, so it will not be updated anymore.
- (Optional) If you plan to use glossary term links (see Inserting Glossary Term Links), click the Style tab. Then select one of the following styles:
- Expanding This displays the definition in expanding text when the link is clicked.
- Popup This displays the definition (or linked topic) in a popup when the user hovers the cursor over the link.
- Hyperlink This opens the linked topic (as specified in Step 8) in its own window, as opposed to a popup. If the definition is provided as simple text rather than a linked topic, this option opens that glossary term link as a popup.
Note By default, glossary terms will not be converted to links if they are found in h1 through h6 styles, as well as hyperlinks (i.e., content with the <a> tag). However, if the same term is found in, say, a regular paragraph, the term will be converted to a link. If you want to avoid certain terms being converted to links automatically (or if you want to reverse this setting for h1-h6 and hyperlink styles), you can use an option to ignore glossary terms.
- (Optional) If you want to apply conditions to the term, select the Conditional Text tab and choose the relevant conditions.
- Click OK.
-
You can remove duplicate terms by selecting one of the rows in the editor and clicking
 in the local toolbar.
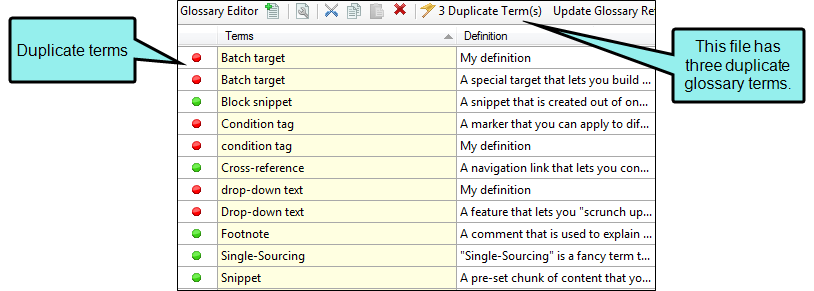
Duplicate terms in a glossary file are identified by red icons. Green icons represent glossary terms that are unique. Also, the number of duplicates in the glossary file is shown in the local toolbar.
This feature is not case-sensitive. For example, if you have "Condition tag" and "condition tag" as terms, they are considered duplicates.

- Click
") to save your work.
to save your work.