Replacing content nodes with text is referred to as "flattening." You can flatten snippets and variables in Flare projects, and content references (conrefs) in DITA projects.
If the content is flattened, you can edit the translation to make it more appropriate for the segment where it appears.
Similarly, you may have multiple versions of content based on the document you are writing. This is often the case if you have content that needs to be translated differently for different audiences.
You can flatten content when creating a new project, or you can update an existing project's flattening settings in the Project Properties dialog. The settings are the same in both locations. Settings are updated dynamically, so you do not need to update the project to apply the settings.
[Menu Proxy — Headings — Online — Depth3 ]
How to Flatten DITA Content References
You can flatten
Flattened
- Do one of the following, depending on the type of project you are using:
- New Project Select File > New Project. The Start New Project Wizard opens. Proceed through the wizard until you get to the Select DITA project settings page (the location of this page in the wizard varies slightly depending on your project creation method).
- Existing Project Select File > Project Properties. The Project Properties dialog opens. Select the DITA Settings tab.
- New Project Select File > New Project. The Start New Project Wizard opens. Proceed through the wizard until you get to the Select DITA project settings page (the location of this page in the wizard varies slightly depending on your project creation method).
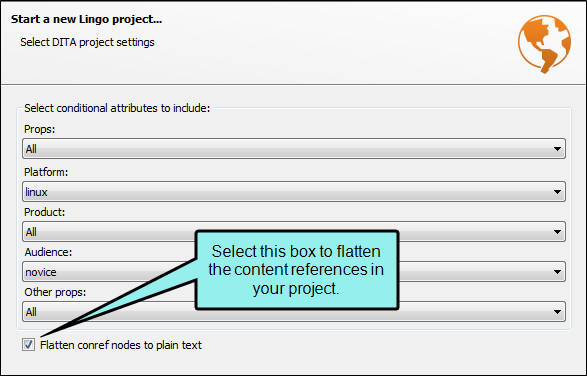
- At the bottom of the dialog, select the check box next to Flatten conref nodes to plain text. This will flatten all conrefs.
-
In the Project Properties dialog, click OK.
OR
In the Start New Project Wizard, click Next or Finish.
Example
You use content references throughout your DITA project. You know that your existing translation memory (TM) already includes some of the segments in your project, but the segments in your TM do not use content references; instead, the text is written as part of the segment. Because of this, you decide to flatten the content references in your entire project. This way, when you send the project to your translator, she will get the most accurate matches from your existing TM. This will also let her account for context in the segment when translating the content references.
Note As a best practice, you should always translate conrefs in the associated DITA file, even if you have flattened them and translated them in the segment. Lingo will use the translation from these files for instances of the conref that are not included in the segment (e.g., conrefs that are removed from the Translation Editor).
Note You can only flatten inline
How to Flatten Snippets
You can flatten
Flattened
-
Do one of the following, depending on the type of project you are using:
- New Project Select File > New Project. The Start New Project Wizard opens. Proceed through the wizard until you get to the Select Flare project settings page (the location of this page in the wizard varies slightly depending on your project creation method).
- Existing Project Select File > Project Properties. The Project Properties dialog opens. Select the Flare Settings tab.
- New Project Select File > New Project. The Start New Project Wizard opens. Proceed through the wizard until you get to the Select Flare project settings page (the location of this page in the wizard varies slightly depending on your project creation method).
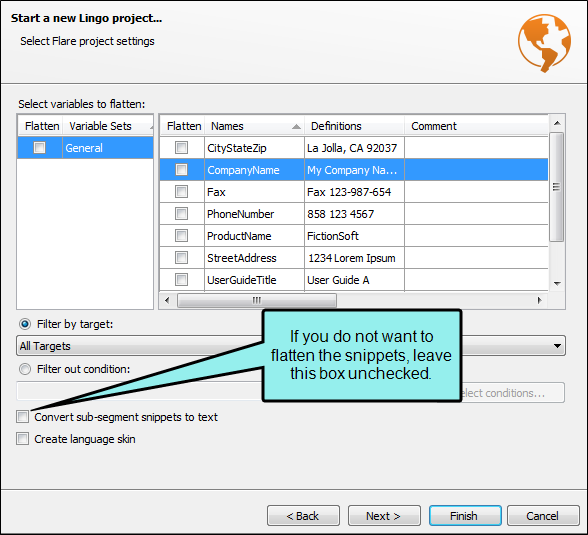
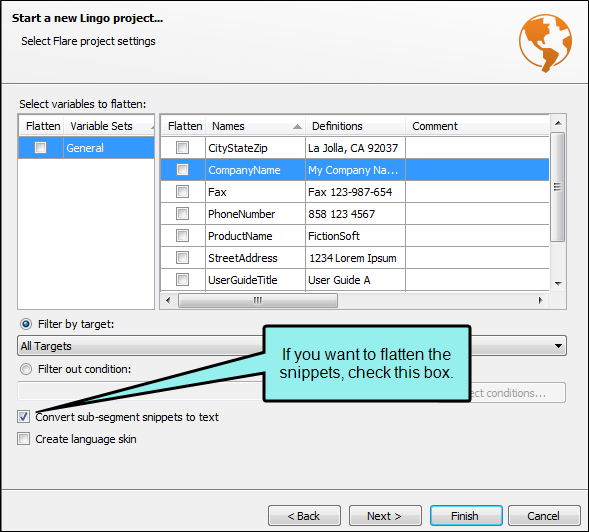
- At the bottom of the dialog, select the check box next to Convert sub-segment snippets to text. This will flatten all inline snippets.
-
In the Project Properties dialog, click OK.
OR
In the Start New Project Wizard, click Next or Finish.
Example
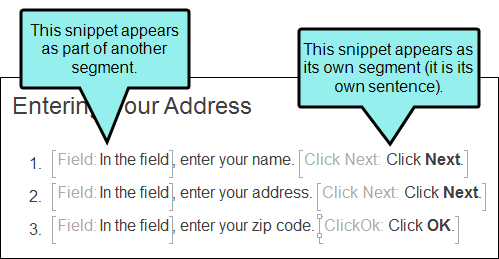
There are several short snippets in your Lingo project. Sometimes they appear as part of a segment. Other snippets appear as their own segments.
If you do not flatten the snippets...
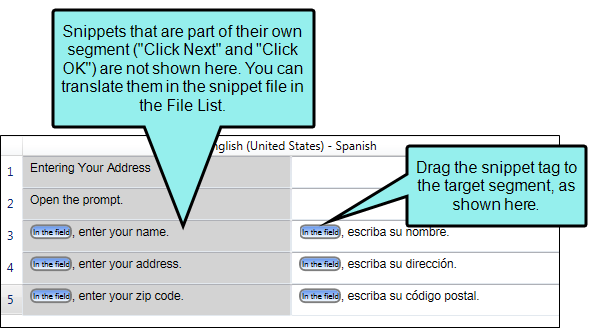
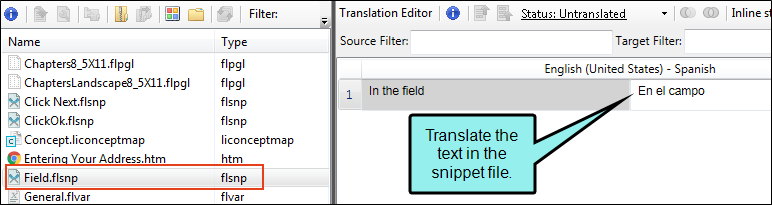
...the content in Lingo looks as follows. Because the snippets are unflattened, you see tags where the snippets appear in the segments. You can drag each tag into the target segment. Snippets that are part of their own segment do not appear as tags in the Translation Editor.
You can translate all of the snippets in the snippet files, which are found in the File List window pane.
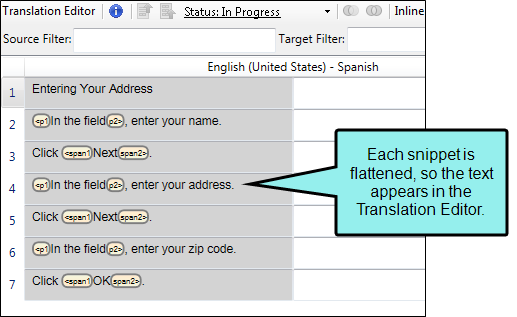
If you do flatten your snippets...
...the content in Lingo looks as follows. Content from each snippet appears in the Translation Editor as text.
Note As a best practice, you should always translate snippet content in the snippet files, even if you have flattened them and translated them in the segment. Lingo will use the translation from these files if it finds instances of the snippet that are not included in the segment (e.g., snippet tags that are removed from the Translation Editor).
Note You can only flatten inline
How to Flatten Variables
Variable flattening works differently from snippet and conref flattening. Unlike snippets and conrefs, you can select the variables you want to flatten. You can flatten variables from a specific variable set, and you can select certain variables in a set. This gives the translator greater flexibility when translating, because some variables (like a company name) may never need to be translated, but others may always need to be translated.
Flattened variables appear as normal text in the Translation Editor, while unflattened variables appear as tags. Translators can move these tags to their correct location in the target segment.
-
Do one of the following, depending on the type of project you are using:
- New Project Select File > New Project. The Start New Project Wizard opens. Proceed through the wizard until you get to the Select Flare project settings page (the location of this page in the wizard varies slightly depending on your project creation method).
- Existing Project Select File > Project Properties. The Project Properties dialog opens. Select the Flare Settings tab.
- New Project Select File > New Project. The Start New Project Wizard opens. Proceed through the wizard until you get to the Select Flare project settings page (the location of this page in the wizard varies slightly depending on your project creation method).
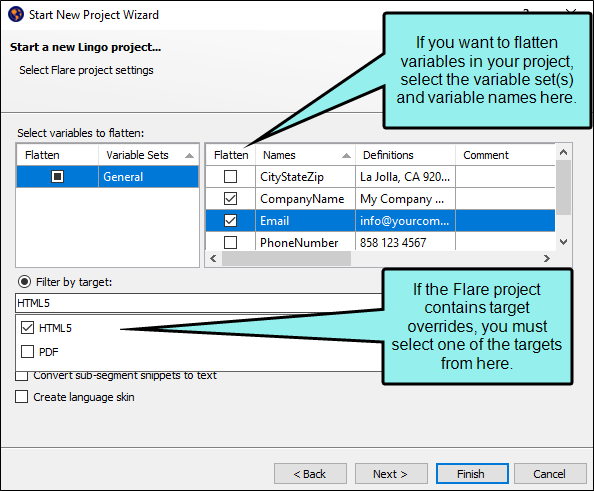
- In the Select variables to flatten area, select the variable set you want to flatten from the left side of the grid. The variables in that variable set appear on the right side of the grid. By default, all of the variables in the set are selected.
-
(Optional) If you only want to flatten some of the variables in a set, on the right side of the grid, remove the check marks next to the variables you do not want to flatten.
Note If you want to flatten variable definitions for a specific target, you can optionally filter by target by selecting a target from the Filter by target drop-down. You can then translate the target-specific variables in the target file in your Lingo project.
- (Optional) Repeat steps
-
In the Project Properties dialog, click OK.
OR
In the Start New Project Wizard, click Next or Finish.
More Information
You might use this feature if a variable definition has different meanings in the translation language, depending on the context (e.g., "cash" versus "currency" in German). If you do not flatten variables, you can only translate the variable with a single term, and it will be used everywhere in the project that the variable is inserted. On the other hand, if you do flatten variables, you will then be able to translate each term separately when it appears in the Translation Editor.
Example
If you do not flatten variables, you will see something like this.

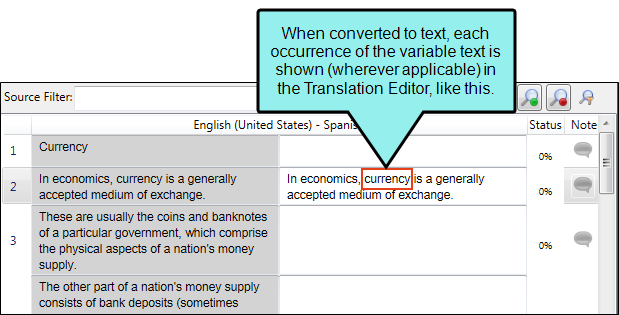
If you do flatten variables, you will see something like this.
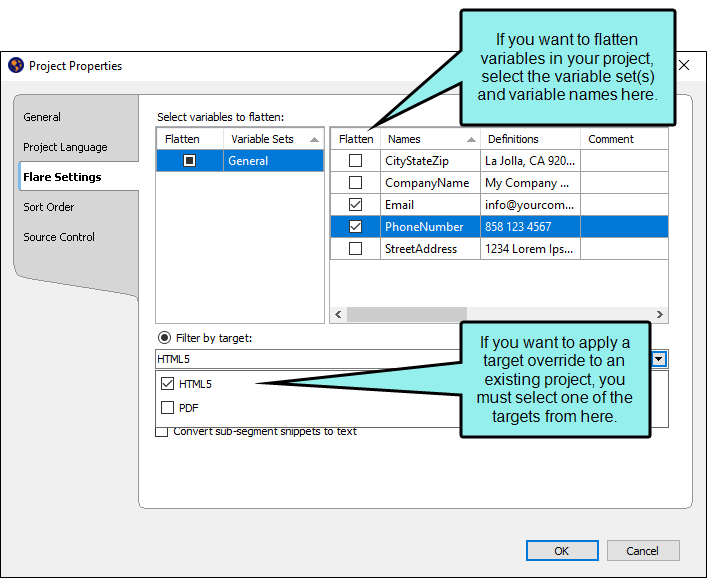
If the Flare author created a target override for a variable (i.e., one Flare target will use a particular variable definition while another target will use a different one), you can create a target filter in addition to flattening variables. This lets you filter the entire Lingo project to the target whose variable definition you want to use when flattening the variables. You can then translate the target-specific definition in the target file in Lingo.
You can flatten variables and apply target overrides to both new and existing projects.
To add them to a new project, apply the settings in the Start New Project Wizard.
To add them to an existing project, select File > Project Properties, then apply the new settings from the Flare Settings tab.
Example
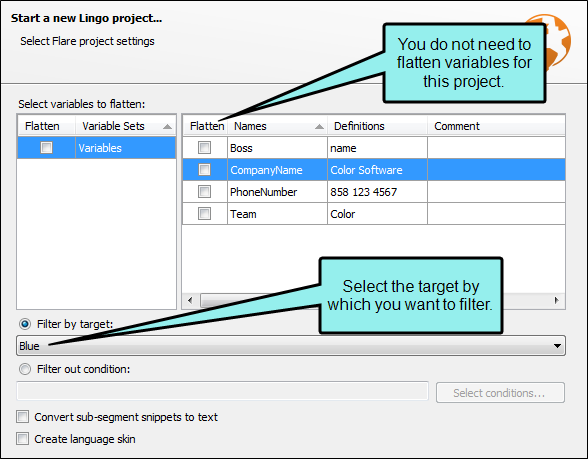
You are a Flare author writing a short manual for a company that has two internal teams: Red and Blue. One of the variables in your project is a target-specific "Team" variable with two definitions: "Red" and "Blue."
You need your manual translated into Spanish. When creating your Lingo project, you filter the Flare project by target so you only see the appropriate topics and variables for each team.
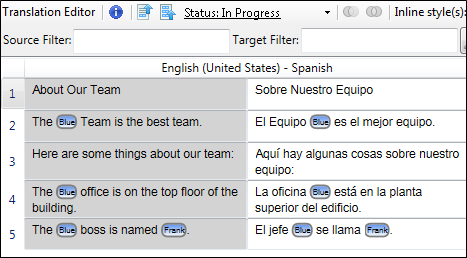
The first document you produce is the one for the Blue team. To do this, you filter by the "Blue" target when creating the Lingo project. You do not flatten the variables for this project.
The variable definition for "Blue" that was specified in your Flare project is included in the Lingo project. When finished, you bundle the project and send it to your translator.
Because you did not flatten the variables in the project, your translator will translate the variable in the target file (because it is target-specific).
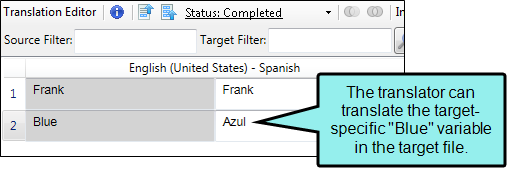
When translating segments, he simply moves the "Blue" tag in the source segment to the target segment. He does not need to translate the variable each time he encounters it in a topic.
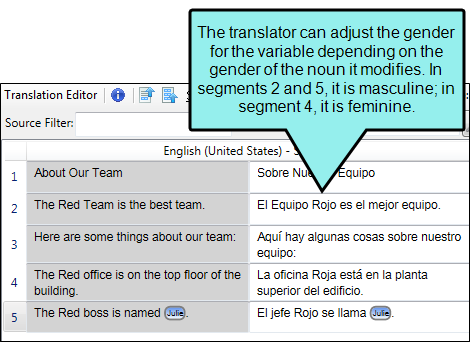
When you create the Lingo project for the Red team, you decide to flatten the "Red" variable. Unlike "Blue," which does not take on a different gender depending on the words it modifies, "Red" might be masculine or feminine. You know that you may need to change the variable slightly to use correct gender agreement.
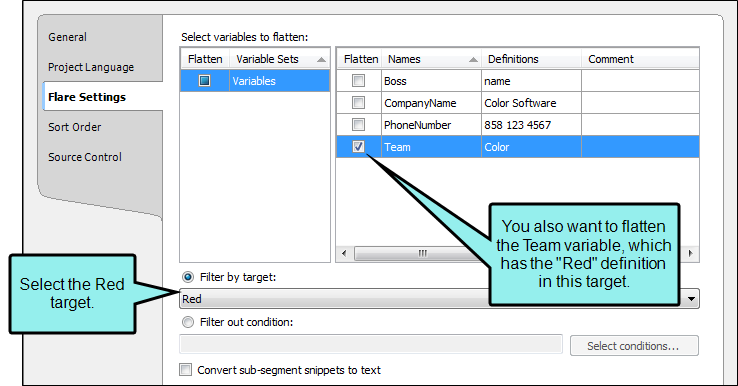
To do this, you update the project's settings on the Flare Settings tab of the Project Properties dialog (File > Project Properties). You choose to filter by the Red target. You also select the "Team" variable (which has the "Red" definition in this target) from the Select variables to flatten area at the top of the tab.
When finished, you bundle the project and send it to your translator.
By flattening the variable, your translator can translate it directly in the segment and make changes based on the context of the sentence.
The variable also appears in the target file, because Lingo will use this translation if the variable is used elsewhere in the project.
What’s Noteworthy?
Note If you filter by target, target-specific variables can be translated in the target file from the File List. Default variable definitions are translated in the variable set file (they are not considered target-specific, even if selected for a target).
All other variables (and variables in projects not filtered by target) can be translated in the variables file.
As a best practice, you should translate variables in the variable set or target file, even if you have flattened them and translated them in the segment. Lingo will use the translation from these files for instances of the variable that are not included in the segment (e.g., variable tags that are removed from the Translation Editor).
Note If you update the flattening settings for an existing project, the translation status of changed segments is set to Untranslated. You also have the option to completely clear any existing translations for these segments.