Editing Cursor Trajectories
If you automatically add cursors to your recorded movies
[Menu Proxy — Headings — Online — Depth3 ]
How to Change a Cursor's Movement
Cursor movement is controlled using position keyframes. Each position keyframe represents the cursor's position on the frame at a specific time. If you automatically added cursors to your movie, position keyframes will be added to the timeline for you.
-
Click on an cursor that contains one or more position keyframes.
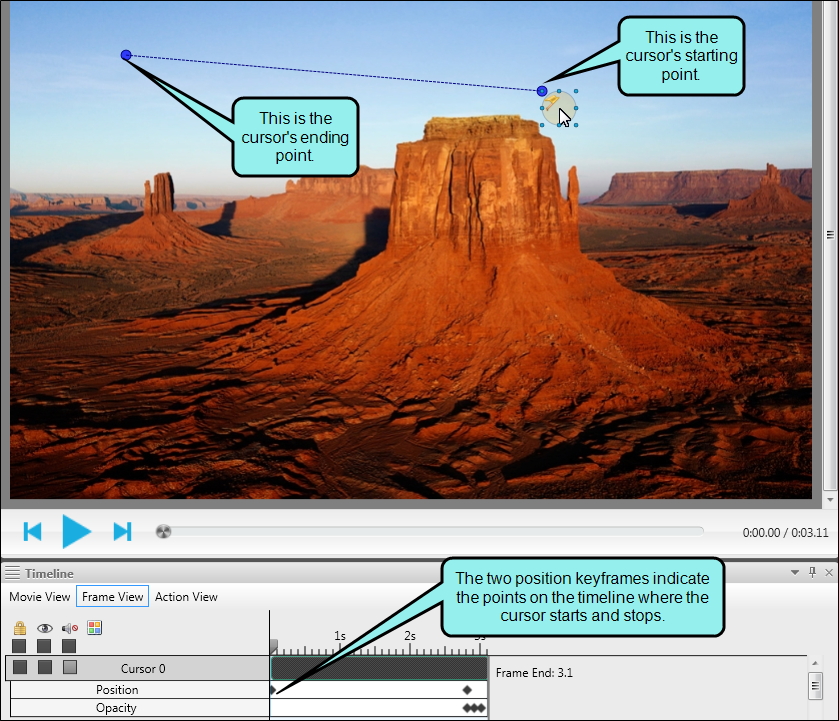
A trajectory (blue dotted path) appears near the object.

- Click on a point (larger blue circle) within the trajectory. The point you selected turns yellow.
-
Drag the point to a new place in the Frame Editor.

You can also add additional position keyframes if you want the cursor to move along a more specific path. See Adding Keyframes.
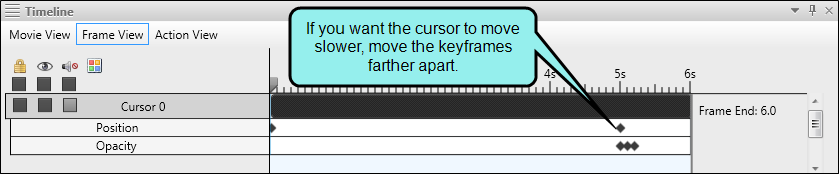
How to Change a Cursor's Timing
Cursor timing in a frame is determined by the space between each position keyframe. To change the speed of the cursor, you need to change the placement of its position keyframes.
-
In the Frame Editor, click on an cursor that contains one or more position keyframes.
-
In the Timeline window pane (View > Timeline), do one of the following:
- If the cursor is a standard object, click Frame View.
- If the cursor is an action object, click Action View.
- Scroll down to the object's position keyframe bar.
- Click on a keyframe (diamond) within the keyframe bar.
-
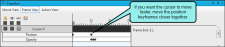
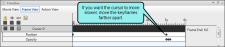
Drag the desired keyframe(s) to a new location in the keyframe bar. To slow down the cursor, move the position keyframes farther apart. To speed up the cursor, move them closer together.

What’s Noteworthy?
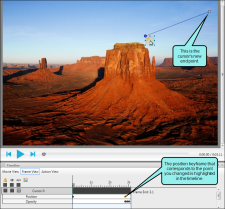
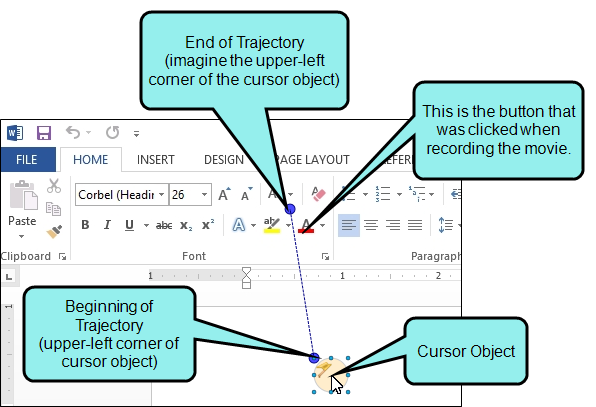
Tip When you click on a cursor in a frame, you will see a blue line with circles representing the beginning and end point of the trajectory. However, this trajectory is based on the upper-left corner of the object, rather than the center of the object.
The default look for a cursor is a translucent circle with an arrow cursor in it. So if you click and drag the blue circle representing the end of the trajectory, keep in mind that where you drop the circle is actually the upper-left of the object when it finishes.
For example, the following cursor was created automatically after a movie was recorded. The cursor moves so that the arrow finishes on the button that has the A and red bar under it.
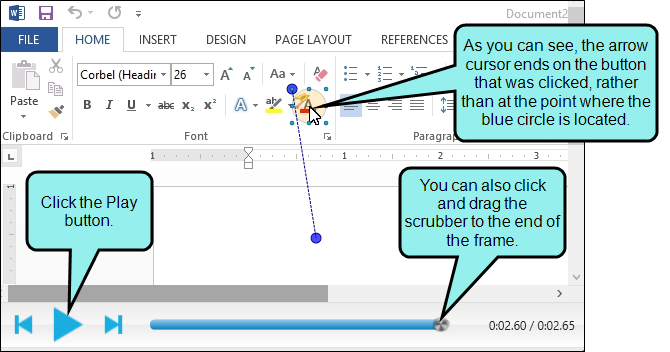
If you click the Play button at the bottom of the frame (or if you click and drag the scrubber), you can see the actual path of the trajectory.
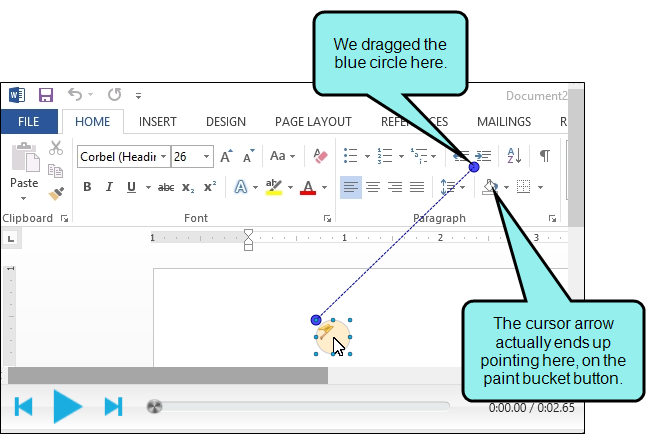
Let's say you decide to adjust the trajectory so that it ends on the paint bucket button. When dragging the blue circle representing the end point, make sure you drop it to the upper-left of the paint bucket button, rather than on the button itself. Then test the results with the Play button or scrubber.
Note You can manually edit the keyframes to change their position, timing, and transition type. See Editing Keyframes.
Note When you automatically add cursors to a recorded movie, Mimic automatically adds opacity keyframes to the timeline, as well. These keyframes change the color of the circle around the cursor. If desired, you can move and edit these keyframes using the same process as you used to move and edit the cursor's position keyframes.

