


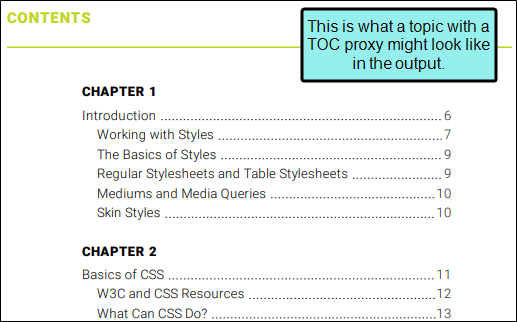
To create a table of contents (TOC) manually for print output, you need to create a unique topic and insert a TOC proxy into it. By default the print-based TOC is based on the h1 through h6 styles that you have applied to content in your topics. The generated TOC in the print output is not necessarily based on the structure of your "outline TOC” (i.e., the TOC file found in the Content Explorer), but the outline TOC is used to determine the content to be included in the print-based output.
[Menu Proxy — Headings — Online — Depth3 ]
How to Create a TOC Manually for Print
- Add a TOC file (which serves as an outline in print-based output) and within it create entries that link to topics.
- Create a new topic.
-
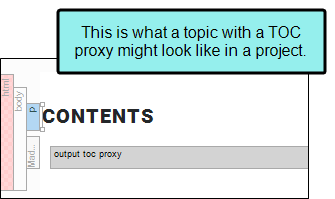
At the top of the topic, enter a title (e.g., “Contents”) and remove unnecessary text after the topic title. It is probably best not to use an h1 through h6 style for the heading since it will then show up in the generated TOC.
Note However, it is possible to configure your stylesheet so that certain h1 through h6 styles do not show up in the generated TOC. In the same way, it is possible to create other styles besides h1 through h6 and configure them so that they do show up in the generated TOC.
- From the Insert ribbon, select Proxy > Insert TOC Proxy.
-
(Optional) From the Stylesheet class field, you can select a style for the TOC.
For example, you might create and use style classes if you want to generate multiple TOCs with different looks for each output. Otherwise, the generated TOC in the output will use the style settings from the parent MadCap|tocProxy style. You can create a style class for this purpose in the Stylesheet Editor. To do this, select the MadCap|tocProxy style and in the local toolbar click Add Selector to create a class. The class will then be available from this field.
Note If you want to affect the look of the individual entries in the generated TOC, you can use the TOC1 through TOC9 styles (classes of the p style) in the Stylesheet Editor. For example, if you want to use blue font for the first-level headings in the generated TOC, you can change the font color setting on the p.TOC1 style.
- Click OK.
- Click
") to save your work.
to save your work. - In the "outline" TOC file, add an entry near the top that links to the new topic containing the TOC proxy.
Other Activities
Following are some additional tasks you might need to perform:
- Specifying Chapter and Page Layout Breaks
- Specifying Section Breaks and Template Pages
- Specifying Autonumbering Flow for Output
- Editing the Look of a Print TOC
- Editing Heading Levels for a Print TOC
What’s Noteworthy?
Note Options in the Advanced tab of print-based targets let you automatically add glossary, index, and TOC proxies to output. This means you do not need to create unique topics and insert proxies into them manually. The auto-generate method is much quicker and easier than the manual method. The manual method is more flexible but requires you to perform a number of extra steps, such as creating topics, inserting proxies, and adding files to the outline TOC. So if you simply want to quickly create print output with generated TOCs, glossaries, or indexes, the auto-generate option might be best for you. But if you want more control over the placement and look of the generated TOCs, glossaries, and indexes, you should use the manual method. See Auto-Generating TOCs for Print.
Note If you are creating Microsoft Word output, you must keep the output in a single Microsoft Word document.


