


You can quickly see how a topic (as well as a snippet or template page) will look in the final output by previewing it. The Preview window pane is dynamic, allowing you to keep the preview open while you work and see changes as you make them in the XML Editor.
You can preview the topic based on the output format used in any of the targets in your project (including conditions that are set for that target). You can also preview a file based on specific conditional expressions that you choose.
The Preview window pane updates when:
- A content file (i.e., topic, snippet, template page) is opened.
- A change is saved in the XML Editor.
- The refresh button
 in the window pane is clicked.
 - The File, Target, or Conditional Expression fields in the window pane are updated.
How to Preview Topics
-
Do one of the following, depending on the part of the user interface you are using:
-
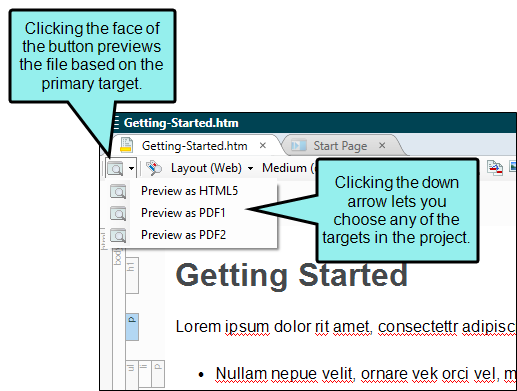
Local Toolbar Open a topic, snippet, or template page. Then in the local toolbar of the XML Editor, click
 . If you click the down arrow, you can choose a target; otherwise, the preview opens according to the settings in the primary target (e.g., with the appropriate conditions already applied).
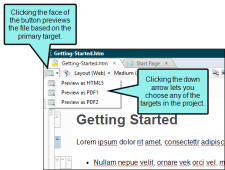
- Ribbon Open a topic, snippet, or template page. Then open the View ribbon and select Preview Window. Like the button in the local toolbar, this option also has a down arrow from which you can choose a specific target.
- Right-Click To preview a topic, snippet, or template page that is not open, you can right-click the file in the Content Explorer and choose Preview.
The Preview window opens using settings for the target you selected.
-
- (Optional) By default, the Preview window pane will be floating. If you want to dock it to the interface, click the title bar and drag it over a region identified by different squares. Then drop the window pane on the appropriate square.
- (Optional) You can continue editing the file. As you save your changes, the preview will automatically update.
-
(Optional) You can adjust the preview in any of the following ways.
To Preview a Specific File
If you want to preview a different file from the current one, next to the File field click
 and select the topic, snippet, or template page you want to preview. The file opens in the Preview window pane.
To Change the Target
From the Target drop-down, select the target you want to use for the preview. When you select a target, the current preview changes accordingly, showing the content using the condition tag settings in that target.
To Change the Conditions
When you preview for a specific target, the condition tags set for that target are automatically used in the preview. However, you can also preview your content by manually setting different condition tags to be included or excluded. Flare will remember the manual condition settings as you open one content file after another so that you do not need to select the conditions each time you move to a different file.
-
Next to the Conditional Expression field, click
 . The Conditional Text dialog opens.
 Note When you open the dialog, either the Basic or Advanced mode is already selected, depending on which mode is being used in the target.
-
If using the Basic mode, highlight a condition row, and select an option to the right (Include, Exclude, Display by Media Query—Web, Tablet, or Mobile). Conditions already provided in the target are set by default.
Note Changes in the Preview window are not transferred to the target settings. They're simply temporary so that you can see what a topic looks like with certain condition settings.
- Click OK.
-
- (Optional) Click in the local toolbar to refresh the Preview window. This ensures you are seeing the most up-to-date content.
-
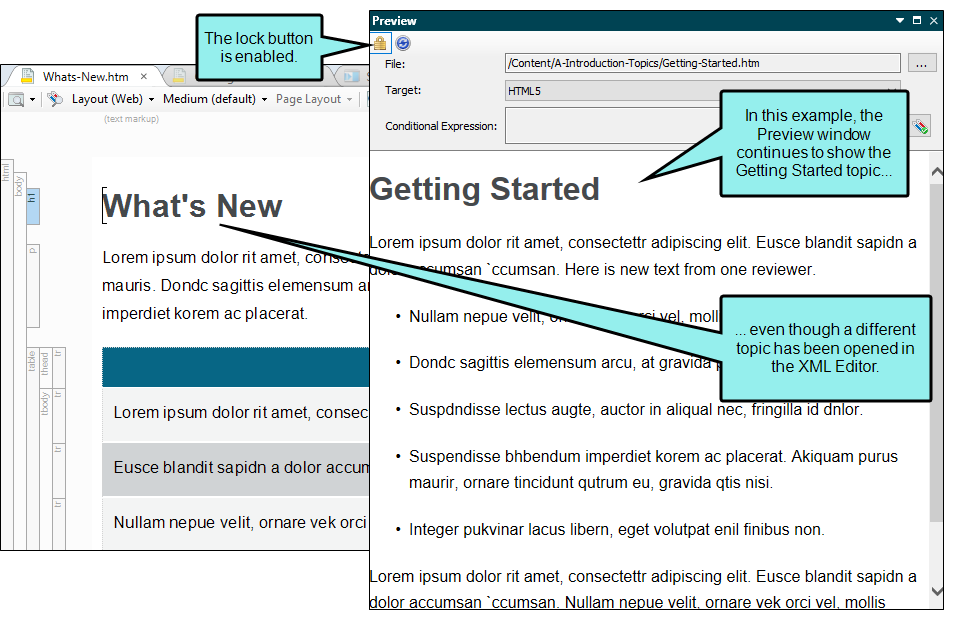
(Optional) Click
 to lock the Preview window. By enabling the lock button, you can continue to show the preview for one topic while opening other topics in the XML Editor.
- Click the X in the top-right corner of the Preview window pane to close it.
Example You are working on a topic and want to use the Preview window to see how the topic will appear using different settings in your project.
When you first open the Preview window, the preview looks as follows, with the primary target settings applied:

Now you want to see how the topic will look when you build the User-Guide-A PDF target. From the Target drop-down, you select User-Guide-A. The preview changes to reflect the new settings.
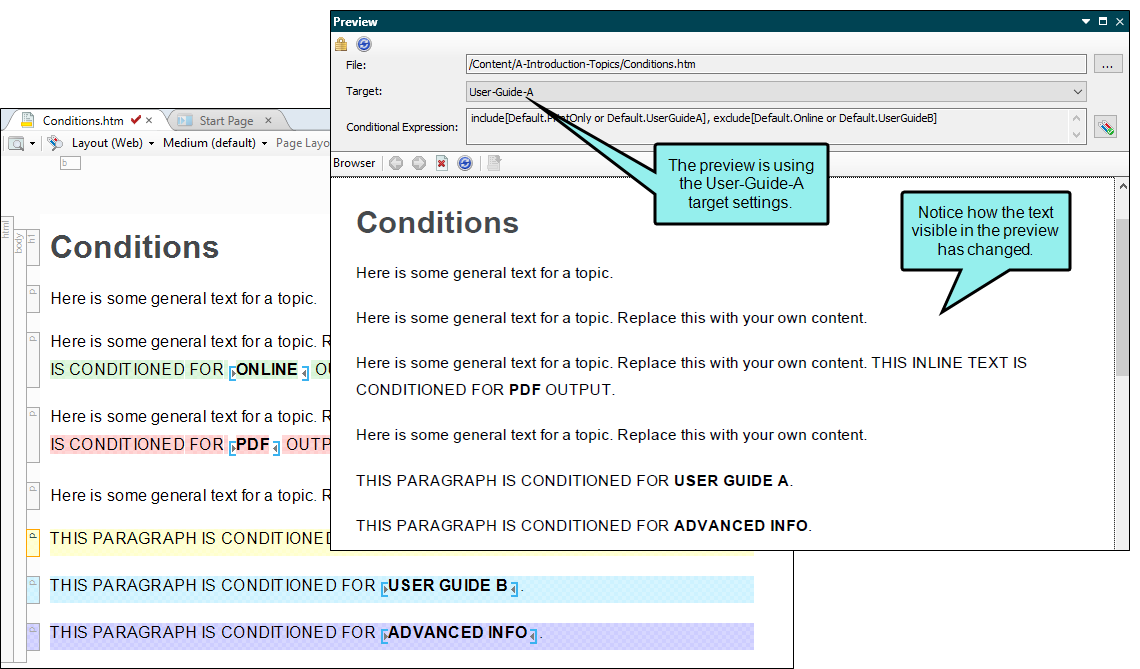
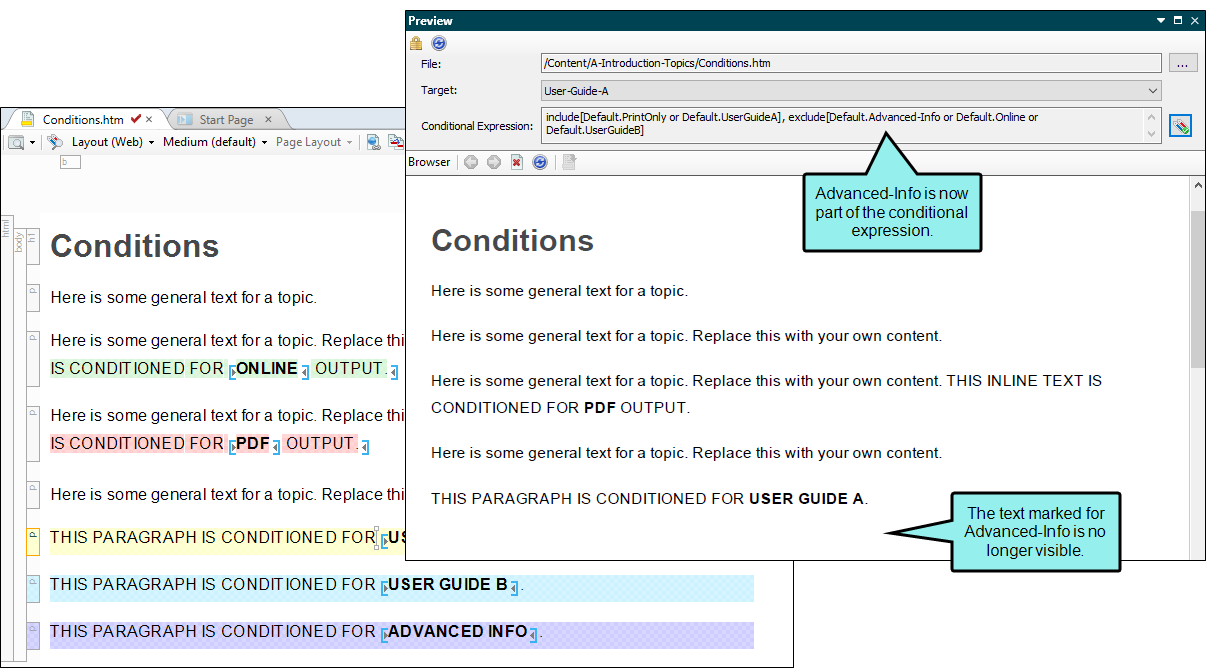
Next, you want to see what would happen if you excluded the “Advanced-Info” condition in that PDF target. You click the Conditions button and make your changes in the Conditional Text dialog.


After you click OK, the preview settings change, and the content associated with “Advanced-Info” is excluded.
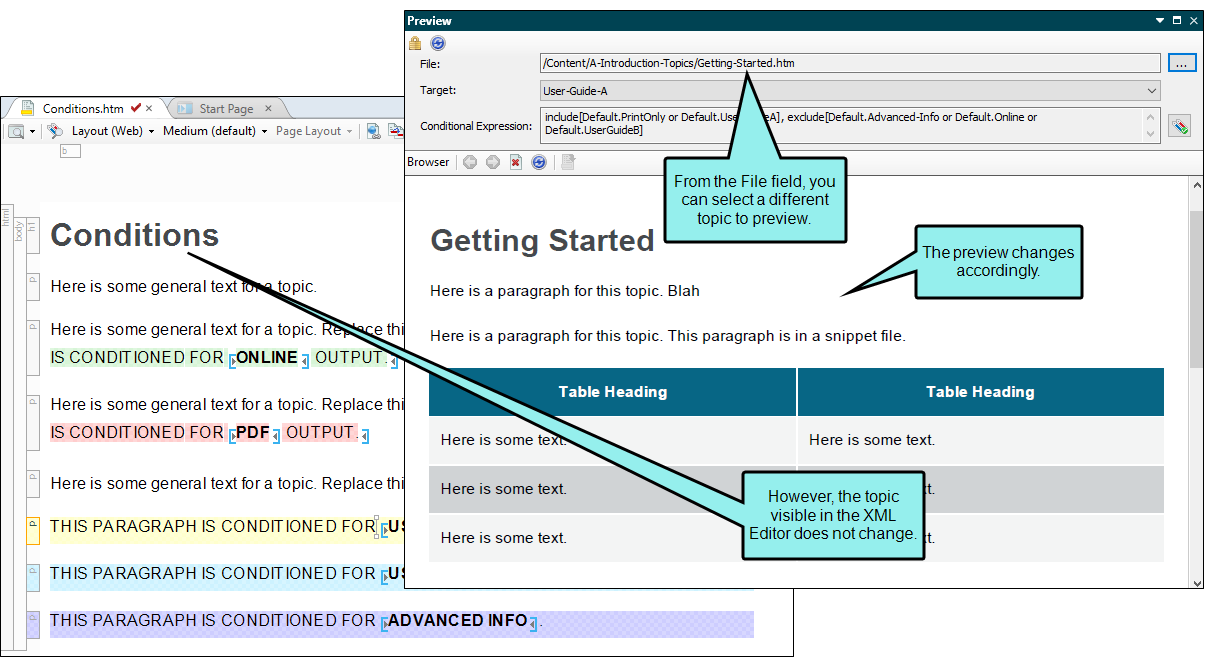
Finally, you want to preview a different topic than the one currently open in the XML Editor, so you select that topic in the File field. The new topic opens in the Preview window pane.
Note The preview feature is useful because it is a quick way to see how a content file looks in the output. However, there may be times when you need to generate the entire target and test the output. For example, you might want to see how topics look when integrated with template pages or tables of contents.

