|
Options
|
- Enable Drag and Drop Text Place a check mark in this check box to enable the drag-and-drop feature. When enabled, you can highlight and drag text to move it within topics. See Enabling and Disabling Drag and Drop.
- Show web images Select this check box to show or hide web-linked images in the XML Editor. If you have many image tags that link to websites, rather than linking to images in the project, slow website response times may slow down your work. Therefore, you might want to disable the rendering of such images in the XML Editor. See Showing and Hiding Web Images in the XML Editor.
- Insert Empty Alt Text Select this check box to automatically add an empty alt tag to images when you insert them into a topic or snippet (unless you specifically add an alt tag to an image). See Applying Empty Alt Text to Images.
- Replace straight quotes with smart quotes Select this check box to use single and double curly smart quotes instead of straight quotes when you type in the XML Editor. This option is disabled by default. See Using Smart Quotes.
-
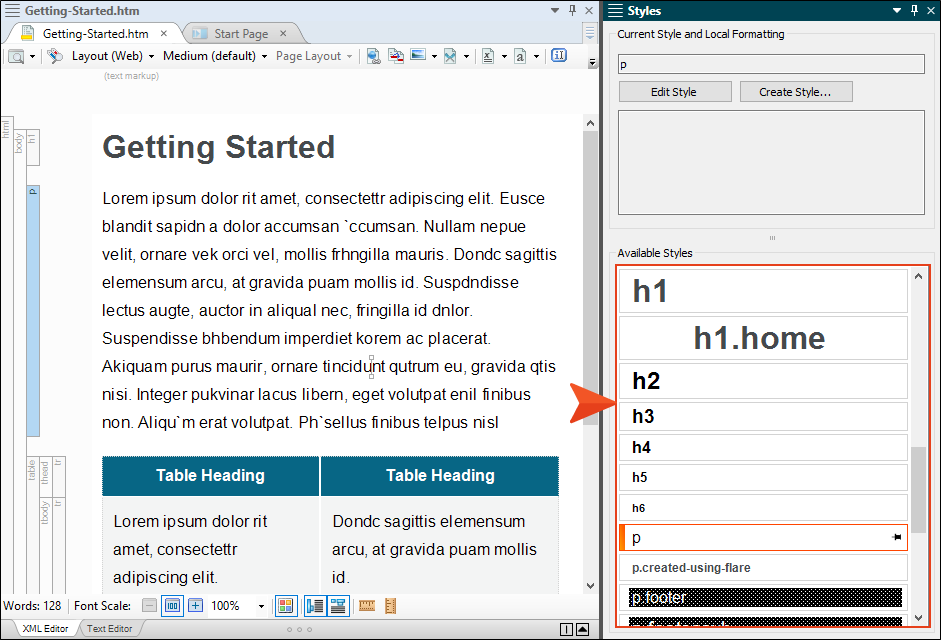
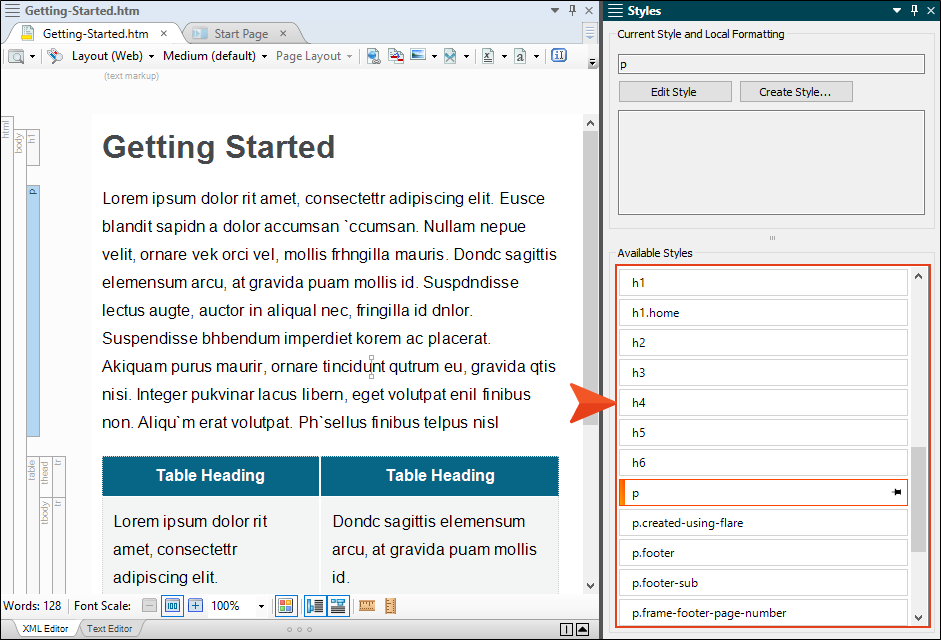
Show style previews in UI When you attempt to apply a style to content using the Style drop-down in the Home ribbon, the Styles window pane, or the floating Style Picker, previews of the various styles are shown by default. This gives you an idea of how each style looks before you apply it to the content.
If you prefer not to see style previews in these areas of the user interface, remove the check mark from this option.
With this option disabled, all of the styles will be presented as plain text when you select them.
|
|
Text Rendering
|
- Enable ClearType Font Smoothing Displays text in a "ClearType" font, which appears to "smooth out" the words and make them easier to read. ClearType is a software technology developed by Microsoft that improves the readability of text on existing LCDs (Liquid Crystal Displays), such as laptop screens, Pocket PC screens, and flat panel monitors. With ClearType font technology, the words on your computer screen look almost as sharp and clear as those printed on a piece of paper. ClearType works by accessing the individual vertical color stripe elements in every pixel of an LCD screen. Before ClearType, the smallest level of detail that a computer could display was a single pixel, but with ClearType running on an LCD monitor, we can now display features of text as small as a fraction of a pixel in width. The extra resolution increases the sharpness of the tiny details in text display, making it much easier to read over long durations.
-
Enable GDI+ Text Renderer Toggles between Microsoft Windows Graphics Device Interface (GDI) and GDI+ in terms of how content is rendered on your monitor. What is the difference between GDI and GDI+? The bottom line is that GDI+ improves the quality of the rendering somewhat, but it can be slower than GDI. For more information about GDI+, see:
Copy
http://msdn.microsoft.com/en-us/library/ms533797.aspx
|
|
Defaults
|
- Paste Text Select the default behavior when pasting text from another program. See Pasting Text From Other Programs.
- Paragraphs Paste the text as regular paragraphs.
- Paragraph Block Paste the text as paragraph blocks, such as <div>, <blockquote>, or <fieldset>. For more information about these types of styles, see Creating Divs and Other Tag Groups.
- Inline Text Paste the text as inline text, so that it takes on the style of the location where it is being pasted. If you have copied multiple lines of text from the source document and use this option, the text will be pasted in one line, not multiple lines.
- Table Paste the text into a new table.
- List Paste the text as a new bulleted list.
- Link Select the default behavior when creating a link by dragging a file into the XML Editor—Cross-References (which are dynamically generated based on commands) or Hyperlinks (which are based on specific text you provide in the XML Editor). See Cross-References and Text Hyperlinks.
- List Select the default behavior when creating a new numbered or bulleted list. You can include <p> tags within each <li> tag (Paragraph), or you can just have <li> tags (Simple) but add <p> tags later manually for list items where you want them. See Creating Numbered and Bulleted Lists.
- Definition List Select the default behavior when creating a new definition list. You can include <p> tags within each <dt> and <dd> tag (Paragraph), or you can just have <dd> and <dt> tags (Simple) but add <p> tags later manually for list items where you want them. See Creating Definition Lists.
- Cut Table Columns Select the default behavior when cutting columns in a table. You can choose to cut the entire Columns (including the contents) or just the Cell Contents. See Cutting Table Columns and Rows.
- Cut Table Rows Select the default behavior when cutting rows in a table. You can choose to cut the entire Rows (including the contents) or just the Cell Contents. See Cutting Table Columns and Rows.
- Merge Table Select the default behavior when creating or pasting a new table above or below and existing one. You can choose to keep the tables separate (Don't Merge Tables), or to merge the tables. Merge Table Up means the new merged table will use the style of the table on top. Merge Table Down means the new merged table will use the style of the table on bottom. See Merging Tables.
- Merge List Select the default behavior when creating or pasting a new list above or below and existing one. You can choose to keep the lists separate (Don't Merge Lists), or to Merge Lists into a single list. See Merging Lists.
- Paste Cells Into Tables Select the default behavior when pasting table cells that you have copied or cut. See Pasting Cells Within a Table.
- Cells Paste the copied cells, replacing the cells nearest to where you have placed your cursor.
- Table Paste the copied cells as a separate table. It will be placed within the cell where you have placed your cursor.
- (Above) Paste the copied cells above the cell where you have placed your cursor.
- (Below) Paste the copied cells below the cell where you have placed your cursor.
- (Left) Paste the copied cells to the left of the cell where you have placed your cursor.
- (Right) Paste the copied cells to the right of the cell where you have placed your cursor.
- Table to Text Select the default behavior when converting a table to text. See Converting Tables to Text.
- Convert to Paragraphs Convert the content in each table cell into separate paragraphs.
- Separate with Commas Convert the content in each table cell into text separated by commas.
- Separate with Text Convert the content in each table cell into text separated by a text string that you specify (e.g., a semicolon).
|