Timeline Window Pane
The Timeline window pane gives you a visual method for adjusting timing and placement of movie elements.
[Menu Proxy — Headings — Online — Depth3 ]
How to Open This Window Pane
Do one of the following, depending on the part of the user interface you are using:
-
Ribbon Select View > Timeline.
- Keyboard Shortcut Press CTRL+T on the keyboard.
Tasks Can Perform in This Window Pane
- Frames You can change the timing for the entire frame by clicking and dragging the vertical border to the right of all the objects. See Setting Timing for Frames.
- Objects You can change the timing for an object by clicking and dragging either the left or right side of the object bar and dragging it. In addition, you can click in the middle of the object bar and drag it to adjust when it starts and ends. See Setting Timing for Objects.
- Keyframes When a keyframe is added to an object, it is indicated below its respective object as a keyframe type bar. Objects can contain multiple keyframes of different types (e.g., position, size, opacity, color), each of which displays on its own bar beneath the object. And each type might have multiple keyframes within it, indicated by diamond shapes within the keyframe bar. You can change the point at which the keyframe begins by dragging it to a new place in the keyframe bar. See Keyframes.
Timeline Views
Three different views are accessible from the top of the Timeline window pane.
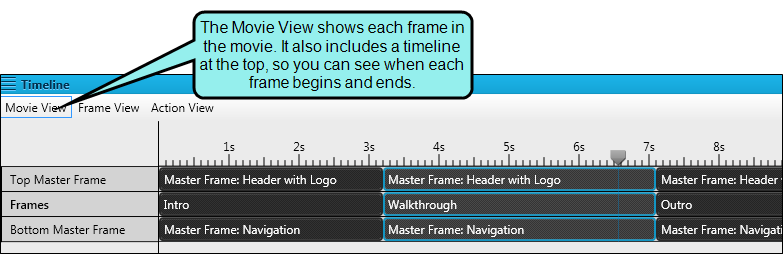
Movie View
When you click Movie View, three bars appear in the Timeline:
- Top Master Frame The top master frame(s) applied at either the movie or frame level, if applicable.
- Frames All of the frames in the movie.
- Bottom Master Frame The bottom master frame(s) applied at either the movie or frame level, if applicable.
Movie View works in conjunction with the live preview controls in the Frame Editor window pane. You can move the Timeline playhead or the preview playhead to the point where you want the preview to begin playing, and then press the Play button.
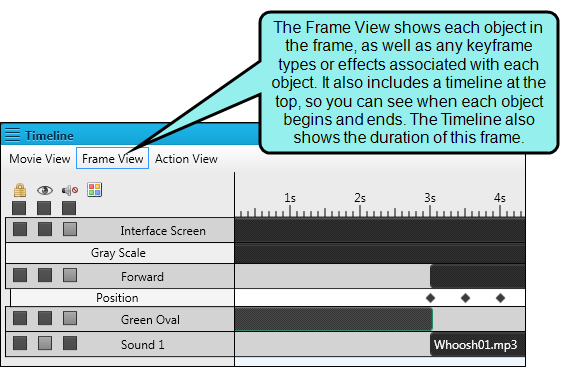
Frame View
The Frame View contains all of the objects (including image objects and audio objects), keyframe types, and object effects currently contained on a frame. This frame shows both regular objects and any action objects that were converted to timeline objects.
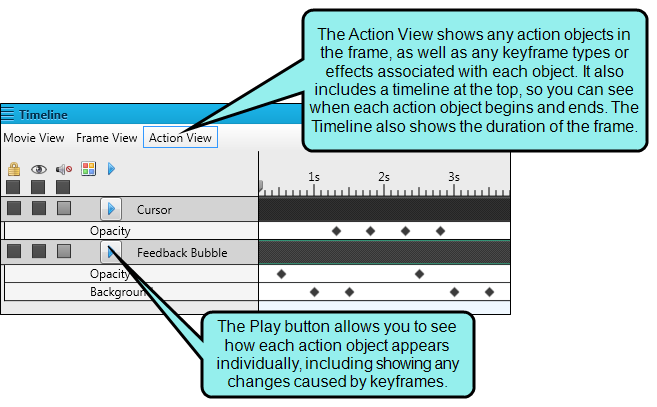
Action View
The Action View contains all of the objects, keyframe types, and effects currently contained on a frame for any regular objects that were converted to action objects (e.g., a bubble being used to deliver success or failure feedback).
Playhead
There is a playhead at the top of the Timeline that you can drag to move to a particular point in time of the frame (or movie). As you drag this playhead, notice that the integrated preview play bar in the Movie Editor also moves accordingly. The audio associated with the movie or frame is also synchronized with the preview.
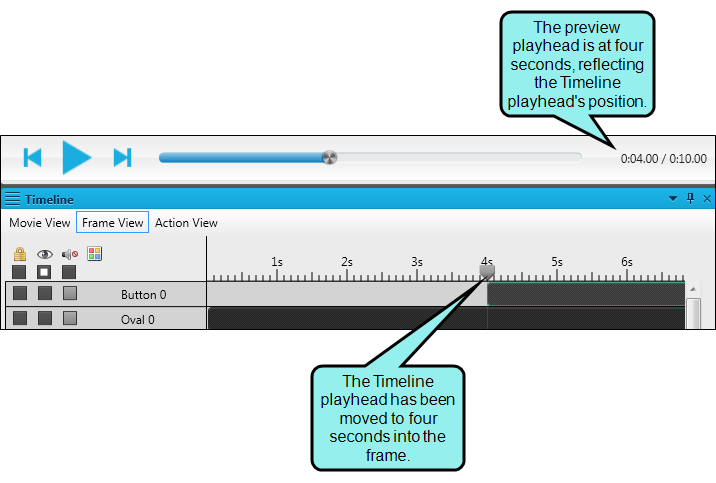
Also, moving the playhead to a specific place in the Timeline lets you add a keyframe at that point. See Adding Keyframes.
Navigation Buttons in the Title Bar
|
|
Lets you move the window pane from its docked position to another location in the interface. Simply click on this area and drag the window pane to the new location. |
|
|
Opens a drop-down menu with commands for moving and resizing the window pane.
|
|
|
"Pins" the window pane to the side of the interface so that you have more room for your workspace. You can show the window pane by hovering over the thin bar on the side of the interface. If you select this option again, the window pane returns to its previous state (no longer "pinned" to the side of the interface). |
|
|
Closes the window pane. |


Buttons and Sections
|
|
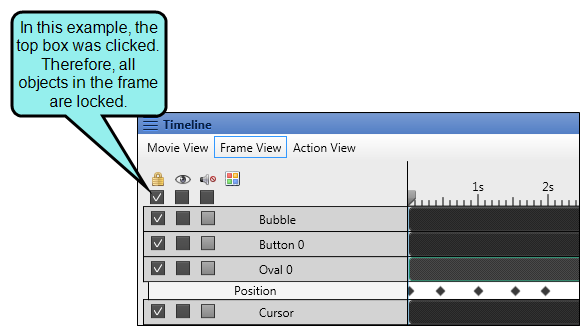
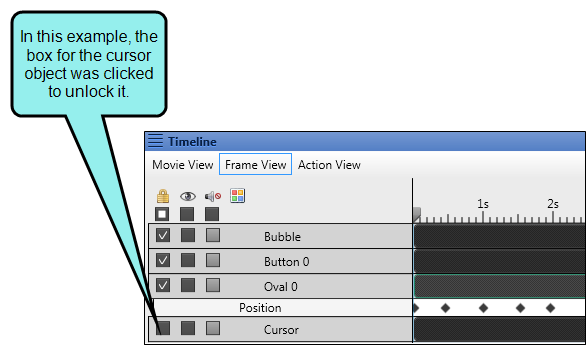
This icon indicates if objects are locked. When objects are locked, they cannot be edited. If you click the box directly beneath the top icon, all objects in the frame are locked or unlocked. If you click an icon next to a specific object, that object is locked or unlocked.
|
|
|
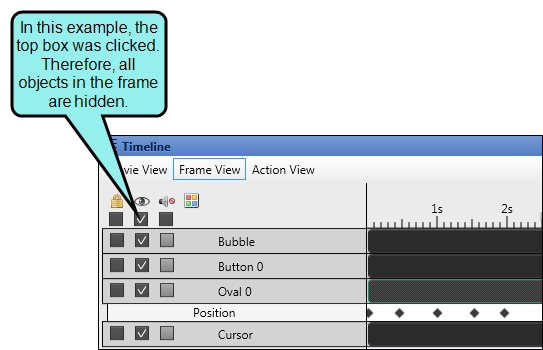
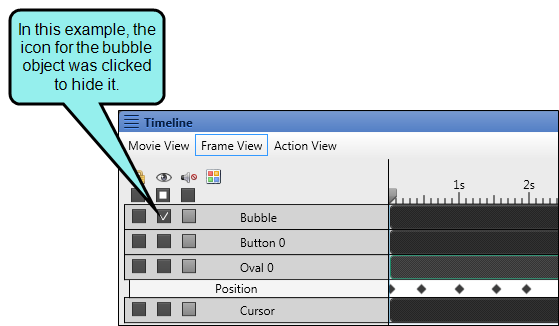
This icon indicates if objects are shown or hidden in the frame. When objects are hidden, they are still part of the frame, but cannot be seen. You might use this feature, for example, if you have many objects on a frame and want to concentrate on some but not on others. If you click the box directly beneath the top icon, all objects in the frame are hidden or shown. If you click an icon next to a specific object, that object is hidden or shown.
|
|
|
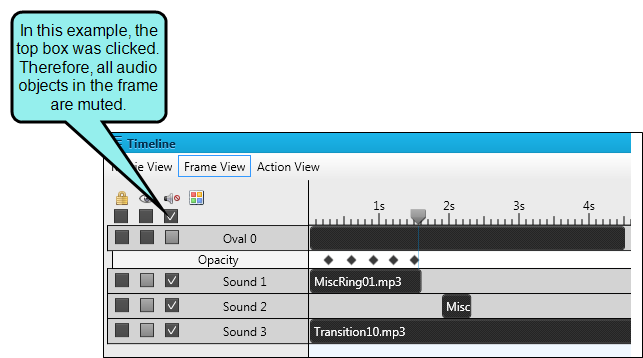
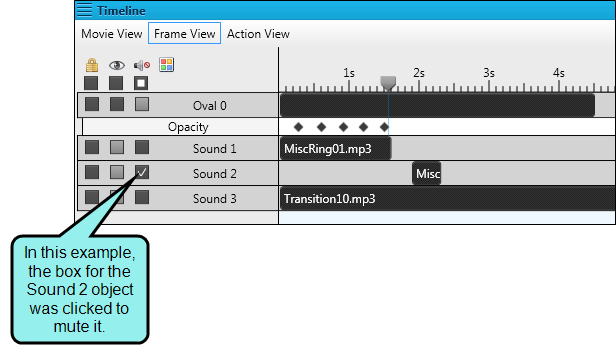
This icon indicates if an audio object is on or muted in the frame. When audio objects are muted, they are still part of the frame but will not be heard. You might want to use this feature, for example, if you are testing out multiple sounds for a frame but aren't sure which one you want to use. If you click the box directly beneath the top icon, all audio objects in the frame are on or muted. If you click a mute box next to a specific audio object, that object is on or muted.
|
|
|
Indicates if a condition tag has been applied to an object in the frame. |
|
|
When in Action View, the Play button in this column lets you see how each action object appears individually, including showing any changes caused by keyframes. You can pause an action object as you are playing it. |
|
[Object, Effect, and Keyframe names] |
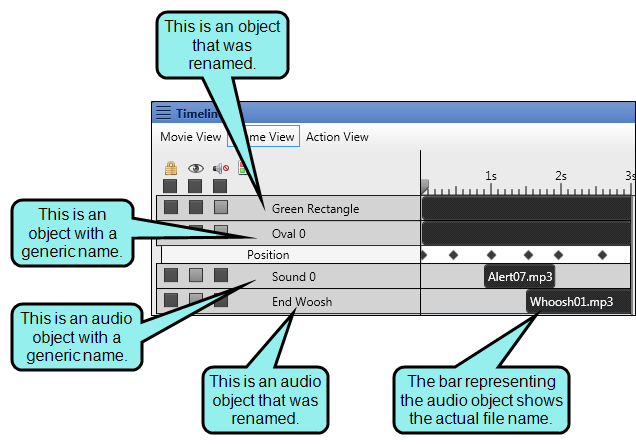
Generic object names (e.g., Oval 0, Button 0), or the optional names you gave to each object in the Object Properties window pane, are displayed on the left side of the window pane. When you add an audio object, Mimic gives it a generic name (e.g., Sound 0, Sound 1) that you can change in the object's properties, but the actual file name appears on the audio object's bar representation. Additionally, effects added to objects and keyframes added to objects and effects are also displayed on the left size of the window pane. Effect bars are nested under their respective objects, and keyframe bars are nested under the associated object or effect.
|
|
|
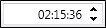
Shows the current location of the playhead in hh:mm:ss format. You can enter a time in these fields to quickly jump to a location in the movie or frame. Select the hour, minute, or second field and use the arrows to skip forward or backward. |
|
|
Resets the scale of the Timeline window pane to 100%. |
|
|
Reduces the scale of the Timeline window pane each time you click the button. |
|
|
Increases the scale of the Timeline window pane each time you click the button. |
|
|
Lets you precisely move the playhead to a keyframe for an object. When this option is enabled and you drag the playhead, it "snaps" like a magnet to the nearest keyframe. If you attempt to align the playhead on a keyframe without this option, you might find that you are slightly off target. |