This dialog lets you choose miscellaneous global settings.
[Menu Proxy — Headings — Online — Depth3 ]
How to Open This Dialog
Select File > Options.
General Tab
|
Auto-Reload Documents |
Select this check box if you want Contributor to reload documents automatically. |
|
Auto-Save Documents |
Select this check box if you want Contributor to periodically auto-save any open files. You can specify the number of minutes that should elapse between each auto-save. |
|
Close others when opening new document |
You can have multiple files of all types open in the interface at the same. By default, when you open a new file, other documents that are already open remain open. However, you can change this behavior so that files already open in the interface are automatically closed when you open a new document. You can use any of the following options:
|
|
Reset "Show Once" Dialogs |
There are some dialogs in Contributor that open just once to give you a message or warning when something changes or you switch modes. These dialogs have a check box labeled "Show this dialog." If you deselect that check box, you will not see the dialog again. However, you can use this reset feature to display that dialog (and all other "Show Once" dialogs) again the next time. |
|
Automatically resize low DPI images |
Starting with Contributor |
|
Prefer Local Help |
By default, Contributor's online and dynamic Help system points to files hosted externally. This allows for live updates to the Help. Because the Help system is hosted online, you may not be able to access it if you are behind a firewall or if you have a slow connection. In that case, you can use a local version of the Help. Contributor will even switch to the local Help automatically if it detects that you cannot connect to the external Help system. Select this option if you want to use the local Help manually. Note The local Help system is only updated when the application is updated. If you want to be sure that you have the most current version of the Help, disable the local Help. |
Interface Tab
|
Menu Style |
You can select an option to display the interface with ribbons or with the classic tool strip. |
|
Theme |
You can click the Active Theme field and select a color scheme for the interface. |
XML Editor Tab
|
Options |
|
|
Text Rendering |
|
|
Defaults |
|
Spelling Tab
|
Select Global Dictionary Location |
A global dictionary is a file that contains words and can be used for spell checking by any Contributor By default, a new global dictionary is stored in your AppData folder, like all of your built-in dictionaries. However, you can select Use custom location to choose a different location for your global dictionary. For example, you might be working with a team of writers and want to make sure you are all using the same spellings for certain terms. By choosing a network directory, your entire team can use the same global dictionary. After selecting this option, click |
|
Installed Dictionaries |
This section displays information about the dictionaries that are installed and therefore available to your files. You can import additional dictionaries if you want.
|
|
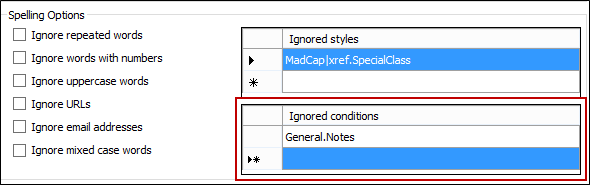
Spelling Options |
You can use these fields to ignore any of the following when spell checking files:
|
 to choose the location.
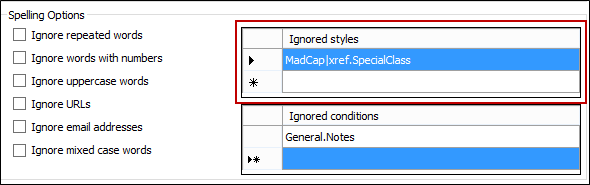
Language Tab
|
Hide languages with no spell check support |
This filters the list of languages to show only those that are supported with the spell check feature. |
|
Language |
You can select a language. |
Keyboard Shortcuts Tab
|
Command Scope |
Select whether the custom shortcut will be available throughout the interface (Global) or just in the XML Editor. The options available on the tab change depending on your selection. See Changing Hot Keys. Note If you set one shortcut with XML Editor selected and another with Global selected, the XML Editor shortcut has precedence. |
|
Option/Shortcut |
Select the option whose hot keys you want to change. You can click the Option or Shortcut column headings to sort the columns alphabetically. This can help you more easily find a command or see which shortcut keys are free to use. |
|
Key Assignment |
Select the hot key that you want to assign to the option. |
|
Other commands using shortcut |
If you create a shortcut that is already being used, this field displays the conflicting command. |
|
Modifier Key Assignment |
You can select the Control Key, Shift Key, and/or Alt Key check boxes if you want to use a combination for the shortcut. For example, if you select D from the list to the right and add check marks to the Shift Key and Alt Key boxes, the new shortcut for the option will be SHIFT+ALT+D. |
|
Unlisted Commands |
You can assign a hot key to a command that does not appear in the grid above by clicking Unlisted Commands. In the Other Commands dialog, select a command, then click OK. The unlisted command appears in the grid. |
|
Reset to Factory Defaults |
This returns the tab to the factory default keyboard shortcuts. |
Index & Concepts Tab
|
Auto-complete Index and Concept entries |
As you enter index keywords in the Index window pane, the application recognizes if you have created a similar index keyword. The similar keywords appear in a list just below the entry field. You can quickly select one of the keywords from the list instead of typing the entire word manually. This option turns this feature on and off. |
|
Mode Warnings for Index and Concept Entries |
If you turn on the Index Entry Mode or Concept Entry Mode and then close the application, you will receive a warning message the next time you open the application. The message lets you know that the mode is still on. You can disable the warning messages from that dialog. This option lets you turn those warning messages on again:
|
Review Tab
|
User Name |
When you first install and launch Contributor, your login user name is captured and stored in the Options dialog (File > Options). You can change the user name (for Contributor purposes) in this field. |
|
Initials |
The first two letters of the user name are also stored as your initials. This information is employed whenever you use the track changes and annotations features. For example, if you insert an annotation in a topic, your initials are displayed at the beginning of the comment so that other users know where the annotation came from. You can change your initials in this field. |
|
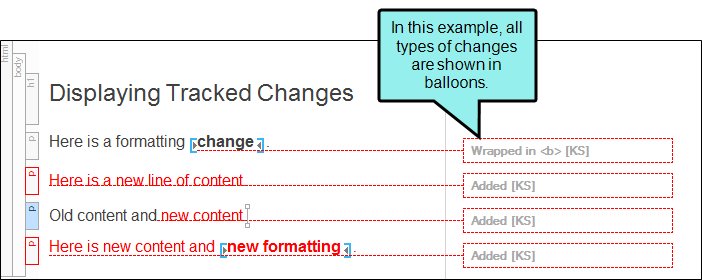
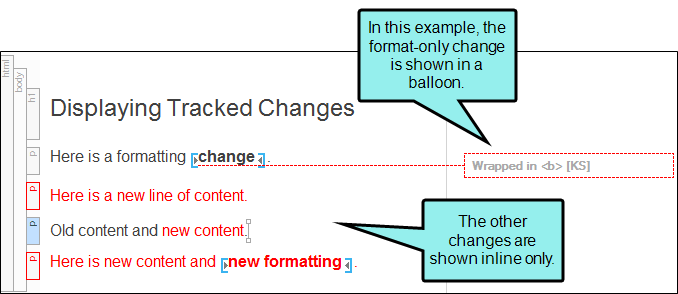
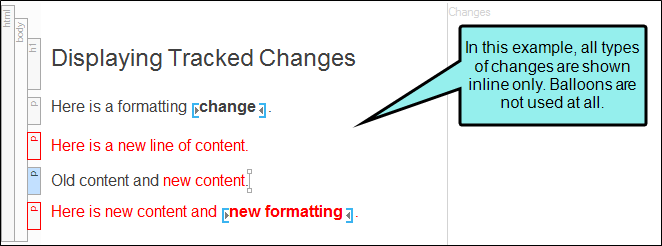
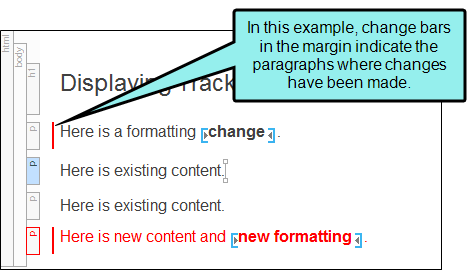
Tracked Change Display |
You can change the way tracked changes are displayed in the interface.
|
|
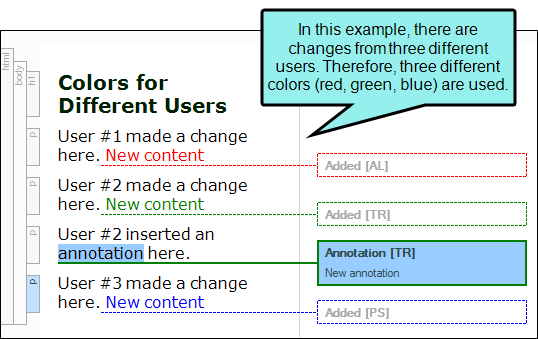
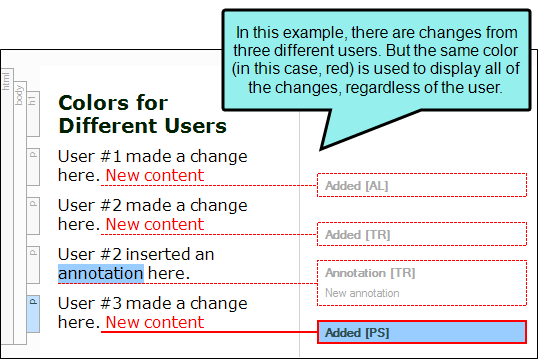
User Colors |
The tracked changes and annotations for each user can be shown in a separate color. You also have the option of choosing a specific color for all users.
|
Plugins Tab
|
Name |
Displays the name of the plugin, based on the DLL file you have created and added to the Contributor installation folder in Windows. |
|
Description |
Displays a description of the plugin. |
|
Version |
Displays the version number of the plugin. |
|
Enable/Disable |
Click Enable to install the plugin, then restart Contributor. Click Disable to uninstall the plugin. |