Integrating Flare and Pulse


Important Pulse is deprecated in Flare, which means that it is slated to be removed in a future version.
To integrate the embedded discussion forms and other Pulse features with your Flare output, add a new community in Flare. This action automatically creates a new system in Pulse, allowing your web server to host, store, and serve the embedded discussion forms that appear below the topics in your Flare output. This system also gives you and your team members the ability to moderate and administer the Pulse features and content from the Pulse dashboard.
[Menu Proxy — Headings — Online — Depth3 ]
Integration Options
If you are developing an online Flare target for a single product, service, or purpose, integrating Flare is a straightforward process. You simply install Pulse and then add a new Flare community to create a corresponding system in Pulse. However, because many organizations develop multiple Flare targets, you also have these options:
- Add a Single Flare Community for Use With Multiple Targets In this scenario, you add one Flare community which creates a corresponding Pulse system. Then you associate that community with multiple Flare targets. This method gives you less-granular reporting capabilities in Pulse.
-
Add a Unique Flare Community for Each Different Target In this scenario, you add a unique Flare community for each different target. This creates a separate system in Pulse. The advantage of using this option is that it gives you more granular reporting capabilities, letting you generate usage reports for each community.
How to Enable the Pulse Server
To give Flare the ability to interact with Pulse, you must supply the Flare community in the target with the appropriate connection information and administrative access credentials for the Pulse web server.
- Open the desired Flare project.
-
In the Project Organizer, open the desired WebHelp or HTML5 target.
-
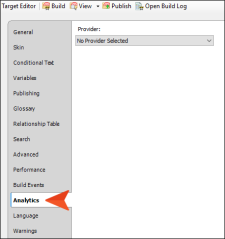
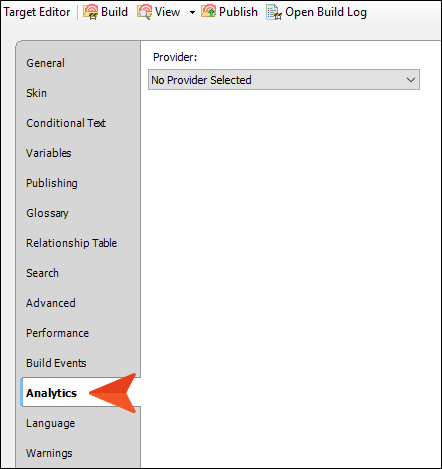
In the Target Editor, select the Analytics tab.
-
Enable the server as follows:
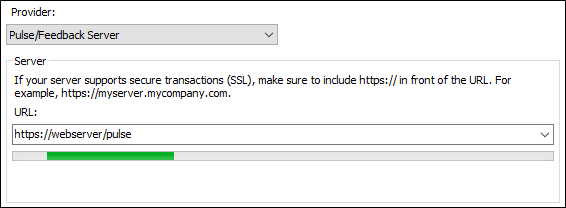
- From the Provider field, select Pulse/Feedback Server.
-
In the URL field, type the URL for the Pulse web server.

Note To find the URL, log in to the Pulse dashboard as an administrator. Then select Administration > Settings > General Settings. The URL above corresponds to the value in the Site URL box.
Note If you have installed a Secure Sockets Layer (SSL) certificate on the Pulse web server, ensure that the URL starts with the https:// protocol (instead of http://).
-
Enter the access credentials as appropriate:
-
If this is the first time you are enabling the Pulse community in the Flare target, the Log In dialog automatically appears.
OR
- If you want to change the existing login information, click the Logout button to clear the existing credentials. Then click Login. The Log In dialog appears.
-
-
In the Log In dialog, type the appropriate User name and Password. The account that you use must have administrative permissions to Pulse. You have these options:
- Use the PulseAdmin Account This is the default administrator account that was created by the person who installed Pulse.
- Use an Account that is a Member of the Administrators Group This can be any account belonging to a registered Pulse user who is a member of the Administrators group.
- Click OK or press ENTER to close the Log In dialog.
- Before you can save the Flare target, you must associate a Flare community with the Pulse system.
Setting Up the Community in Flare
After enabling the Pulse server in the desired target, you can set up the community in Flare. If you are setting up Flare for the first time, you will add a new Flare community.
How to Add a New Flare Community
If this is the first time you are integrating Flare andPulse, add a new Flare community to your project's Flare target. This process automatically creates a new "system" on the Pulse server. In Pulse, a system hosts the following items:
- The activity streams that are used when moderating your topics with the Pulse dashboard
- The embedded discussion forms that registered Pulse users can access in the Flare output
Important To integrate Flare content with Pulse integration, you must always add new or use existing communities in Flare. While you have the ability to create systems using the Pulse dashboard, you do not have the ability integrate those systems with a Flare community.
-
In the Analytics tab, locate the Communities list and then click Manage.
- In the Manage Community dialog, click Add.
-
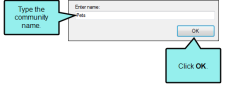
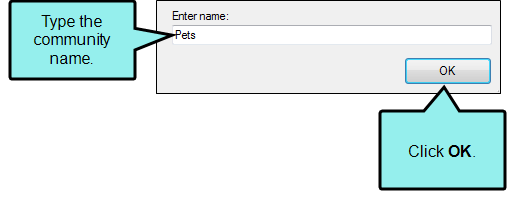
In the Enter Name dialog, type a name for your community. In this example, we are creating a community to use with a Flare target about Pets. Then click OK.
- In the Manage Communities dialog, the new community appears. Click OK to close the dialog.
- Click Refresh to update the Current Pulse Configuration info. This provides you with basic information about the community, such as the status of the server, and the total number of users.
After the community is associated with the Flare target, the Remap Topics button becomes available so you can map your community topics to Pulse for the first time.
You also have the ability to select an existing community, delete a community, provide a published URL, and rename a community as follows:
How to Select a Flare Community
If you need to publish any updates for your Flare output and do not wish to create a new community for your documentation release, select the community that you previously created for the target. This gives you the ability to ensure that any new, removed, and updated topics are mapped to the appropriate embedded discussion forms in the Pulse system.
- In the Analytics tab, locate the Community area.
-
From the Communities list, select an existing community.

-
Click Refresh to update the Current Pulse Configuration info. This provides you with basic information about the community, such as the status of the server, and the total number of users.
Note The Communities list in Flare initially only includes communities that have been added with the Flare user interface. If you create Pulse systems using the Pulse dashboard, those systems will be not be listed as Flare communities until you remap the topics.
Note You can associate multiple Flare targets with a single community if desired. However, for best results with reporting, we recommend that you create a separate community for each target. This will also simplify any mapping/remapping tasks when you publish updates.
Note If you want to verify that the Flare community you added is now a system in Pulse, log in to the Pulse dashboard using an account that is a member of the Administrators or Employees group. The select Systems > Find Systems from the menu. The community you created will appear in the list.
After the community is activated, the Remap Topics button becomes available so you can remap the community topics to Pulse.

How to Delete a Flare Community
If you want to delete a Flare community, use the steps below. This deletes both the Flare community and the Pulse system.
-
In the Analytics tab, locate the Communities list and click the Manage.
- In the Manage Community dialog, select the community that you want to remove. Then click Delete.
- When prompted to confirm the delete action, click Yes. This removes your selection from the Communities list.
- Click OK to close the Manage Communities dialog.
- Click Remap Topics and confirm the topics to remove.
- Click
") to save your work.
to save your work.
How to Provide a Published URL for a Community
You can assign a URL path to your community from your Flare target. This can also be done from the Pulse dashboard (by selecting Administration > Settings and clicking Communities), but using the Flare target is recommended.
- Under the Analytics area, click the Manage button.
- In the Manage Communities dialog, highlight the community that you want to edit. Then click Edit
-
In the Edit Community dialog, click in the Enter published url field and enter a path to the main landing page of your Flare output.
When you enter a published URL path, make sure you include http:// at the beginning of the URL.
Example You've generated a target called "FlareOutput" and you've uploaded the output so that users access it here: help.mycompany.com/FlareOutput/Default.htm. In that case, enter http://help.mycompany.com/FlareOutput in the Published Url field.
- Click OK to close the Edit Community dialog. Click OK to close the Edit Community dialog.
- Click OK to close the Manage Communities dialog.
- Click to save your work.
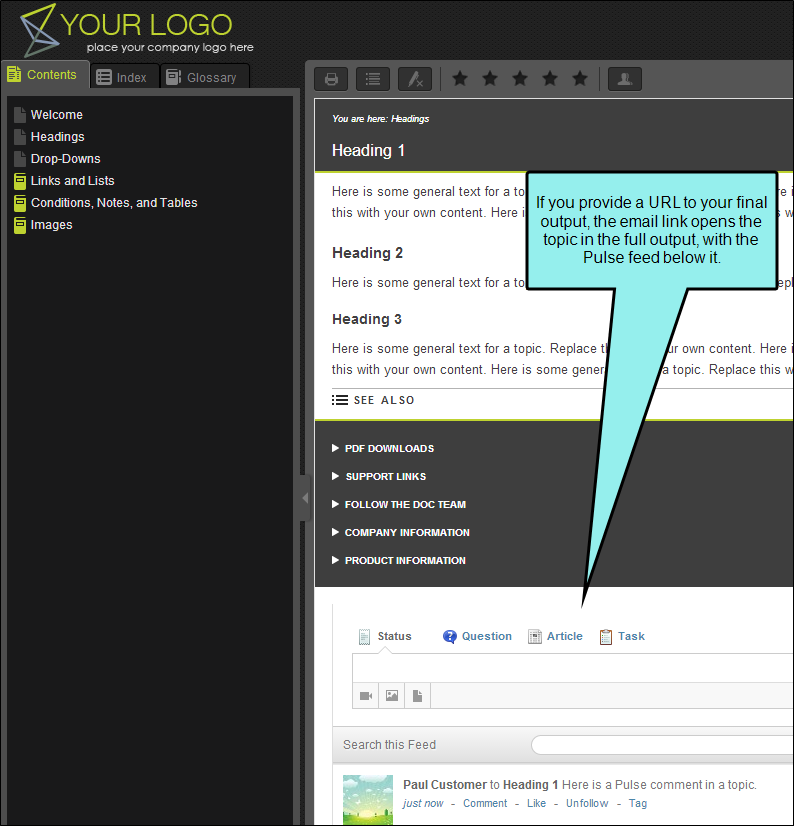
Why is it a good idea to assign a URL path to a community? Because it allows topic feeds to open in context.
Example You have not provided a published URL for your community. You receive an email notification stating that a user has posted a comment in one of your topics. So you click the topic name link in the email notification to see the feed where the comment was posted. The feed opens in the dashboard view of Pulse, which shows only the feed and not the topic associated with it.

On the other hand, let's say you provide a published URL to your community. In that case, when you click the topic link, the topic opens in the actual Flare output. You see both the topic and the Pulse feed below it, therefore giving context to the post.
How to Rename a Flare Community
- In the Analytics tab, under Current Pulse Configuration, click the Refresh button.
- Under the Community area, click the Remap Topics button ensure your topics have been mapped
- Under the Analytics area, click the Manage button.
-
In the Manage Community dialog, highlight the community that you want to rename. Then click Rename.
In order to add the embedded discussion forms to the Flare output that you will publish, you must map/remap the community topics in Flare for Pulse.
-
In the Enter Name dialog, type a new name for your community. Then click OK.
This changes the name of the community in Flare, as well as the name of its corresponding Pulse system.
Note If an error message appears, try clicking the Refresh button and the remapping the topics. This typically resolves any issues.
- Click OK to close the Manage Communities dialog.
- Click to save your work.
Mapping/Remapping a Flare Community to Pulse
In order to add the embedded discussion forms to the Flare output that you will publish, you must map/remap the community topics in Flare for Pulse.
How to Map a New Flare Community to a Pulse System
If this is the first time you are setting up a Flare community for a target, you will need to map the topics for your community to Pulse.
- Make the desired changes to your Flare target. Always be sure to update the TOC before remapping the topics.
- In the Target Editor, select the Analytics tab.
- From the Communities drop-down list, select the appropriate community.
-
Click Remap Topics.
This opens the Remap Community Topics dialog.
-
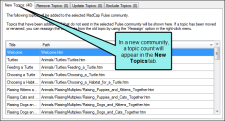
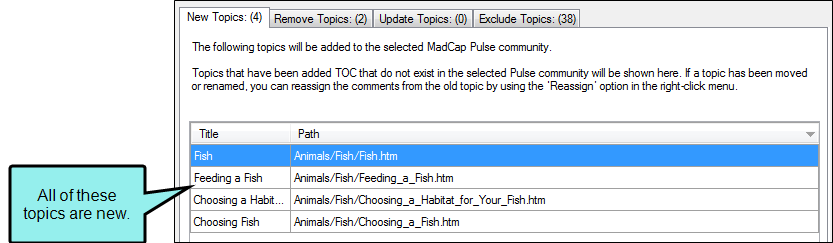
In the Remap Community Topics dialog, make sure the New Topics tab is selected and review the topics in the list.
Example A topic count appears in the label of the New Topics tab. The tab lists the topic titles and paths to the topics. These items will be mapped to a corresponding stream in Pulse. In a new community, the counts in the other tabs will typically be zero (0).
- When finished, click OK. The system automatically maps each community to a stream in Pulse. The community updated message appears.
- Click to save your work.

How to Remap a Flare Community to a Pulse System
As you prepare to publish content updates to a Flare target, you can review the new, removed, and updated topics and then reassign any of the topics to the appropriate stream in the Pulse system. This stream corresponds to the embedded discussion form at the bottom of the Flare topic.
- Make your content changes in Flare. Be sure to make all of the desired updates in the Flare TOC associated with your target.
- Open the Flare target.
- In the Target Editor, select the Analytics tab.
- From the Communities drop-down list, select the appropriate community.
-
Click Remap Topics. This opens the Remap Community Topics dialog so you can review the updates:
new topics tab
The New Topics tab lists Flare updates that have an effect on the Pulse mapping definitions:
- New Topics New topics that have been added to the Flare TOC associated with the target.
- Moved Topics Existing topics that have been moved to a different folder or location in the Content Explorer.
- Renamed Topics (New Name) Existing topics where the actual file name has changed. The new file name appears in this tab.
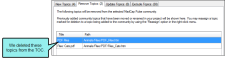
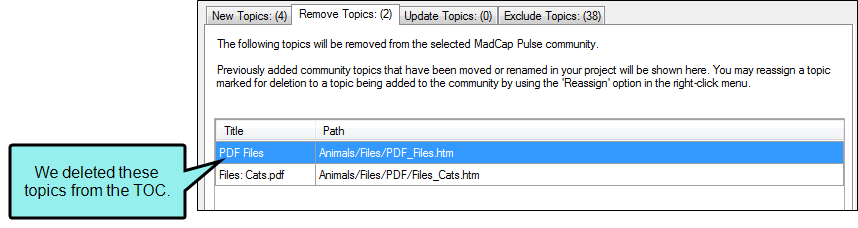
remove topics tab
The Remove Topics tab lists Flare updates that have an effect on the Pulse mapping definitions:
- Deleted Topics Topics that have been removed from the Flare TOC associated with the target.
- Moved Topics Existing topics that have been moved to a different folder or location in the Content Explorer.
- Renamed Topics (Former Name) Existing topics where the file name has changed. The former file name appears in this tab.
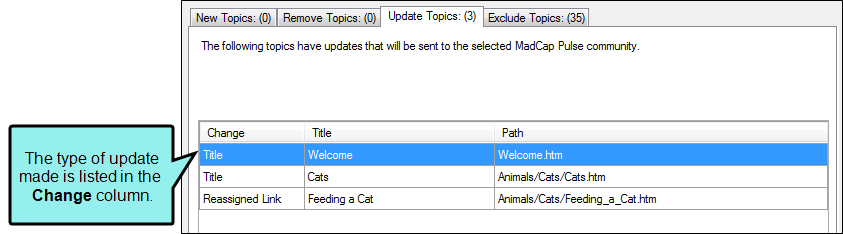
update topics tab
The Update Topics tab only lists community topic updates that specifically relate to Pulse mapping definitions. This includes topic updates such as title changes, reassigned links, and so on.

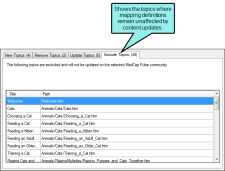
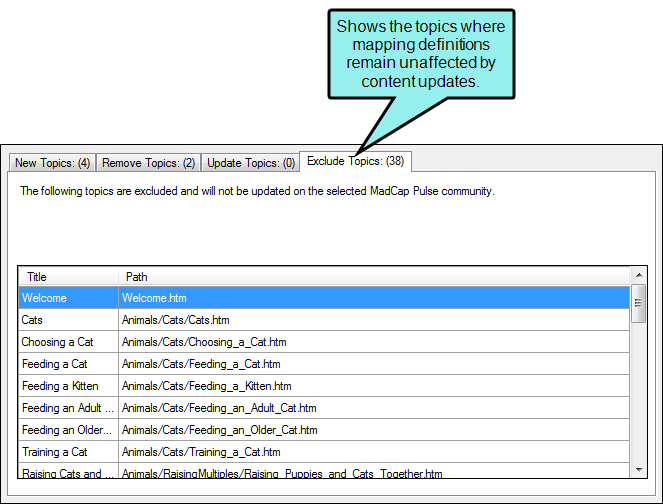
exclude topics tab
The Exclude Topics tab lists all topic files where Flare changes have no effect on the Pulse mapping definitions.
When finished, click OK. The community updated message appears.
- Review the topics in each tab and then reassign the links as desired. See below for instructions.
- When finished, click OK. The community updated message appears.
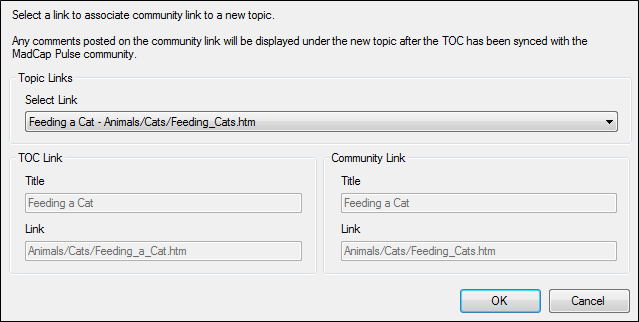
How to Reassign a Link
When you are preparing to publish content updates for a Flare target, there may occasionally be times when you want to reassign a link that is associated with a community topic. This lets you take the embedded discussion form associated with a topic and associate it with a different topic.
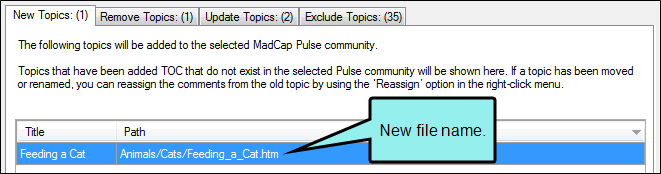
Example You have a topic with the file name, "Feeding_Cats.htm" and you decide to rename it, "Feeding_a_Cat.htm." When you make this change, the Remap Community Topics dialog will list this change in two places.
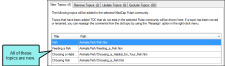
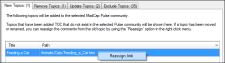
The New Topics tab will shown the new topic file name. If you click OK in the dialog, the system would add a new stream for the topic in the Pulse system:
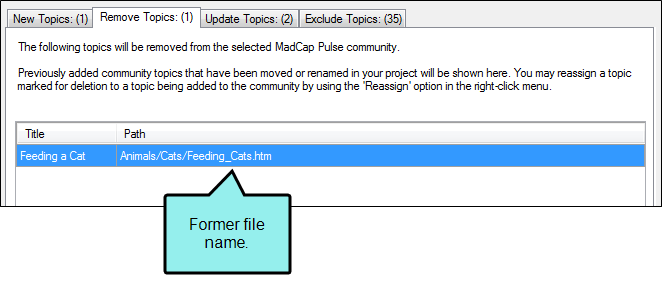
The Remove Topics tab will show the former file name. If you click OK in the dialog, the system would remove the corresponding stream for the topic in the Pulse system:
Instead of creating a new stream for the new topic named "Feeding_a_Cat.htm", let's say you want to keep the discussion from the existing stream associated with "Feeding_Cats.htm." You can reassign the link to tie the discussion with the old file name to the new file name.
- Make your content changes in Flare. Be sure to make all of the desired updates in the Flare TOC associated with your target.
- Open the Flare target.
- In the Target Editor, select the Analytics tab.
- Select the appropriate Flare community in the Community drop-down list.
-
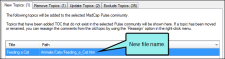
Click Remap Topics. This opens the Remap Community Topics dialog so you can review the updates. In this example, we've renamed a topic file from "Feeding_Cats.htm" to "Feeding_a_Cat.htm."
-
In the New Topic tab, right-click the new topic and select Reassign Link from the context menu.
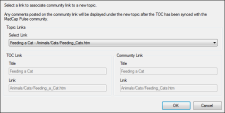
This opens the Reassign Community Link dialog.
-
From the Select Links drop-down list, select the desired topic. This will map the embedded discussion form for the selected link with the topic. In this example, we will select the topic formerly named, "Feeding_Cats.htm."
-
When finished, click OK. The community updated message appears.
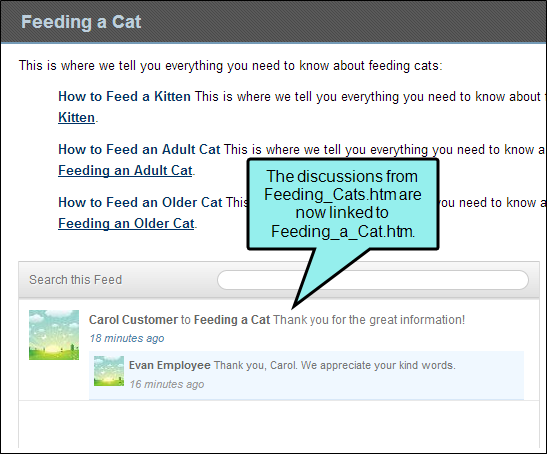
When you republish your Flare target, the discussion originally linked to the former file is now linked to the new file.

How to Verify the Community Topics in the Pulse System
To see the community topics that have been created for your Flare output:
-
Log in to the Pulse dashboard with an appropriate user account.
Note To access systems, you must be a member of the Administrators or Employees group.
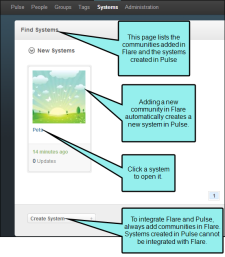
- In the menu bar, select Systems > Find Systems. The Find Systems page appears.
-
Under New Systems, click the Pulse system that corresponds to the appropriate Flare community.
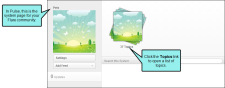
-
In the community page, click the Topics link.
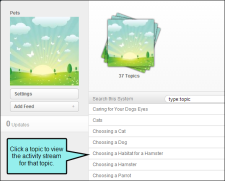
-
In the list of topics, click a topic. Any community activity for the topic will be reflected in the stream.


Enabling the Community Tab in the Output
You need to decide whether you want to include or exclude the Community tab with your published output. For HTML5 output, this can be done for Tripane skins only.
Below is an example of the Community tab:
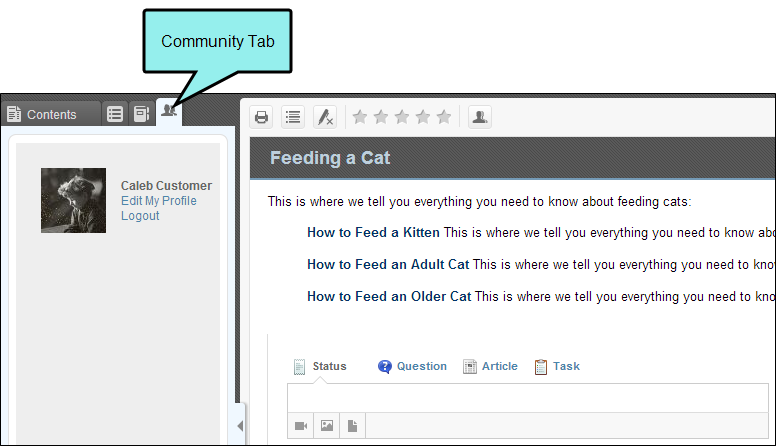
You can enable or disable this feature by editing the general features of the skin associated with the Flare target.
The benefits of including the Community tab in your output include:
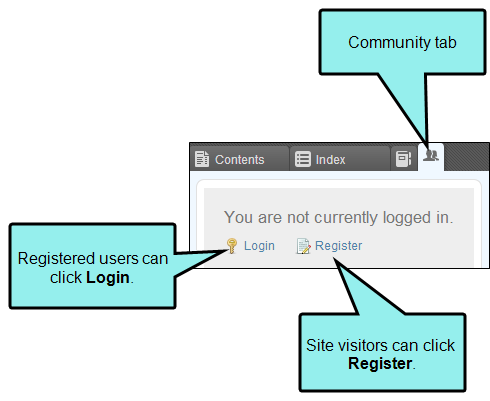
-
Gives site visitors the ability to register for a Pulse account. Also gives registered users the ability to log in to Pulse directly from the Flare output.

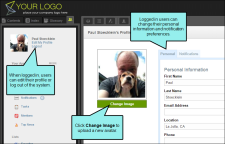
-
Gives registered users the ability to edit their profile, which includes changing their avatar image, updating personal information, and modifying notification preferences.

Note You cannot add a Community pane to Top Navigation or skinless HTML5 output, because those outputs do not use panes. However, registered users can open the dashboard in a browser and access some of the features that are normally available in the Community pane in the Flare output (depending on the access level).
How to Set the Community Options Using a Skin
- In the Project Organizer, open a Standard or HTML5 skin.
-
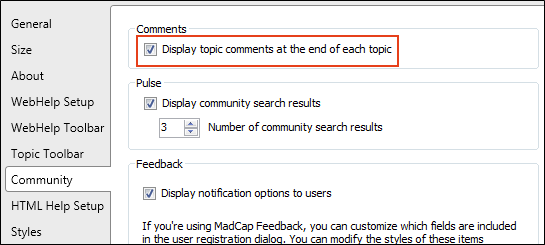
In the Skin Editor, click the Community tab. You have these options:
to display topic comments
If you want registered Pulse users to have the ability to post comments in the embedded discussion forms that Pulse includes at the bottom of the Flare topics, place a check mark in the Display topic comments at the end of each topic check box. This check box is selected by default.
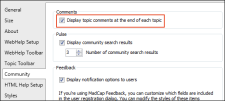
to display community search results
You can configure the Flare skin to give the Flare search engine the ability to index the Pulse system and return any community results when end users perform searches.
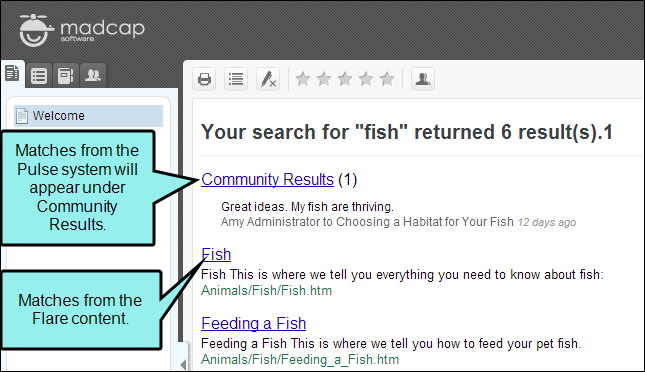
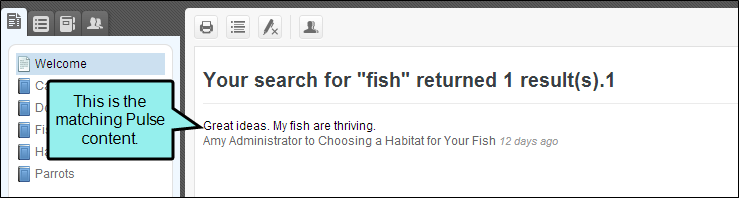
Example In HTML5 output, Pulse posts matching the search query are listed on the Search Results page under a Community Results link:

If a user clicks the Community Results link shown above, only the matching Pulse content appears in the results page:
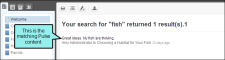
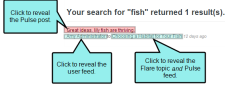
Users can then hover the mouse cursor over the content to reveal a links that open either the matching Pulse post, the matching Flare topic and the matching Pulse post, or the Pulse user feed.
This feature works similarly in WebHelp output.
to display search results
- Open a Standard or HTML5 skin.
- Click the Community tab.
- Place a check mark in the Display community search results box.
- (Optional) In the Number of community search results field, you can enter the number of community search results shown by default when a search is made in the output. The default number in this field is 3.
Note The Feedback area in the Community tab of the Skin Editor is only relevant to Feedback Server Admin. The Feedback option is not supported by Pulse.
- Click to save your work.

How to Set the Community Options (Display Comments) Using a Stylesheet
- Open the stylesheet.
- Find and select the html style or the appropriate class.
- In the Show filter field, select Alphabetical List.
- Find the mc-community-features property and set it to enabled or disabled. The default setting is "enabled."
- Click to save your work.
This stylesheet method can be especially useful if you only want some topics to display the comment area.
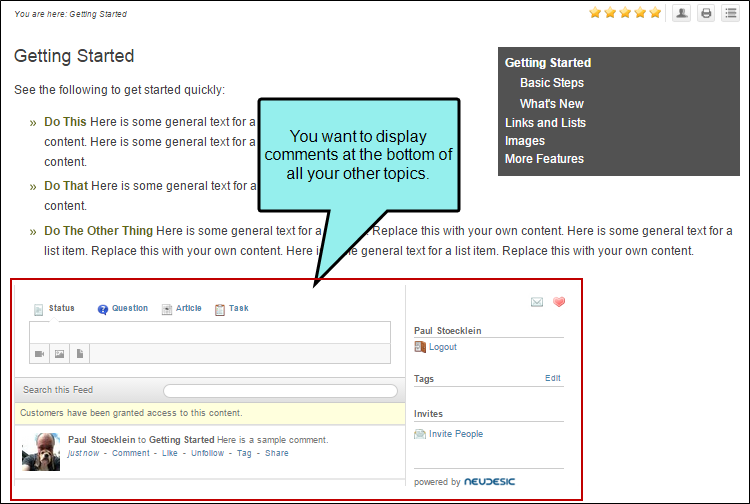
Example Let's say you create a Flare project and structure it in much the same way that some of Flare's project templates are structured. In other words, you have a main Home page that looks much different than the rest of your topics and serves primarily as a landing page with links, not to provide content. Therefore, you do not want the Pulse comment area to be displayed at the bottom of that topic.
However, you do want the comments to appear at the bottom of all of your other topics.
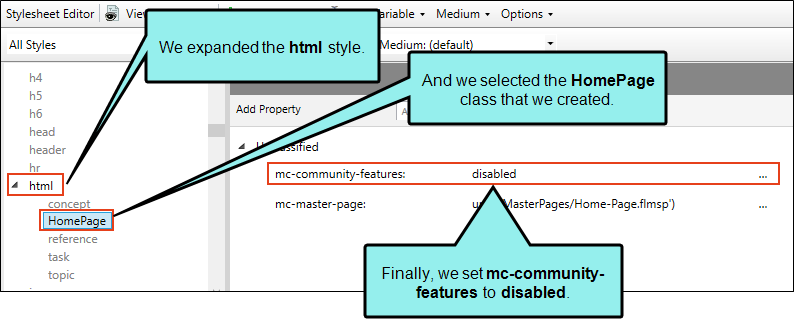
You have two stylesheets—one for the Home topic and another for all the other topics. So you open the stylesheet that is designated for the Home page and for a special html style class you've created (called "HomePage"), you set the mc-community-features property to disabled.
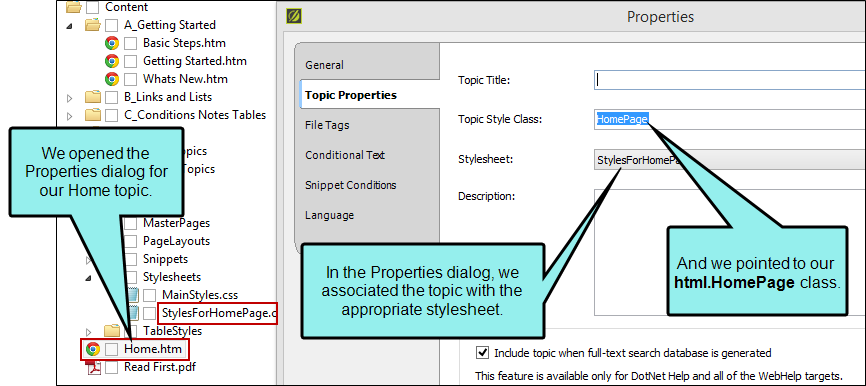
Then you open the Properties dialog for that Home topic. You associate the topic with the stylesheet and choose the HomePage style class.
As far as the other topics are concerned, they are using a different stylesheet. But you don't need to set the mc-community-features property in it, because the default setting is to enable the Pulse comments area. Therefore, the comment area will automatically be displayed. The only thing you need to do is make sure all of those topics are using the appropriate stylesheet.
Note If there is a discrepancy between the skin and the stylesheet setting (e.g., the skin is set to disabled and the CSS is set to enabled), the stylesheet setting has precedence.
Note Comments at the bottom of topics are not shown in tablet or mobile view. This is the same case for HTML5 Tripane output.
Note The comments area at the bottom of topics is wrapped in an iframe. Therefore, the output is technically not entirely frameless. However, because it is only the comments that are contained in the iframe, the main topic content still retains the benefits (e.g., better search results) of frameless output.
Styles for Generated Pulse and Search Topics
Sometimes your output may display content that is entirely auto-generated, rather than pulling content from one of your topics. This occurs when search results are displayed. It also occurs if your output is integrated with MadCap Pulse and a user clicks the Edit User Profile button, which then displays information on the Pulse home page, with no topic content shown.
Style Classes
For HTML5 Side and Top Navigation (and skinless outputs), you can add the following classes of the html style to control the look of these generated pages:
- pulseTopic This style class controls the look of a generated Pulse page (i.e., page opened via the Edit User Profile button).
- searchTopic This style class controls the look of a generated search results page.
- templateTopic This style class controls the look of all generated pages and has precedence over the other the pulseTopic and searchTopic classes.
See Creating Selectors.
Suggested Style Setting
If you include a side menu—via a Menu proxy—that is not context-sensitive, this menu may display on generated pages, not just in regular topics. This is probably something you want to avoid.
Therefore, to prevent this issue, you may want to copy the following to your stylesheet via the Internal Text Editor.
html.templateTopic div.sideContent
{
    display: none;
}
See Editing Styles in the Internal Text Editor and Internal Text Editor.
Note These styles are supported only in HTML5 Top Navigation and skinless outputs. They are not supported in HTML5 Tripane output.
Building and Publishing the Flare Output
Once you set up the community features, you can build and publish your Flare output.
When building the output, you may see a message that states, "Some community features will not be displayed in tablet and mobile outputs." This means that when users are viewing your responsive output on a tablet or phone