
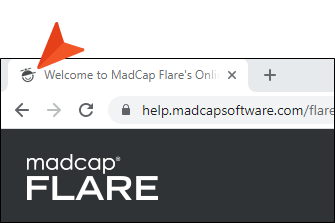
Short for “favorite icons,” favicons are supported in Flare for HTML5 output. A favicon is the image that you sometimes see in a browser tab, address bar, bookmark, Windows tiles, etc.
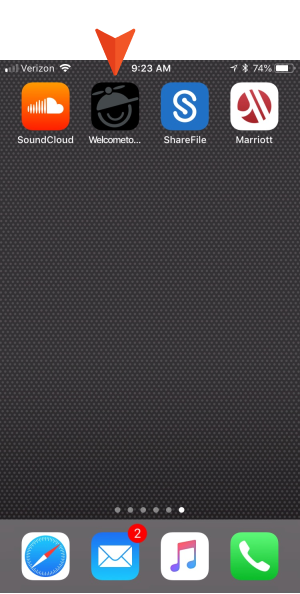
They can also be used on smart phones when a website is saved to the home screen.
There are several places in the output where a favicon image might display. Therefore, it is common to use different sizes of an image to satisfy each instance appropriately (e.g., small image used for bookmark but larger image used for Windows tile). Fortunately, Flare makes this easier by letting you select a large main favicon image; this image is then automatically resized for most of the different uses in the output.
To use custom favicons, you first need to add a new “Favicons” skin component to your project. Within this skin component, you can choose your image and other settings. The Favicons skin component is slightly different from the other kinds of skin components that can be added to a project in that it does not require a corresponding proxy. Instead, you simply create and edit the Favicons skin component and it will automatically be integrated with your HTML5 output.
[Menu Proxy — Headings — Online — Depth3 ]
How to Add a Favicons Skin Component to a Project
- In the Project Organizer, right-click on the Skins folder and from the context menu select Add Skin.
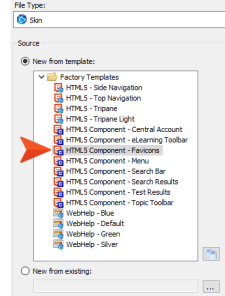
- In the File Type field at the top, make sure Skin is selected.
- In the Source area select New from template.
-
Under Factory Templates, select HTML5 Component - Favicons.
- (Optional) If you want to place the file into a subfolder previously created in the Content Explorer or Project Organizer, in the Folder field click
 and select the subfolder. Otherwise, keep the default location.
 - In the File Name field, type a new name for the skin component.
- (Optional) If you want to apply condition tags to the file, expand the Attributes section at the bottom of the dialog. Next to the Condition Tags field, click and select the conditions you want to apply.Click OK.
- (Optional) If you want to apply file tags, expand the Attributes section at the bottom of the dialog. Next to the File Tags field, click and select the file tags you want to apply. Click OK.
- Click Add. The skin component is added to the Skins folder in the Project Organizer. The Favicon Skin Editor opens to the right. Continue with the steps for editing the skin component.

How to Edit a Favicons Skin Component
- Open your skin component (if it is not already open).
-
In the Main Favicon field, click
 and select an image—PNG, JPG, or GIF. (ICO files cannot be selected for the main favicon, but you can select an ICO file to override the main favicon in certain fields below.)
Tip For best results, select a square image that is 558 pixels or larger. If you select a smaller image, it might not be automatically generated for some of the favicon uses shown in the Options sections of the Favicon Skin Editor.
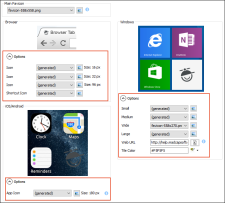
In the sections below, you can see the image has been added to the previews.
-
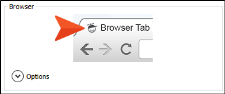
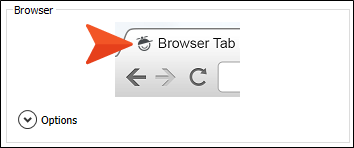
Browser This shows how the image will be shown when viewed in a standard web browser. The preview shows the image on a tab, but the image will appear in other places as well, such as next to bookmarked pages.
-
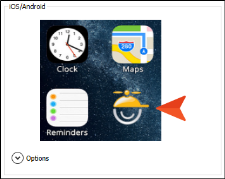
iOS/Android This shows how the image will be shown on iPhone and Android smart phone screens when a user adds a web page from your output to the home screen.
-
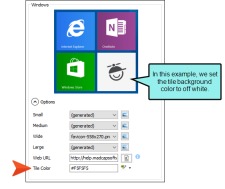
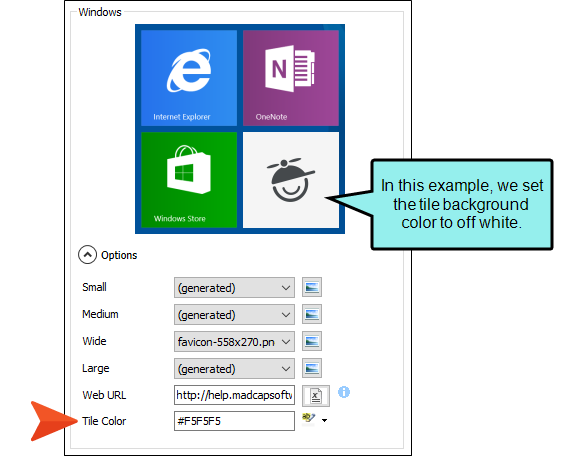
Windows This shows how the image will be shown in the tile format used in Windows 8 and Windows 10.

-
-
(Optional) Under the Browser, iOS/Android, and Windows sections, click Options.
Various fields are shown under each section. Notice that, depending on the size of the image that you added as the main favicon, “(generated)” is shown in many of the fields. This means that the main favicon image will be used for each of these fields and auto-sized as necessary.
Note If you see a warning icon
 next to a field, this means the main favicon was not auto-generated for that field. Hover over the warning icon to see the reason. You can then either select a main favicon of a different size, or you can select a different image for the field where the warning icon appears.
 - (Optional) In the Browser section, you can click to override the main favicon image for any of the fields, although most users will likely keep the generated image. The different sizes shown (16, 32, and 96 pixels) are necessary to be compatible with various types and versions of browsers on the market.
-
(Optional) In the iOS/Android section, you can click
to override the main favicon image with a different icon image (180 pixels). This will be shown when a user adds a shortcut to your output on the home screen.Note If you add an image that has a transparent background, iOS devices will replace the transparency with a black background. Also, images on iOS devices will have rounded borders. So keep this in mind when designing and choosing an image.
-
(Optional) In the Windows section, you can click
next to the Small, Medium, Wide, or Large fields to choose a different image for the tile design in Windows 8 and Windows 10.The Wide field will typically never be auto-generated from the main favicon, so you will need to choose a different image in this field if you want to provide a picture for that type of tile. That’s because the main favicon is square, whereas the Wide field requires a rectangular image. The recommended size is 558 pixels wide by 270 pixels high.
Note Windows 8 acts somewhat differently than Windows 10 in the way tiles are shown in the interface.
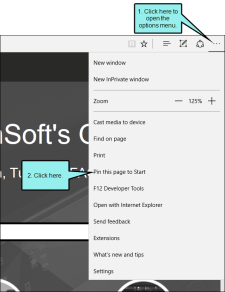
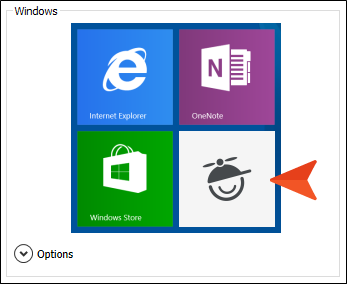
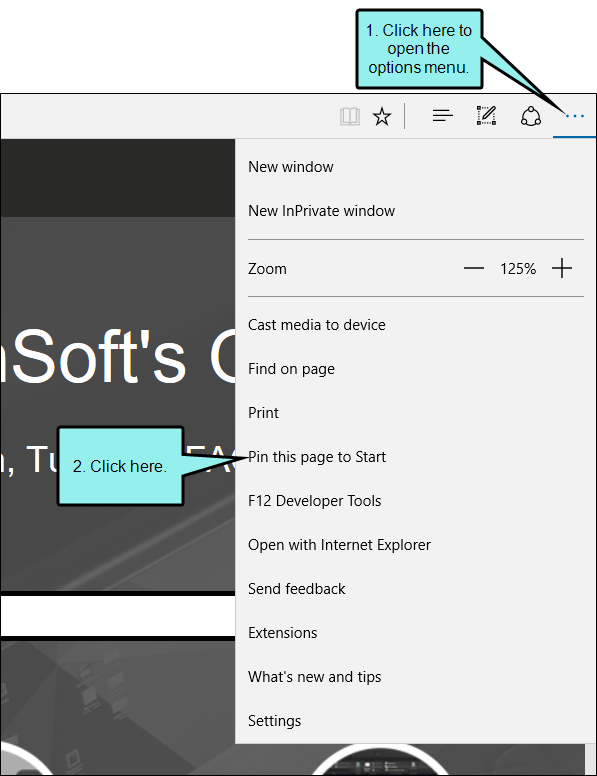
Example You are using Windows 10 and you open HTML5 output in a Microsoft Edge browser. You then open the options menu from the upper-right corner of the browser and select Pin this page to Start.
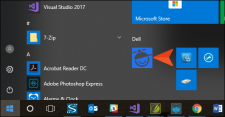
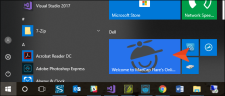
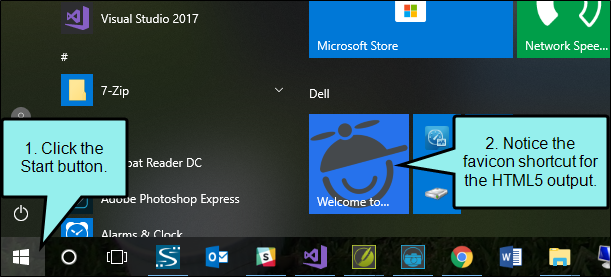
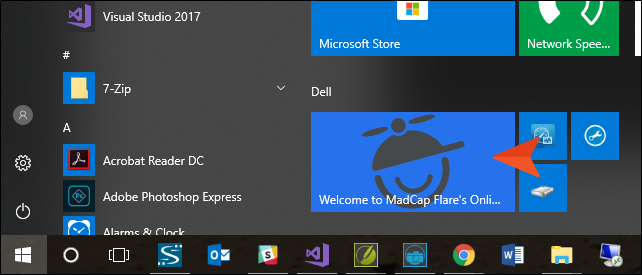
When you click the Start button in the lower-left corner of your screen, you see tiles for different kinds of shortcuts. If you scroll down to the bottom of the tiles, you will see the favicon for the HTML5 output that you pinned. Initially, you will see the medium-sized image.

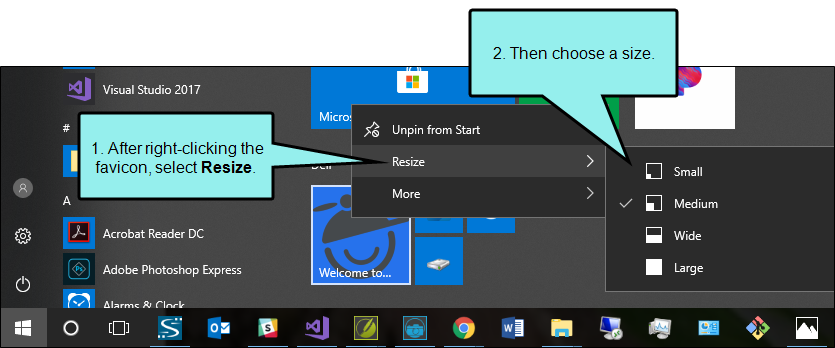
Next, you right-click this favicon and select Resize. From the menu, you can choose any of the other sizes (Small, Wide, Large).

If you select Small, the favicon will look something like this:
If you select Wide, the favicon will look something like this:
And if you select Large, the favicon will look something like this:

-
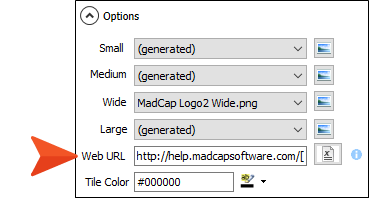
In the Web URL field, enter the path where your output will be published (e.g., http://mycompany.com/help/product/). Completing this field is necessary because Windows tile images are relative to the root location of your output. You can also click
 to insert a variable into the URL field.
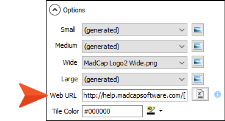
-
(Optional) In the Tile Color field, you can use the drop-down to the right to choose a background color for the tile displaying your favicon.
- Click
") to save your work.
to save your work.


Note Microsoft Edge does not support favicons unless the output is published to a web server.
Note If you generate the target from a MadCap Central license, any custom favicons that you have set will be overridden by the Central favicons.
What’s Next?
Many writers may only need one Favicons skin component for an entire project. This is true even if you have multiple targets. That’s because you can use a variable in the Web URL field (in the Windows section of the Favicons Skin Editor, under Options) in order to account for different publishing locations. However, if you find that you need to create multiple Favicons skin components for various targets, you can associate each skin component with the appropriate target on the Skin tab of the Target Editor.
