Following are the steps for creating a new Flare project using the Start New Project Wizard.
[Menu Proxy — Headings — Online — Depth3 ]
How to Create a Project
- On the Start Page click New Project. Alternatively, you can select File > New Project.
- Complete the fields on the first page of the wizard and click Next.
- Project name Enter a name for the project.
Project folder Keep the default location for the project, or click
 to select another.
Tip You might consider placing your project closer to your root C: drive, or perhaps within that drive itself. This shortens the paths to files, which might help prevent certain issues from arising where paths are too long.
Tip It is recommended that you always store your project locally, rather than on a network. Of course, there may be times when you need to place a copy of your project on a network (e.g., to use source control, or to make a copy available to a co-worker). But performance and speed should be significantly better if you work on a local copy of the project rather than working on it from a remote server.
- Language Select the primary language for the project.
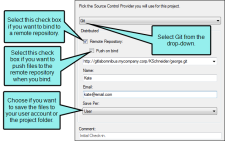
- (Optional) Bind to Source Control Select this if you want to integrate the new Flare project with a source control application
-
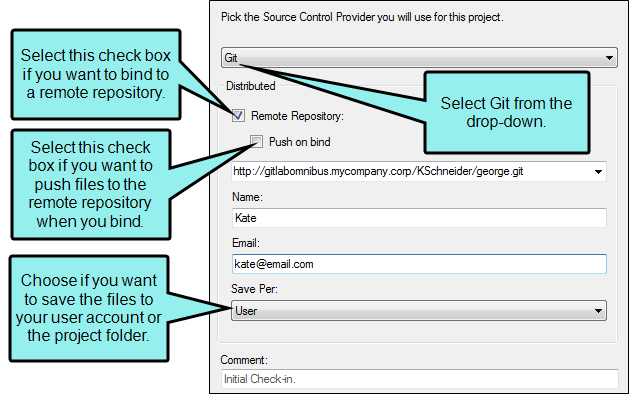
(Optional) If you selected the "Bind to Source Control" option, click Bind Project. In the Bind Project dialog, complete the fields, depending on the source control application being used. When you are finished, click Next.
-
From the drop-down, select Git.
-
If you are going to bind to a remote repository, select Remote Repository, then enter the address of the repository in the field. If you want to work locally, you can leave this box unselected. You can enter an HTTP URL or an SSH URL.
Note You may need to obtain this information from your system administrator.
- If you want to push to the remote repository when you bind the project, select the Push on bind check box. This will push the initial project files to the repository when you bind the project.
- In the Name field, enter your name.
- In the Email field, enter your email address.
-
From the Save Per drop-down, select how you want to save your files.
- User Saves the files in your local folder. Select this option if you are working with other tools (e.g., Tortoise) or if you want to use the same user identity across multiple projects.
- Project Saves the files locally to your project. Select this option if you want to use different identities for each project.
- (Optional) In the Comment field, you can enter any internal comments.
- In the Bind Project dialog, click OK.
- (Optional) If you entered an HTTP address, enter your user name and password in the Log In dialog. Click OK when you are finished.
-
(Optional) If you entered an SSH URL, the Certificate Specification dialog opens. In the dialog, do the following and click OK when you are finished:
- In the Public key field, enter your public SSH key, or use to browse for the key on your network.
- In the Private key field, enter your private SSH key, or use to browse for the key on your network.
-
If you want Flare to remember your key information so you do not need to enter it again later, select the check box next to Save certificate information.
Note SSH keys allow you to establish a secure connection between your computer and your Git source control provider (likewise, using an SSH URL is more secure than an HTTP URL; you need to use SSH keys if you want to use an SSH URL). If you do not have a public and private SSH key, your can generate these keys using your Git source control provider (e.g., Gitlab). Follow the directions provided by your source control provider to add these keys to your Git account. Once you generate these keys, they are typically found in the C:\Users\[username]\.ssh folder on your computer.
Public keys typically have a .pub extension. Private keys use the same file name as the public key, but without the file extension.
Example Use the following as guides when setting up your URLs and keys.
SSH URL
Copygit@gitlabomnibus.mycompany.corp:MyUserName/myproject.gitHTTP URL
Copyhttp://gitlabomnibus.mycompany.corp/MyUserName/myproject.gitSSH Private Key
CopymycompanySSHkey_id_rsaSSH Public Key
CopymycompanySSHkey_id_rsa.pub
- In the Public key field, enter your public SSH key, or use
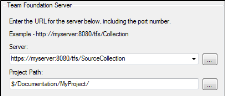
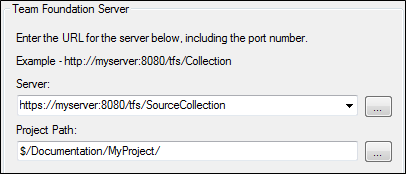
- From the drop-down, select Microsoft Team Foundation Server.
-
In the Server field, enter the name of the computer or the IP address of the server. You can also click
to select a "Team Project Collection." If you click this button, the Select Team Foundation Server Project Collection dialog opens, and you can do the following.- To add a server, click
 .
. - Enter the name or URL of the server.
- Enter the path and port number.
-
Select the protocol (HTTP or HTTPS).
Note If you are binding a Visual Studio Team Services repository to TFS, in the Server field, enter the URL of the project's "Default Collection."
Note You may need to obtain this information from your system administrator. Click OK in the dialogs until you return to the main wizard page.
Note Be sure to specify the path deeper than the server name. For example:
Copy.../tfs/DefaultCollectionor
Copy.../tfs/SourceCollectionIf you do not know this information, contact your system administrator.
Note If you run into issues in this dialog, chances are your user permissions do not have access to all of the collections on the TFS server or Visual Studio Team Services. Please try to enter in the server/collection path manually.
- To add a server, click
- Next to the Project Path field, click .
- Click on the Team Foundation Server folder to which you want to bind the Flare project.
- Click OK.
- (Optional) In the Comment field, you can enter any internal comments.
- (Optional) If you want the files in the project to be checked out when you are finished, click Keep files checked out.
- In the Bind Project dialog, click OK.
- From the drop-down, select Subversion.
- In the Server field, enter the IP address.
- Next to the Project Path field, click .
- Click on the Subversion folder to which you want to bind the Flare project.
- Click OK.
- (Optional) In the Comment field, you can enter any internal comments.
- In the Bind Project dialog, click OK.
- If the Log In dialog opens, complete the User name and Password fields and click OK. Copies of the Flare files are created and added to the folder you specified.
Perforce Helix Core
- From the drop-down, select Perforce Helix Core.
- In the Server field, enter the server address.
- Next to the User field, click .
- Select a user and click OK. (Users are set up separately in Perforce Helix Core.)
-
From the Type drop-down, select whether you want to bind to a stream or a depot. A depot contains multiple streams.
If You are Binding to a Stream
-
Next to the Stream field, click New.
If the Log In dialog opens, complete the User name and Password fields and click OK.
- From the Stream Type drop-down, select the type of stream you want to use. Most streams are mainline streams.
-
Next to the Streams Depot field, click Browse.
- Select a depot. This is essentially a folder or directory in Perforce Helix Core that contains multiple streams, one of which will be your Flare files.
- Click OK.
- (Optional) In the New Stream dialog, you can complete any of the other fields as necessary. For information about these fields, please refer to the documentation provided with Perforce Helix Core.
- Click OK.
If You are Binding to a Depot
-
Next to the Depot field, click New, or select an existing depot using the drop-down arrow.
If you clicked New, the New Depot dialog opens.
- In the Name field, enter a name for the depot.
- (Optional) In the Description field, enter a description for the depot.
- Click OK.
-
Next to the Path field, click
.If the Log In dialog opens, complete the User name and Password fields and click OK.
- Select the location where you want to bind the project.
- Click OK.
-
- (Optional) In the Comment field, you can enter any internal comments.
- (Optional) If you want the files in the project to be checked out when you are finished, click Keep files checked out.
- In the Bind Project dialog, click OK.
Note If you have elected to bind the project to source control but do not complete the source control fields, the Finish button in the wizard is disabled.
-
-
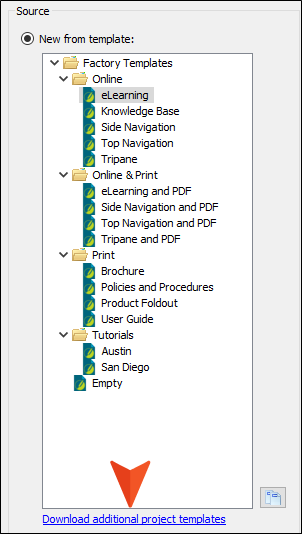
Select a template using one of the three options—(1) new from template, (2) new from existing, (3) new from import—and click Next.
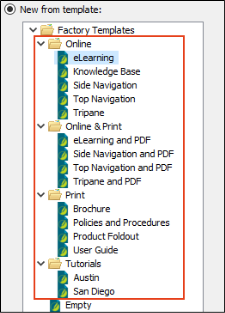
New From Template
Choose either a factory template file or one of your own custom template files as a starting point. The new file will take on all of the settings contained in the template. If you want to use the factory template provided by Flare, expand the Factory Templates folder and click on a template file. If you want to use your own custom template file, expand the appropriate folder and click on a file.
Flare's factory templates are organized into the following folders:
- Online These templates were designed for online output only (although you can always add print-based outputs later).
- Online & Print These templates were designed to generate both online and print-based outputs from the same content.
- Print These templates were designed for print-based output only (although you can always add online outputs later).
- Tutorials This folder contains templates intended to be used with various Flare Tutorials.
Online Templates
Template
Characteristics
eLearning

- Contains starter topics and other files designed for an eLearning course in HTML5 format. You can quickly generate a course with simple knowledge checks, another with a gradable quiz, or a combination.
- Lets you integrate course output with an external learning management system (LMS) for tracking results; supports SCORM and x-API.
- Includes responsive output, which means the content display changes automatically depending on the width of the screen.
Knowledge Base

- Contains starter topics and other files designed for an online knowledge base in HTML5 format. If you intend to use Flare to generate an online knowledge base, this project demonstrates one approach you may consider.
- Includes responsive output, which means the content display changes automatically depending on the width of the screen.
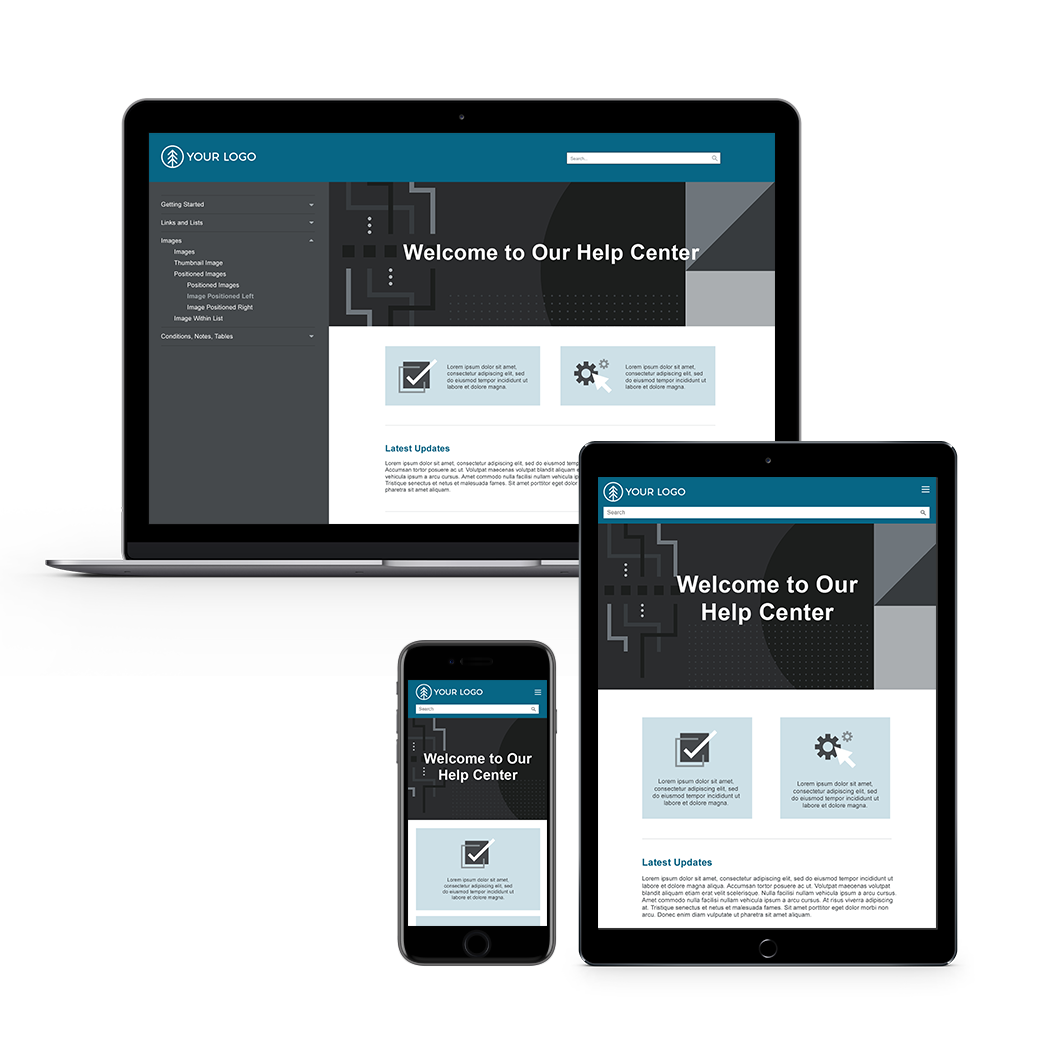
Side Navigation

- Contains starter topics and other files intended for online HTML5 output that looks like a modern website with navigation on the side (left or right).
- Offers a frameless, modern alternative to the more traditional tripane format.
- Includes responsive output, which means the content display changes automatically depending on the width of the screen.
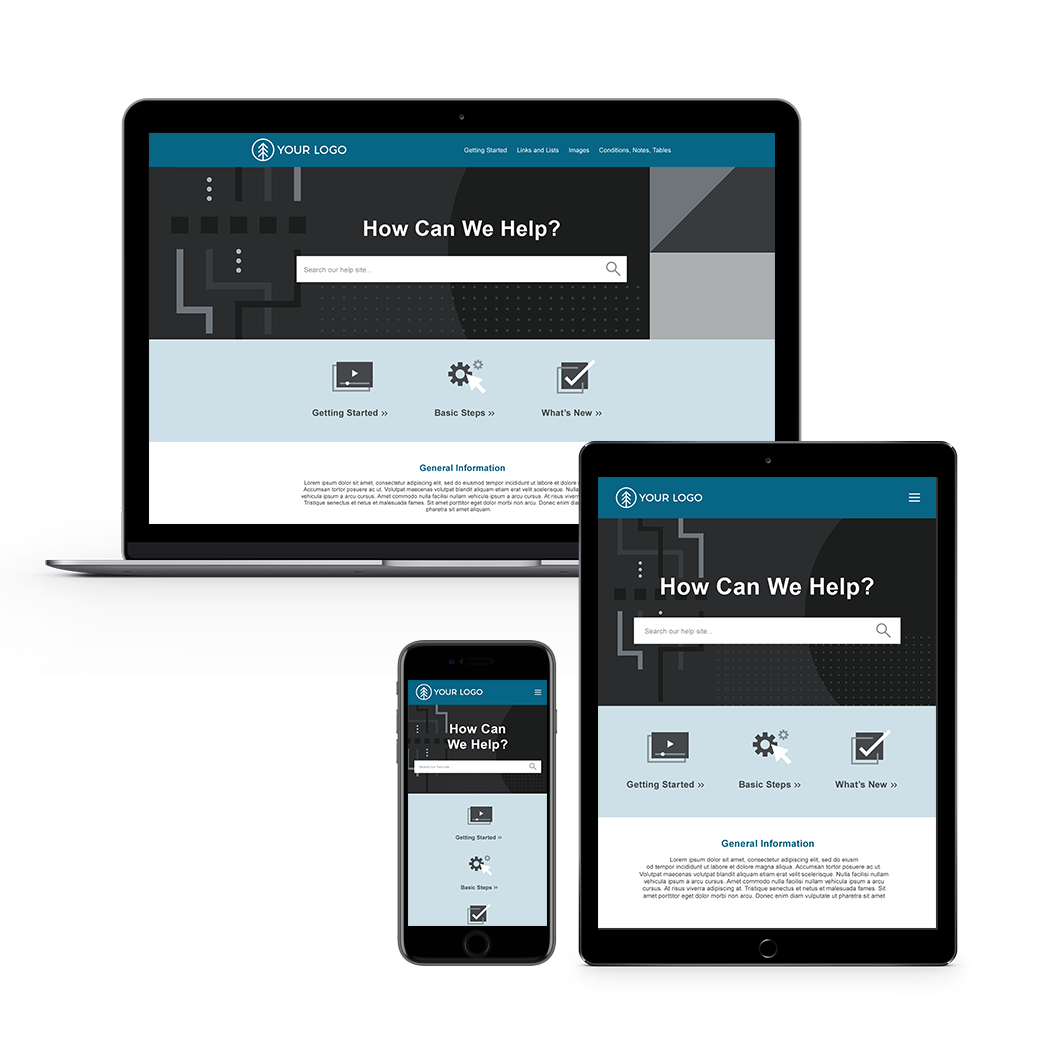
Top Navigation

- Contains starter topics and other files intended for online HTML5 output that looks like a modern website with navigation on the top.
- Offers a frameless, modern alternative to the more traditional tripane format.
- Includes responsive output, which means the content display changes automatically depending on the width of the screen.
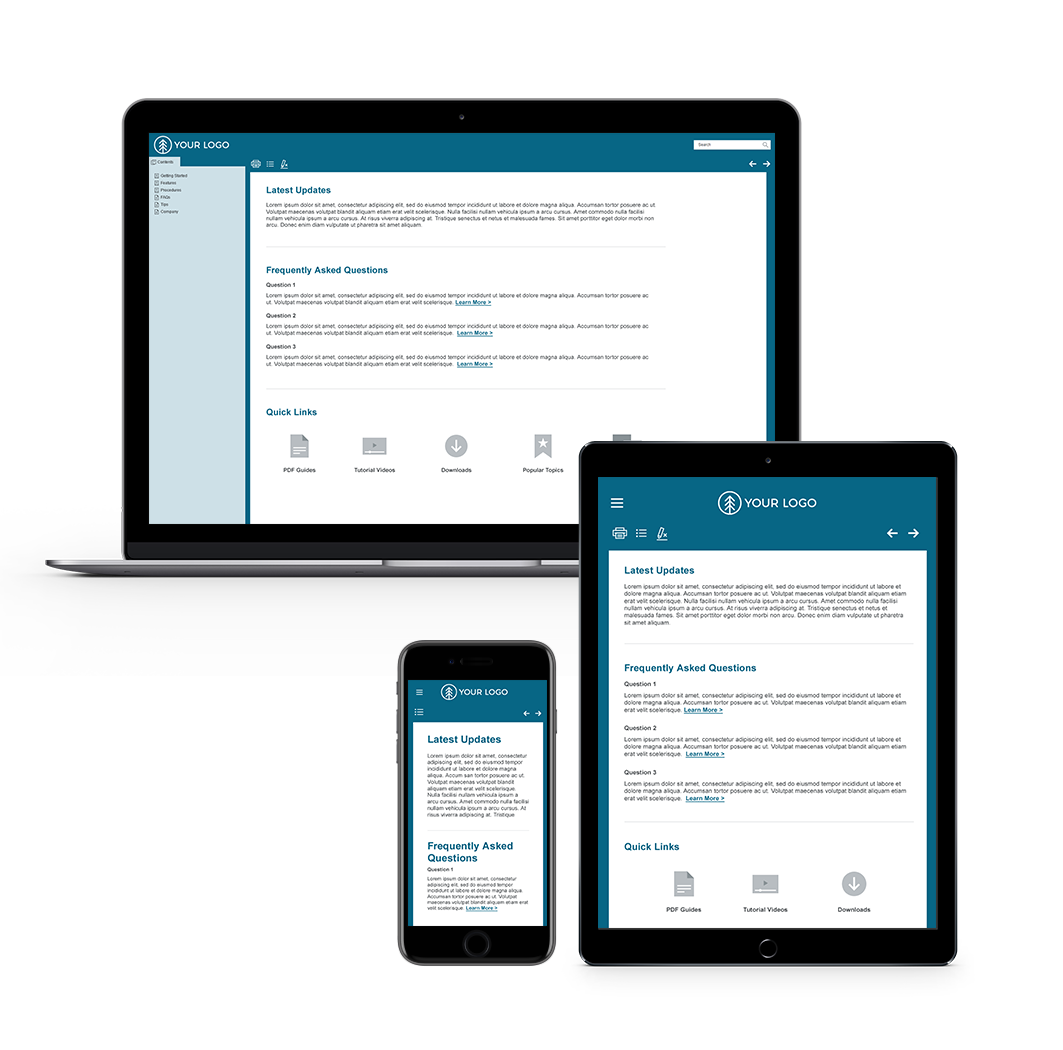
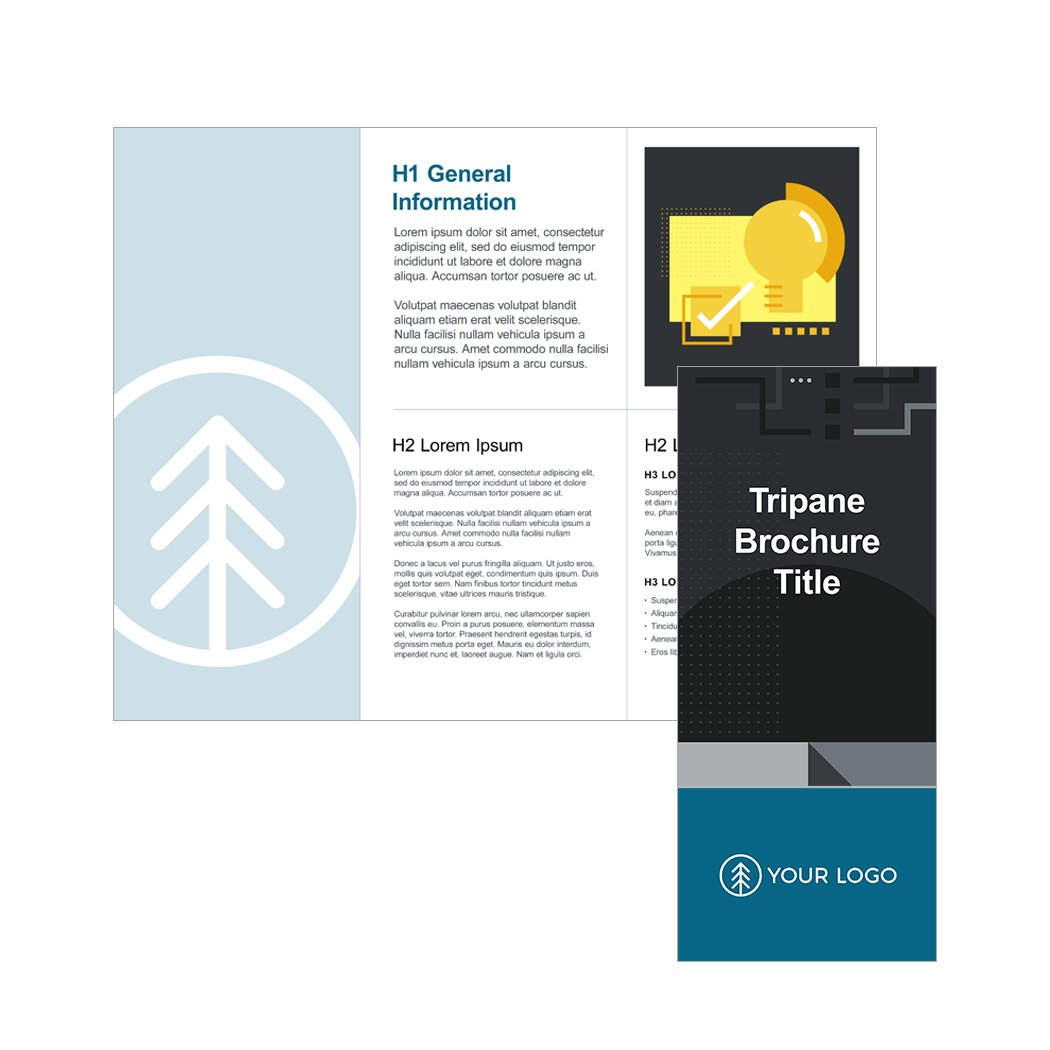
Tripane
- Contains starter topics and other files intended for online HTML5 output in a traditional tripane format (navigation pane, toolbar pane, content pane).
- Includes responsive output, which means the content display changes automatically depending on the width of the screen.
Online and Print Templates
Template
Characteristics
eLearning and PDF

- Contains starter topics and other files designed for an eLearning course in HTML5 format. You can quickly generate a course with simple knowledge checks, another with a gradable quiz, or a combination.
- Lets you integrate course output with an external learning management system (LMS) for tracking results; supports SCORM and x-API.
- Online HTML5 output allows for interactivity in learning blocks (e.g., selecting answers, viewing feedback and test results). Includes responsive output, which means the content display changes automatically depending on the width of the screen.
- PDF output allows for distribution of a print version of the course, with a one-click option to show or hide answers in the output.
Side Navigation and PDF

- Contains starter topics and other files intended for both online and print-based output.
- Online HTML5 output looks like a modern website with navigation on the side (left or right). Offers a frameless, modern alternative to the more traditional tripane format. Includes responsive output, which means the content display changes automatically depending on the width of the screen.
- PDF output is a user guide that includes auto-generation of a TOC, glossary, and index.
Top Navigation and PDF

- Contains starter topics and other files intended for both online and print-based output.
- Online HTML5 output looks like a modern website with navigation on the top. Offers a frameless, modern alternative to the more traditional tripane format. Includes responsive output, which means the content display changes automatically depending on the width of the screen.
- PDF output is a user guide that includes auto-generation of a TOC, glossary, and index.
Tripane and PDF

- Contains starter topics and other files intended for both online and print-based output.
- Online HTML5 output uses a traditional tripane format (navigation pane, toolbar pane, content pane). Includes responsive output, which means the content display changes automatically depending on the width of the screen.
- PDF output is a user guide that includes auto-generation of a TOC, glossary, and index.
Print Templates
Template
Characteristics
Brochure
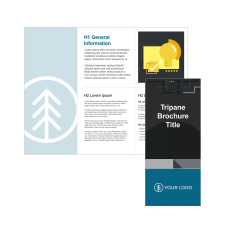
- Contains two topics and two page layouts designed to create a brochure with three panes.
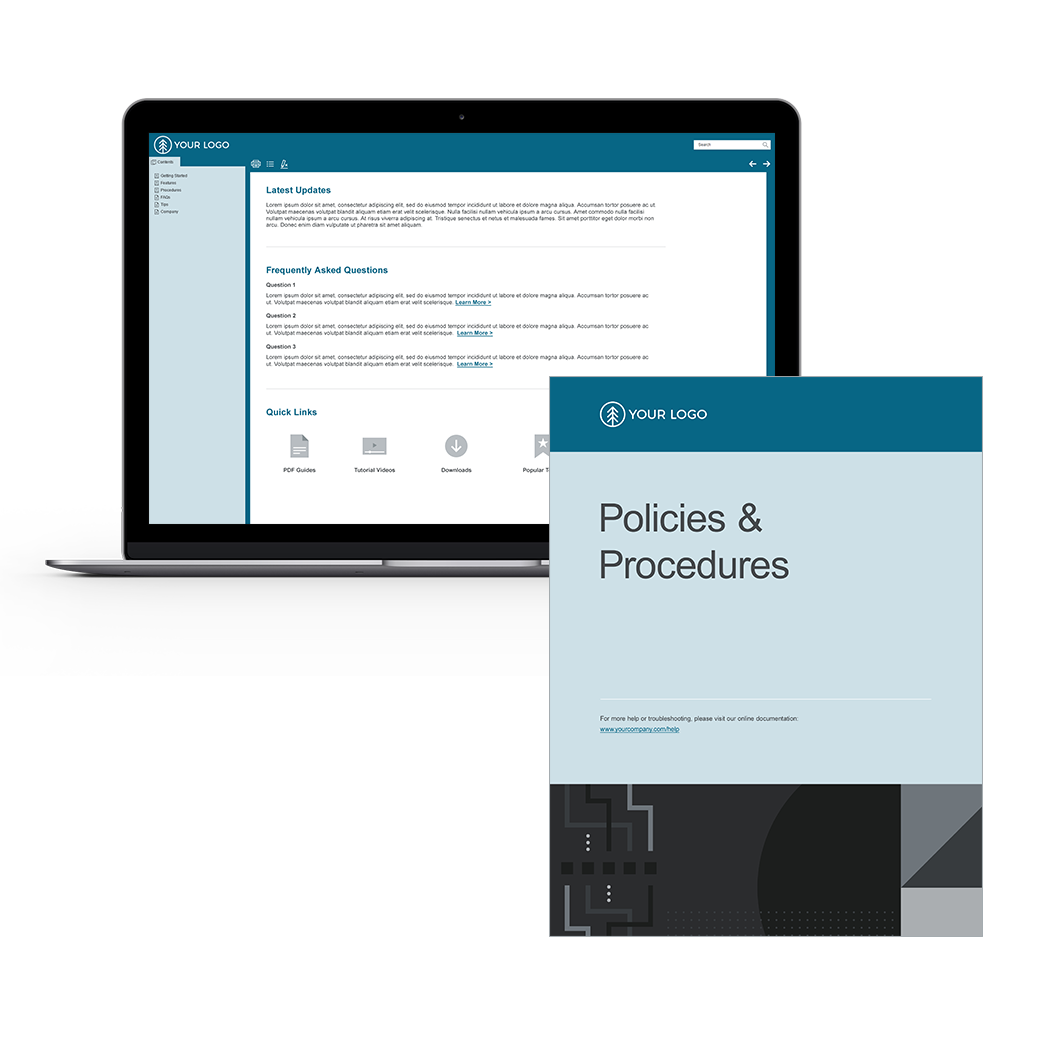
Policies and Procedures

- Contains starter topics and other files designed to produce a policies and procedures manual in PDF format.
- Includes content and variables that you can re-use.
- Includes auto-generation of a TOC and index.
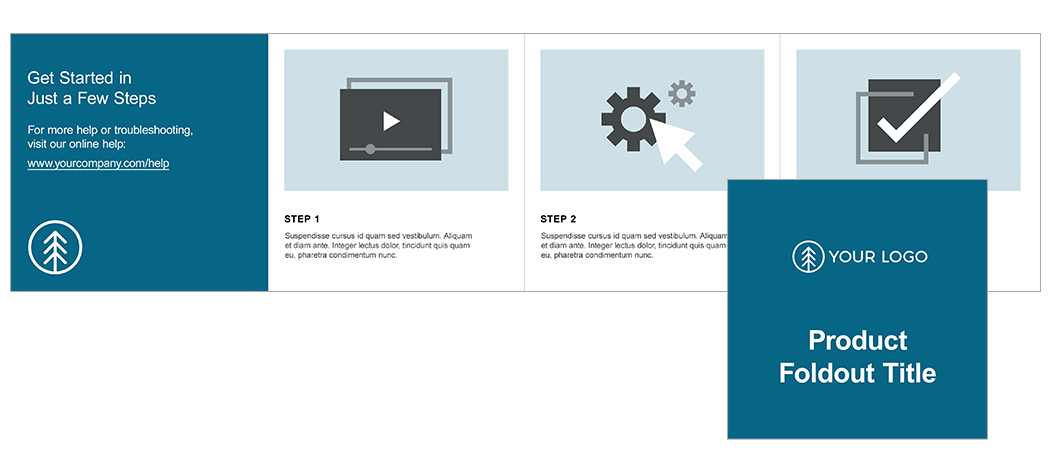
Product Foldout
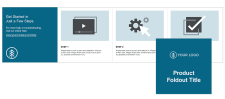
- Contains two topics and two page layouts designed to create a four-pane PDF product foldout.
- Ideal for brief product instructions.
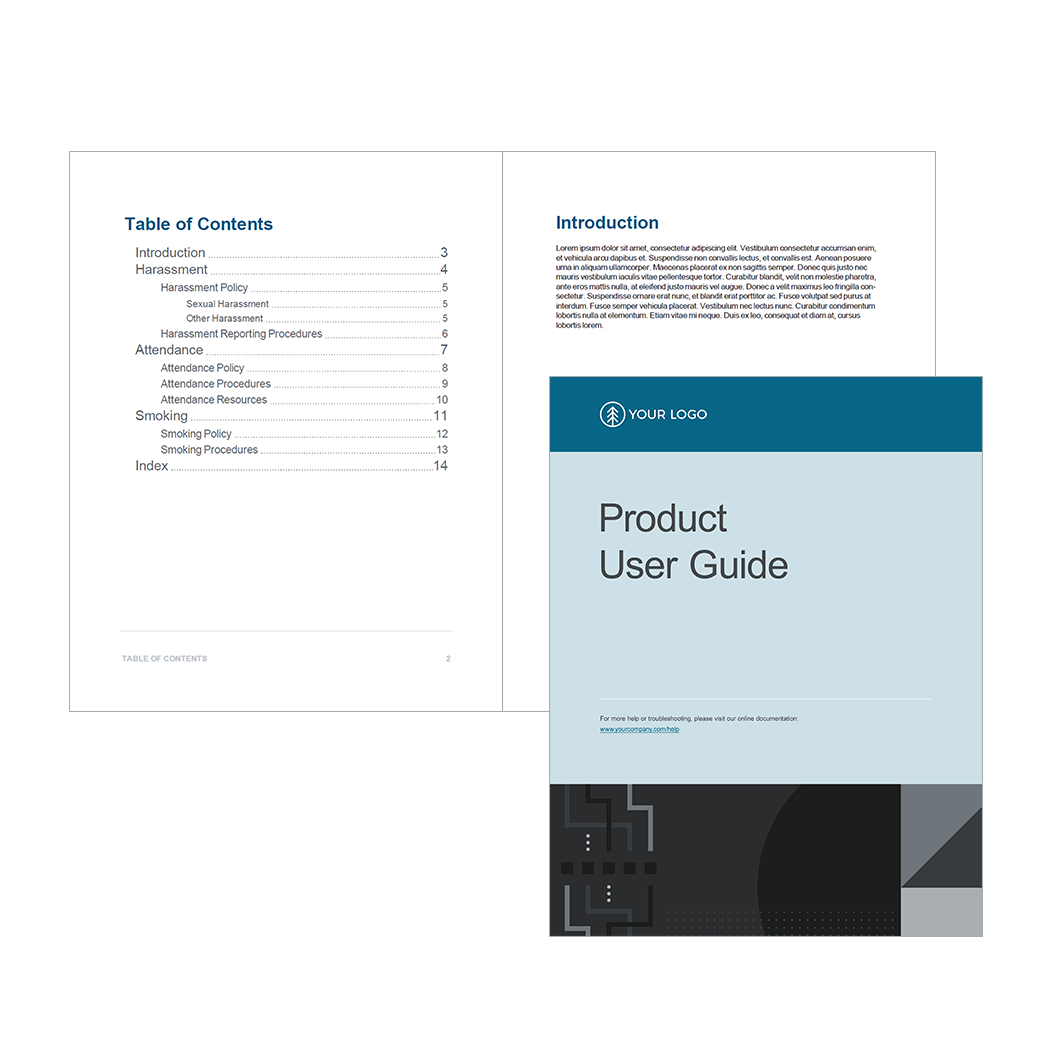
User Guide
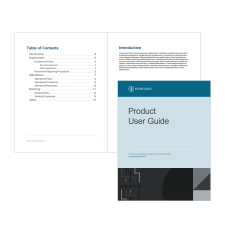
- Contains starter topics and other files designed to produce a user guide in PDF format.
-
Includes auto-generation of a TOC, glossary, and index.
Tutorial Templates
Template
Characteristics
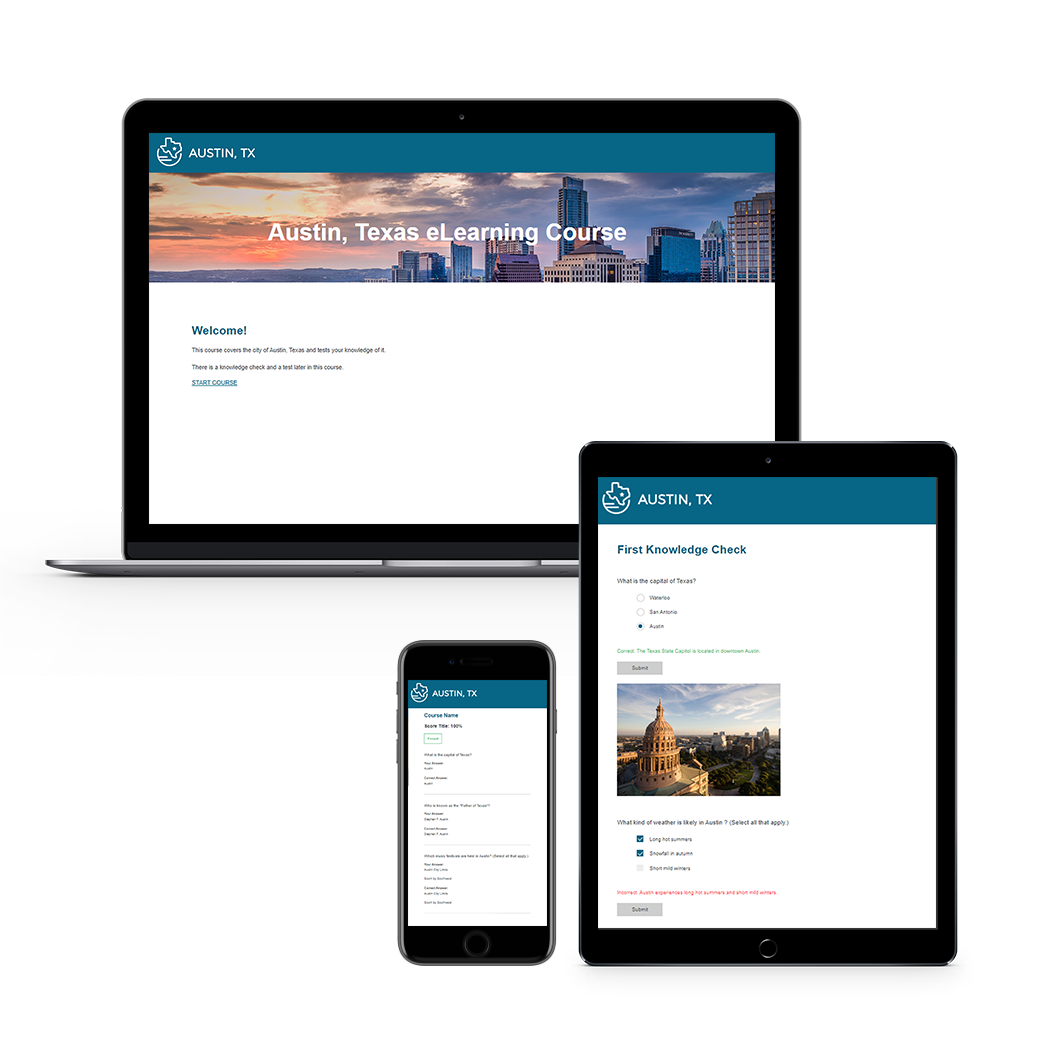
Austin

- Designed to be used alongside various feature tutorials
- Tutorials help you in the creation of Flare features, such as micro content, context-sensitive Help, snippet conditions, and more.
San Diego

- Designed to be used alongside self-paced Getting Started tutorial
- Tutorial gives you hands-on experience in Flare, guiding you in the basic steps for creating, developing, and building output.
- End result is a PDF guide and online HTML5 output with top navigation like a modern website, instead of the more traditional tripane format.
Downloading Additional Project Templates
If you want to use one of the many other templates available from the MadCap Software website (including older ones that once were available in this wizard), you can click a link to browse the templates and download them.

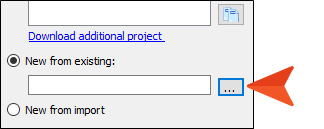
After downloading a project template, you can unzip it and save it to a location on your computer. Then, next to New from existing, click
and select that project’s main .flprj file.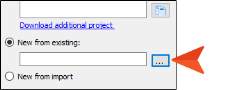
New From Existing
You can use this option if you already have a Flare project that you want to use as the basis for your new project. Click
, use the Open File dialog to find a Flare project file (FLPRJ), and double-click it.New From Import
You can choose legacy files (e.g., Word, Excel, FrameMaker, HTML, DITA, HTML Help, RoboHelp) to import. If you select this option and click Next, a list of import options is displayed. You can select the file type, click Next again, and complete the options in the new wizard that opens, instead of completing the rest of the Start New Project Wizard.
-
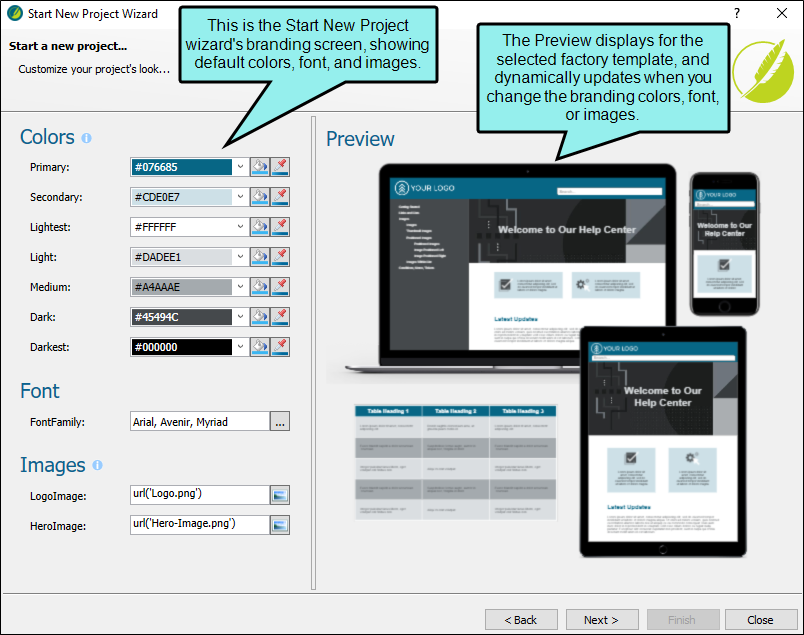
(Optional) Depending on the template selected, choose branding colors, a font family, logo, and hero image to apply to your project. This will give your project a custom look and feel from the start. These options can be changed later in the Branding Editor.
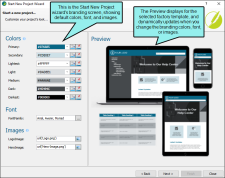
Note If you use a factory template or a custom preview project template, the branding page displays. If you select files from a New from existing or a New from import source, the branding screen will be bypassed.
Note The field selection for the branding screen in the wizard might change slightly depending on the factory template chosen.
-
Select the primary target for your project and click Finish. The targets listed in the drop-down are limited to the those found in the template you selected.
A target is a file that generates output from your project. You want your output to look and behave in a certain way, but not all authors have the same audience or work for the same company with the same needs and the same computer networking setup. Therefore, Flare lets you choose the best type of output(s) for your needs. A target file is used for each instance of an output type. And you can have many targets in your project (e.g., eight targets using PDF, two targets using HTML5).
This page of the wizard lets you select a primary target as you get your project off the ground. This means that—although you can use more than one target for your project—you might use one target most of the time. By selecting a primary target, you will be able to use shortcut buttons to build, view, and publish its output more quickly. Also, when you open topics in the XML Editor, they will be displayed by default with the styles and other specifications associated with the primary target. However, you can use the Layout and Medium drop-downs in the local toolbar of the XML Editor to view topics with other settings.
Do not worry if you're not yet sure of the best output type for your project. No matter which output type you select now, you can always change the primary target later.


What's Next?
Now that the project is created, you can move on to any of the other basic steps.
- Step 2: Adding Content and Features
- Step 3: Designing
- Step 4: Developing Targets
- Step 5: Building and Publishing Output
If you want to produce eLearning content, also refer to Learning and Development for more information.
Note You do not necessarily need to follow all of the above steps (and their substeps) in the exact order given. For example, as you add topics to a project, you may want to start applying styles and formatting to them right away, before adding other features to the project, such as a glossary. However, the above sequence probably makes the most overall logical sense. For example, you must start a project before adding content and features (i.e., topics, content, cross-references, etc.) to it.


