After you clean up your source files and import into Flare, you may need to clean up or re-create certain elements.
[Menu Proxy — Headings — Online — Depth3 ]
Set Up Your Page Layouts
Master pages from FrameMaker are not converted in Flare. You need to re-create them as page layouts. The good news is that page layouts are more flexible than master pages in FrameMaker. For example, FrameMaker master pages do not allow different sized pages in the same file.
Flare lets you have many pages defined in page layouts, and they can be different sizes. For example, this lets you have an 8 x 11 page layout that includes an 11 x 14 page, which allows for the fold-out schematic that you need in the middle of a chapter.
You can also have multiple sets of page layouts, something that FrameMaker does not allow. This lets you define one set of page layouts for the 8 x 11 PDF book that you put on your website for customers to download. You can also define 7 x 9 page layouts for the book you will send to the printer that needs to fit in the product box.
Reference Pages
There are no equivalents to reference pages in Flare. The formatting and other tasks you are used to performing are done in the Stylesheet Editor, the Page Layout Editor, or both.
Organize Your Files
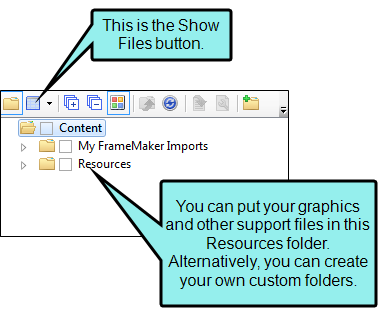
After you import, any graphics in your FrameMaker files are put in the same folder as your converted FrameMaker files. This looks messy and probably isn't what you wanted. You can easily fix this.
In the Content Explorer, click the Show Files button  .
.
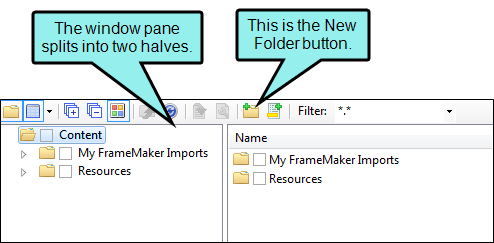
After you click the Show Files button, a two-pane view opens. You can expand your folders or create a new folder by clicking the New Folder button  .
.
On the right side, select one or more files you want to move. Drag them to the folder on the left where you want to store them. The Resources\Images folder is the default location for new images that you create in Flare, so you may want to drag all of your graphic files to that folder (you may need to manually create the "Images" subfolder first). All of the standard Windows multi-select options are available.
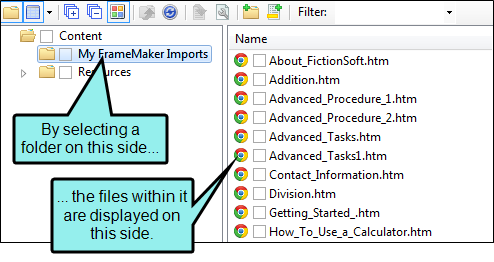
You are prompted to update links when the files are moved. Make sure you click Update so that Flare knows where these files have been moved to and how to find them.
For more information see Creating Subfolders.
Move and Resize Your Graphics
Your graphics came through but, as with any conversion, there will be some tweaking to get them placed exactly where you want them, especially if your graphics were in the left margins in FrameMaker.
There are no anchored frames in Flare. To select a graphic, right-click it and choose Select. You can also right-click the image and select Image Properties to format and position the graphic the way you want it; you can also right-click and use the Text Wrap context menu and position images absolutely by dragging them around.
Reuse Your Stylesheet in the Next Project
The next time you need to import another FrameMaker project, all the time and work you put into perfecting your stylesheet will pay off.
During your next import process, browse and select the stylesheet you already like. This reduces all the effort in defining and mapping styles. All you have to do is map styles and account for any new FrameMaker formats not mapped or created in your stylesheet.
Reuse Your Import File
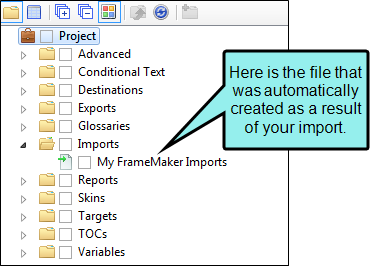
When you finish importing FrameMaker documents, an import file is created and stored in the Project Organizer in Flare. This file contains all of the settings ("rules") that you entered in the Import FrameMaker Wizard when you imported the documents. If you need to reimport the files, you can simply open this file so that you don't have to redo all of your settings. You can also make copies of this file and tweak it for importing other FrameMaker books and files (i.e., remove selected files from the Source Files list and add other files that you want to import with the same rules).
What’s Next?
Now that you've completed the first step (creating a project), you can add more topics, create snippets, develop tables of contents, edit targets, and work your way through all of the other steps that are part of producing online and/or print-based output.

