The Stylesheet Editor is used to modify styles contained in regular stylesheets. For special table stylesheets, you will use the Table Style Editor. However, you can also use the Stylesheet Editor to modify standard table tags (e.g., th, td) that are contained within a regular stylesheet.
Note Working in the Stylesheet Editor or Style Inspector is supported only for HTM and MCDOC file types in Contributor.
[Menu Proxy — Headings — Online — Depth3 ]
How to Open This Editor
- Open a document that you created (not using a contribution template).
- In the menus view, select Tools > Edit Stylesheet.
Two Views
There are two views available in the Stylesheet Editor: Simplified and Advanced. You can toggle between these two views by clicking  or
or  in the local toolbar of the editor.
-
Simplified The Simplified view displays styles in a grid view and is often best for brand new users.
This view provides an easy way to apply properties to styles, with format options available from a toolbar and dialogs (similar to the way one would use an interface such as Microsoft Word). In some cases, only the most common property options are available in the Simplified view (e.g., font, letter/word spacing, paragraph alignment/indentation, autonumbering format, borders, background). One advantage of the Simplified view is that you can apply a property to multiple styles at the same time. You can also click a check box to hide the properties in the editor, allowing you to see only the styles.
-
Advanced The Advanced view displays styles in a tree structure, and despite the name, is user friendly for authors of all levels.
For the properties, you can toggle between a grouped display and an alphabetical display. The Advanced view of the Stylesheet Editor lets you edit more settings than are available in the Simplified view. In addition, the Advanced view lets you see and apply settings to multiple mediums and media queries at the same time.
What You Can Do in This Editor
You can accomplish many things in this editor. Some of the primary tasks that you can perform are listed below:
- Comments (Add) If you are familiar with using cascading stylesheets (CSS) in a text editor, you probably already know that you can add comments to styles. This is simply a way to remind you or others about information related to a style (e.g., which situations are appropriate to use a certain style). In Contributor you can add, edit, and view these style comments through the user interface. See Adding Comments to Styles.
- CSS Variables (Create/Insert/Edit) A CSS variable lets you place the value for a style in one place and reuse it throughout a stylesheet. As with other kinds of single-sourcing, this can help with speed, ease of use, and consistency. Whenever you want to change the value, you only need to do so in one place and the new value is propagated everywhere that the variable is referenced. You certainly could use the "find and replace" feature instead to change the value, but CSS variables are preferred because you won’t need to worry about inconsistencies in your stylesheet. For example, some values—such as colors—can be written in various ways, so in those cases CSS variables make a lot of sense. See CSS Variables, Creating CSS Variables, Inserting CSS Variables, and Editing CSS Variables.
- Media Queries (Create) A media query is an alternative group of settings in a stylesheet. These settings are automatically used under certain conditions, such as when a screen of a certain size is displaying the output. Media queries are able to do this because they are configured with specific criteria (e.g., maximum width of the screen, orientation, resolution). When the criteria are met, the style settings in the media query are used to display the output. See Creating Media Queries.
- Mediums (Create) A medium is an alternative group of settings in a stylesheet and can be very useful when you are generating multiple kinds of outputs. See Creating Mediums.
- Selectors (Create) A selector is a way to associate XHTML content with style settings based on various information—most often its type, class, or ID. Sometimes the word "selector" is used interchangeably with the term "style," but a selector can be much more than just a simple style. When you create a new stylesheet, it already has many selectors in it. If necessary, you can create new selectors of varying levels of complexity. See Creating Selectors.
- Selectors (Rename) You can rename a selector (e.g., class, ID) after you have created it. However, you cannot rename existing parent styles, such as p, h1, or span. See Renaming Selectors.
- Styles (Disable) You cannot remove root styles provided by Contributor. However, you can prevent certain styles from being shown in the Stylesheet Editor and in the Contributor interface. Rather than being overwhelmed with the sight of all styles in the stylesheet, you can ensure that you see only the styles that you tend to use. Those styles will not be removed from the stylesheet; they will simply be hidden until you enable them. See Disabling and Hiding Styles.
- Styles (Edit) After you create a new regular stylesheet, you can edit the styles within it. See Editing Styles.
- Styles (Import) You can manually create new style classes in a stylesheet. Another option is to import existing styles from another stylesheet. See Importing Styles.
Why are Some Styles Gray?
When making changes to styles in the Advanced view of the Stylesheet Editor, you may notice that some styles are gray. These are called "inherited" styles. That's because they do not yet have explicit settings on them, so they are inheriting default values from somewhere else (e.g., a factory stylesheet located where you installed the application). As soon as you make a change to one of these styles, it ceases to be an inherited style (or at least the property you set is no longer inheriting from the default value), and the style name turns from gray to a darker font. You can click Hide Inherited in the local toolbar if you want to hide these inherited styles.
Also, if you hover over an inherited style, Contributor displays the path to the stylesheet from which the style is inherited.
Local Toolbar
|
|
Toggles between an Advanced view and a Simplified view of the Stylesheet Editor. |
|
|
Opens the New Selector dialog opens, which lets you create a new selectors of varying levels of complexity. See Creating Selectors. A selector is a way to associate XHTML content with style settings based on various information—most often its type, class, or ID. Sometimes the word "selector" is used interchangeably with the term "style," but a selector can be much more than just a simple style. |
|
|
Lets you rename a selector (e.g., class, ID). See Renaming Selectors. |
|
|
Opens a menu, which lets you add a new CSS variable or insert an existing one into a property. See CSS Variables, Creating CSS Variables, and Inserting CSS Variables. |
|
|
Opens a submenu that lets you select from the following options:
|


Advanced View
|
[Styles] |
You can use this field to filter which types of styles to show in the area below.
|
|
Hide Inherited |
Hides the inherited styles from the list below in the editor. These are styles that do not yet have explicit settings on them, so they are inheriting default values from a stylesheet located elsewhere (e.g., a factory stylesheet stored in the place where you installed Contributor). As soon as you make a change to one of these styles, it ceases to be an inherited style (or at least the property you set is no longer inheriting from the default value). In the Advanced view of the Stylesheet Editor, inherited styles are gray; non-inherited styles are black. In addition, there are a couple of factory media queries (tablet and mobile), which are inherited. If you have not yet edited these media queries, they will not show up in the Medium drop-down field in the local toolbar if you have this option set to hide inherited. |
|
|
Toggles between showing the properties in grouped view or alphabetical view. |
|
|
If you are using the grouped view, this expands all of the property groups. |
|
|
If you are using the grouped view, this collapse all of the property groups. |
|
Medium: [Name of Medium] |
You can use this field to select a medium or media query, which opens it in the editor so you can edit it. This includes factory mediums and media queries, as well as those that you may have created. If you have "Hide Inherited" enabled, the factory mediums and media queries will not show up in the drop-down if you have not yet made any edits to them. In the Advanced view of the editor, you can have multiple mediums or media queries open at the same time.The default medium is always placed on the left of the others. |
|
Show: [Properties] |
You can use this field to filter the style properties that are displayed.
|
|
[Styles] |
Lists the styles. After you select a style on the left, you can edit its properties on the right. |
|
[Properties] |
Lists the properties relevant to the style that is selected to the left. If the properties are displayed in group view, expand the group to see the actual properties. The property name is displayed on the left. Click |
|
Comments |
You can select the style and then type a comment in the field at the bottom of the Styles section.
|
|
[Preview] |
As you make changes to a property's values, you can see how the changes look in the Preview section at the bottom of the editor. |


 on the right and use the options to specify the value settings for the property. Depending on the property, you might set the value by typing an entry, selecting an option from a drop-down list, or specifying settings in a small popup.
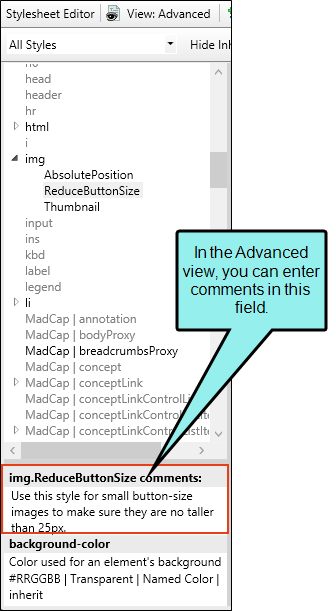
Simplified View
|
[Styles] |
You can use this field to filter which types of styles to show in the area below.
|
|
Hide Inherited |
Hides the inherited styles from the list below in the editor. These are styles that do not yet have explicit settings on them, so they are inheriting default values from a stylesheet located elsewhere (e.g., a factory stylesheet stored in the place where you installed Contributor). As soon as you make a change to one of these styles, it ceases to be an inherited style (or at least the property you set is no longer inheriting from the default value). In the Advanced view of the Stylesheet Editor, inherited styles are gray; non-inherited styles are black. In addition, there are a couple of factory media queries (tablet and mobile), which are inherited. If you have not yet edited these media queries, they will not show up in the Medium drop-down field in the local toolbar if you have this option set to hide inherited. |
|
Hide Properties |
Hides the properties in the main portion of the Stylesheet Editor. By hiding the properties you can make the editor load faster than it would otherwise. |
|
Medium: [Name of Medium] |
You can use this field to select a medium or media query, which opens it in the editor so you can edit it. This includes factory mediums and media queries, as well as those that you may have created. If you have "Hide Inherited" enabled, the factory mediums and media queries will not show up in the drop-down if you have not yet made any edits to them. In the Advanced view of the editor, you can have multiple mediums or media queries open at the same time.The default medium is always placed on the left of the others. |
|
|
Opens the Properties dialog for the selected style. From this dialog, you can provide various settings for the style(s), such as changing the font or the background color. |
|
|
Applies bold typeface to the font for the selected style. |
|
|
Applies italic typeface to the font for the selected style. |
|
|
Underlines the font for the selected style. |
|
|
Lets you select a font type (e.g., Arial, Times New Roman), applying it to the selected style. |
|
|
Lets you select a font size, applying it to the selected style. |
|
|
Lets you choose and apply a color to the font for the selected style. |
|
|
Lets you choose and apply a color to the background of the selected style. |
|
[Styles Grid] |
Columns and rows in the grid display the various styles and classes in the stylesheet, as well as some of the more common property settings. These grid cells are populated based on the settings you provide in the Properties dialog (which is opened by clicking
|


 ) or by selecting certain buttons (e.g., bold, font size) in the editor.
Ribbon Options for Editing Styles
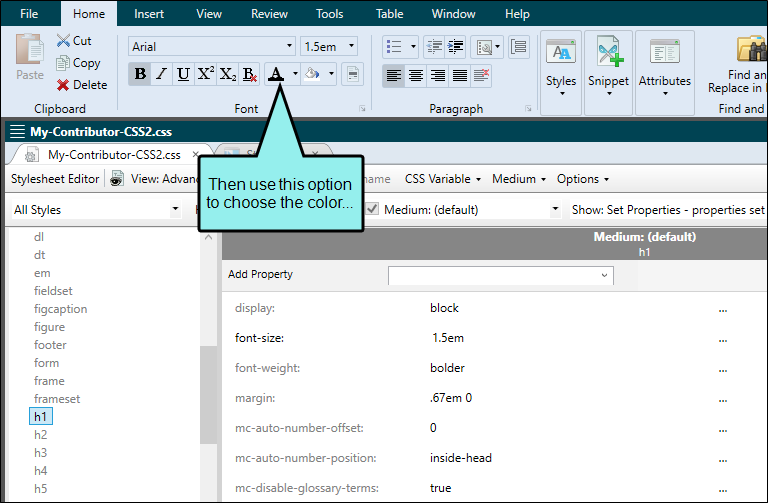
Some options in the Home ribbon were originally reserved for local formatting only, which is generally discouraged.

However, if you have a stylesheet open, these options can be used to apply formatting to styles in the Stylesheet Editor. This can speed up the process of editing certain style properties.
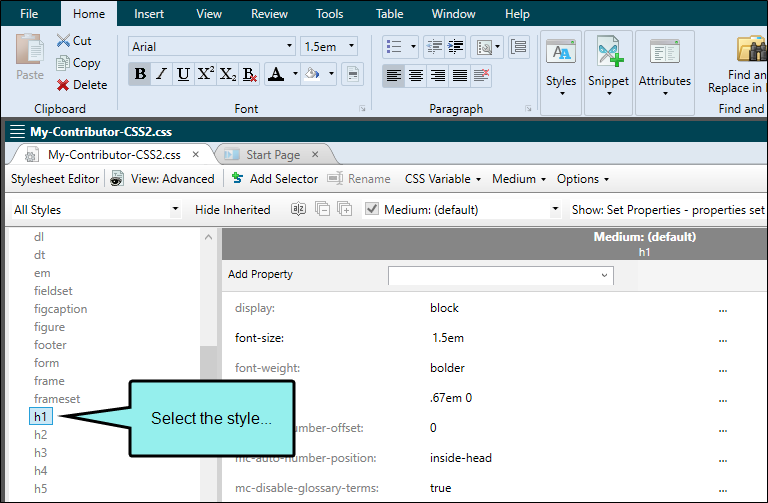
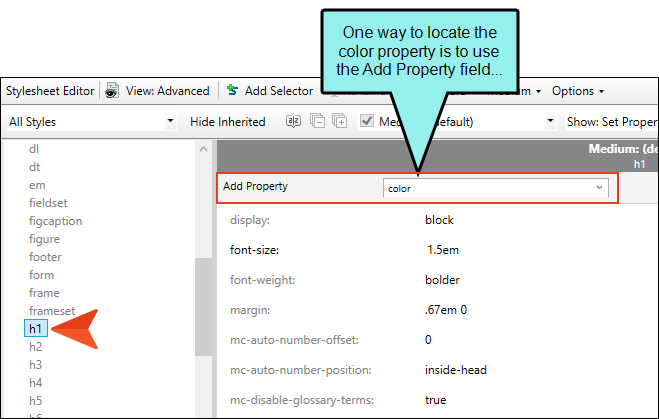
Example
You want to make the h1 style green in your stylesheet. After selecting the style in the Stylesheet Editor, you could find and set the color property to green.

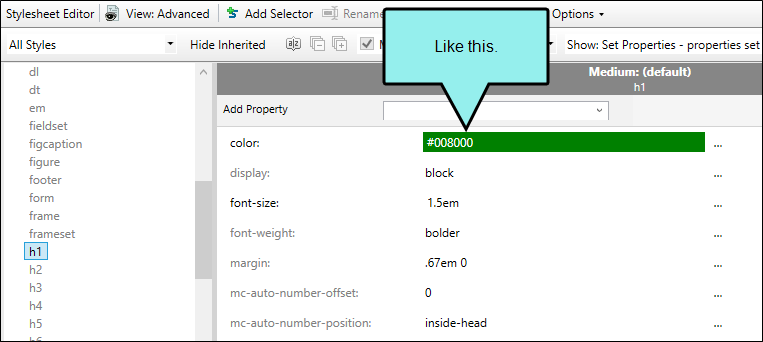
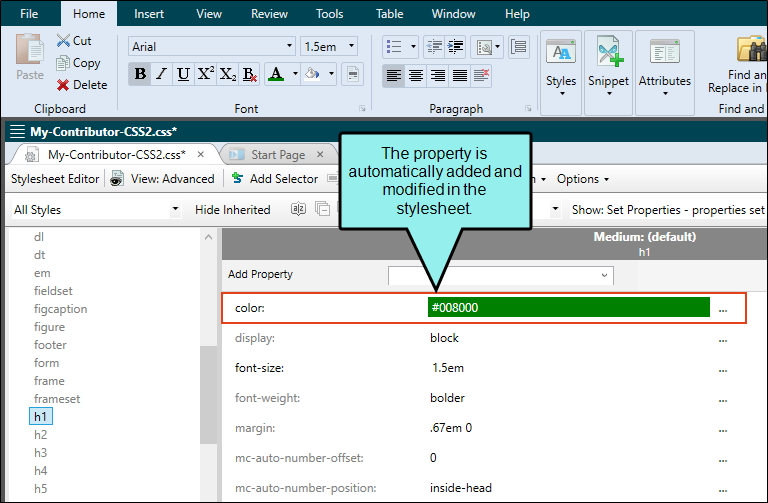
However, you could use the color option in the Home ribbon to do the same thing, only faster.