The Micro Content Editor lets you work with conditions in a couple of ways for single-sourcing.
[Menu Proxy — Headings — Online — Depth3 ]
Conditions on Phrases
You can apply conditions to individual micro content phrases. This lets you separate the phrases to be included in different outputs.
How to Apply Conditions to Phrases
- From the Content Explorer, find and open the micro content file.
- On the left side of the Micro Content Editor, right-click a phrase, and from the context menu select Properties. (Alternatively, you can select the phrase and click
 in the local toolbar or press F4.)
 - In the Properties dialog, select the Conditional Text tab. The first condition tag set is selected and the associated condition tags are shown on the right.
- If you want to see condition tags for a different condition tag set, select it.
- For each condition tag that you want to apply to the file, click the check box next to the tag. A check mark appears in the box.
-
Click OK. The square next to the file name in the Micro Content Editor now takes on the color of the condition tag. If you applied more than one condition tag to the file, each color is shown. (If you do not see squares, click
 in the local toolbar.)
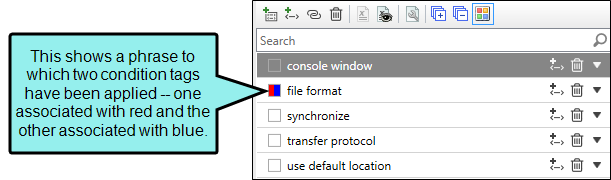
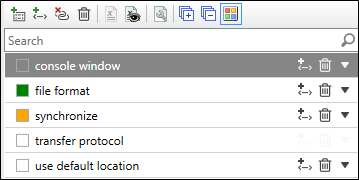
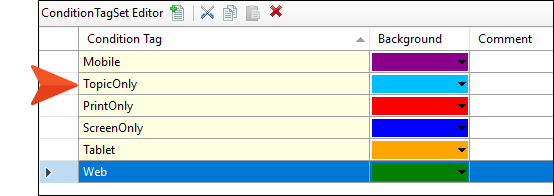
Example You have two HTML5 targets in a project—one named "Target1" and the other "Target2." In addition, you have a couple of conditions named after each of these targets. The Target1 condition is associated with green, and the Target2 condition is associated with orange. Each target is set to include its conditions but exclude those from the other target.
In a micro content file called "Interface," you have five phrases. You want the phrase "file format" to be included as micro content only in Target 1, and you want the phrase "synchronize" to be included as micro content only in Target 2. Therefore, you apply conditions like this.
After building and viewing the Target1 output, you search for each of these. The "file format" micro content displays.

But the "synchronize" micro content does not display.

Then you build and view the Target2 output. The "synchronize" micro content displays.
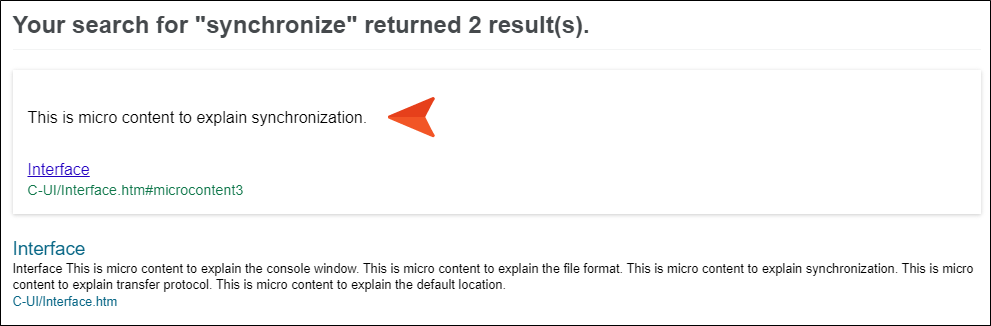
But the "file format" micro content does not display.

Micro Content Conditions
There might be times when you want to show or hide certain content depending on whether it is viewed in a regular topic in the output or when it is viewed as micro content (e.g., in search results). This is possible for linked responses by using micro content conditions. It is similar to the snippet conditions feature, but is for micro content only.
How to Use Micro Content Conditions
- Create all of the conditions that you plan to apply within micro content responses.
- Create a micro content file and create phrases linked to responses. This can be done by tagging content in topics as micro content, or by linking phrases from the Micro Content Editor.
-
Apply the necessary conditions to the text or other content in the linked responses.
Tip It is a good idea to enable the Hide/Show Conditional Indicators button
at the bottom of the editor so that you can clearly see where the different tags have been applied. - In the Micro Content Editor, right-click the phrase and select Properties.
-
In the Properties dialog, select the Micro Content Conditions tab.
Note You will not see this option if you haven't linked the phrase to a response. Instead, you will see "Snippet Conditions," which can be applied to content entered directly in the Micro Response Editor, just as it can be applied in a regular topic.
- If you want to exclude a condition tag from the micro content, select its row to highlight it. Then click the Exclude option to the right. If you want to include a condition in the micro content, select its row to highlight it, then click the Include option to the right.
- Click OK.
-
Click
") to save your work.
to save your work.
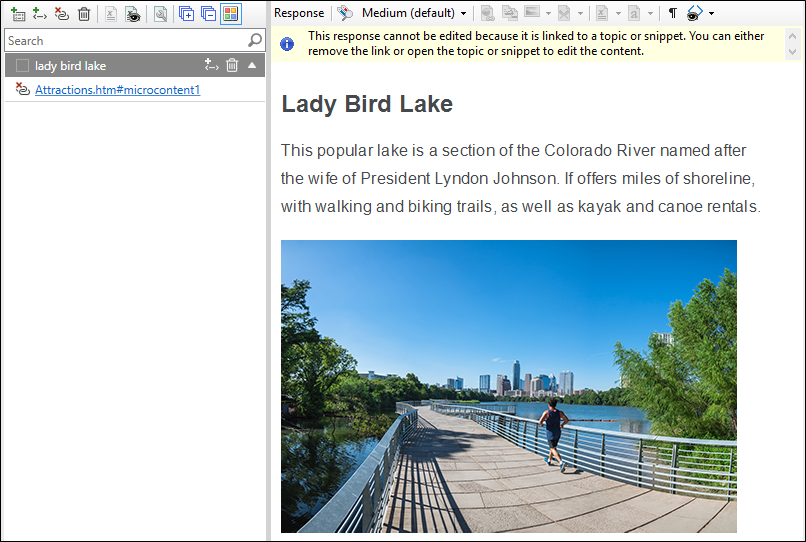
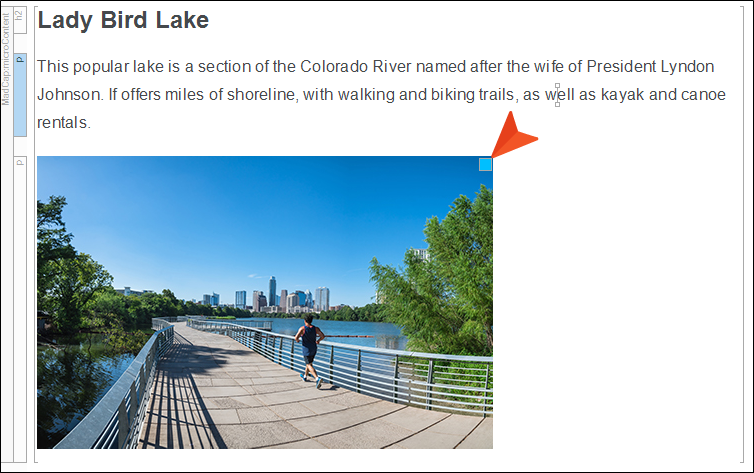
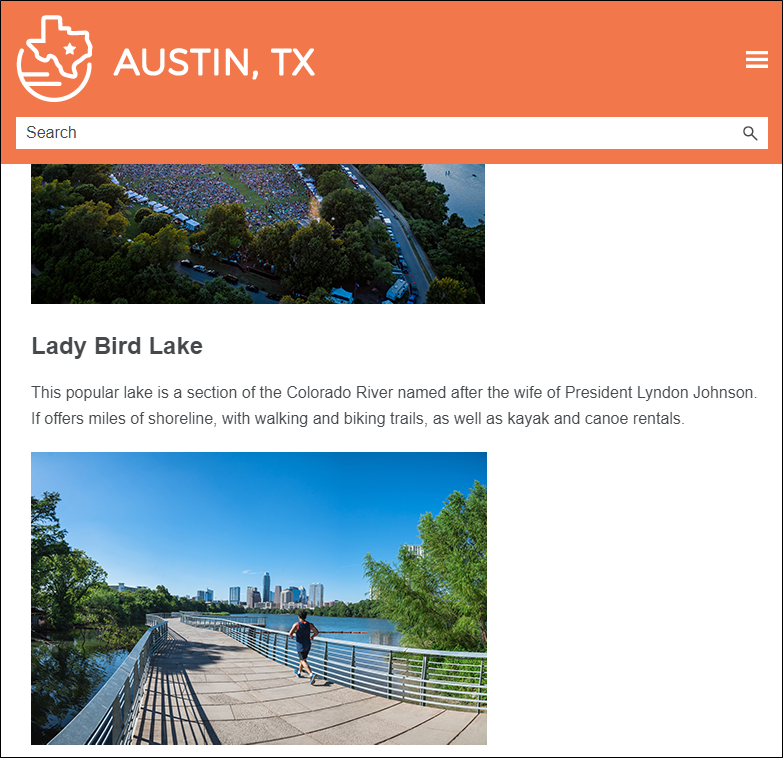
Example You have a micro content phrase called "lady bird lake," which links to part of a topic in your project. This response includes a heading, a paragraph, and an image.
When you generate the HTML5 output and search for Lady Bird Lake, you will see all of this content in the micro content search results. And when you open the topic, you see the same.
Suppose you want the image to display only in the topic, but not in the micro content search results. Therefore, you begin by creating a condition. Let's say you name it "TopicOnly."
In the topic where the content exists, you apply this condition to the image. A small blue square in the upper-right corner indicates that the condition is applied.
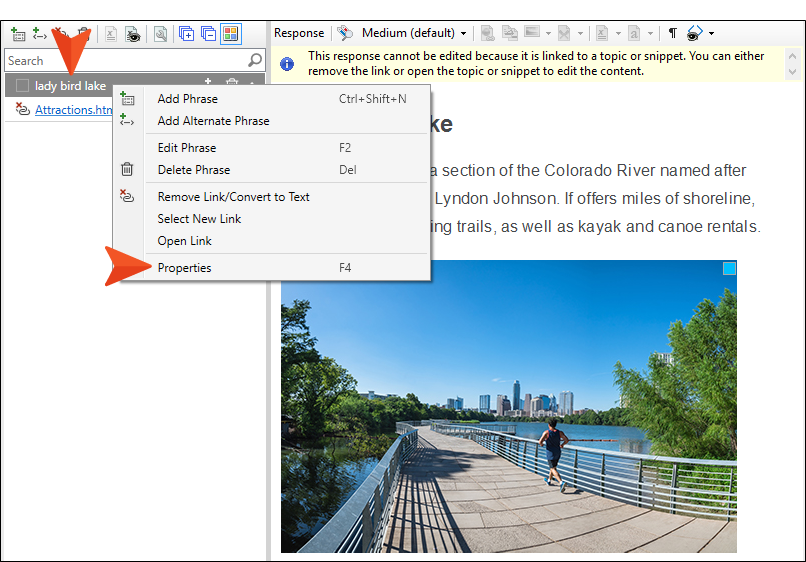
Next, you open the micro content file, right-click the phrase, and select Properties.
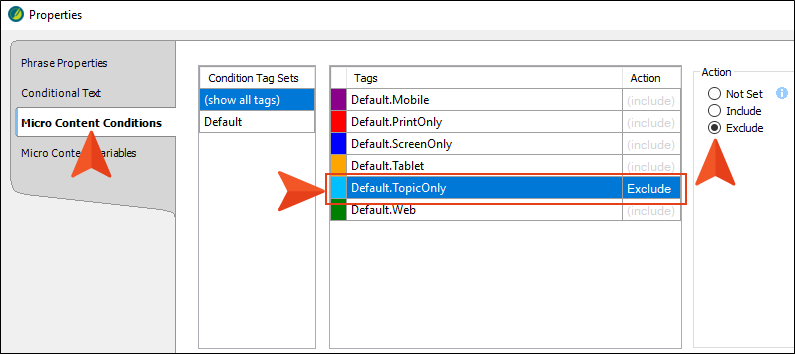
In the dialog, you select the Micro Content Conditions tab. Then you select the Default.TopicOnly condition row and set it to Exclude.
After you click OK and save the changes, you build the HTML5 output.
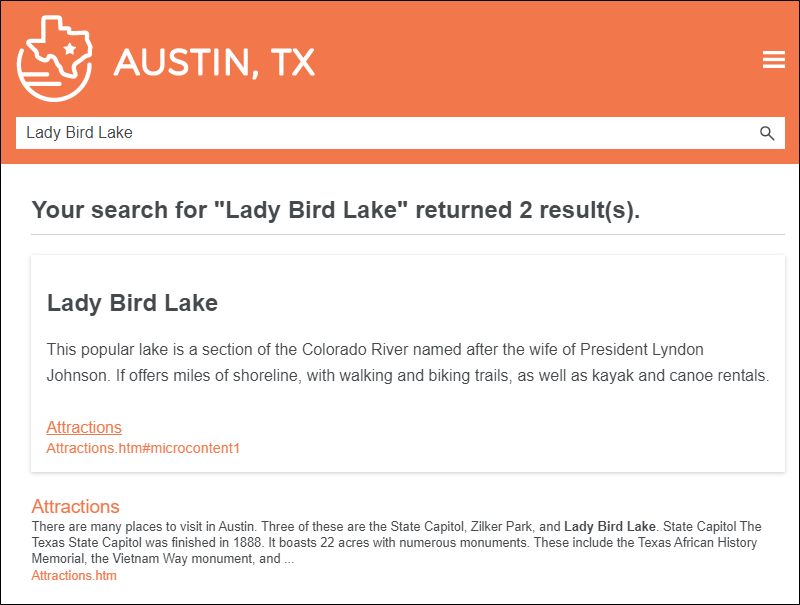
When you open the topic in the output, you see all of the content, including the image.
But when you search for Lady Bird Lake, you only see the heading and paragraph in the micro content.
Note If you want to include content in the micro content search results, but exclude it from the topic in the output, it is probably easier to achieve this using styles.


