Snippet conditions are just regular condition tags that you can apply to content within snippets and then include or exclude them at the snippet or topic level (rather than at the target level). They are especially useful when the majority of the snippet content is identical everywhere the snippet is used, but there are some small differences in some places. This lets you use one snippet for many purposes, rather than having to create multiple snippets to account for the small exceptions.
[Menu Proxy — Headings — Online — Depth3 ]
How to Use Snippet Conditions
-
Create all of the condition tags that you plan to use for separating your snippet content.
Tip You might want to include the word "Snippet" somewhere in the name of a new snippet condition tag (e.g., Snippet1, Snippet2). This way, you can easily identify it, rather than confusing it with the rest of the condition tags that you use for other purposes (e.g., online output or printed output condition tags).
Note The more variations that you have in your snippet content, the more condition tags you will need to create. An average number is four to eight condition tags, but you may find that you require fewer or more tags than this for snippet content. It is always preferable to create more condition tags than you may need, rather than to realize later that you have too few. You can even create a separate condition tag set to be used specifically for holding your snippet condition tags, while keeping the rest of your condition tags in other tag sets.
- Create and open the snippet.
-
Apply the necessary condition tags to the text or other content in the snippet.
Tip It is a good idea to click the Hide/Show Conditional Indicators button
 at the bottom of the editor so that you can clearly see where the different tags have been applied in the snippet.
 -
Do one of the following.
To Apply Snippet Conditions at the Snippet Level
This method is recommended in most cases. It allows you more flexibility and tends to be easier to maintain topics as time goes by. Snippet conditions at the snippet level override snippet conditions applied at the topic level.
- Insert the snippet into the topic, or determine which topic already contains the snippet.
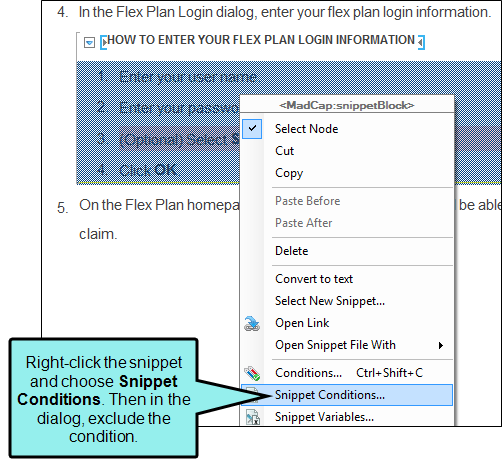
- In the topic, right-click the snippet, and from the context menu, select Snippet Conditions. The Snippet Conditions dialog opens.
-
If you want to exclude a condition tag from the
- Click OK.
- (Optional) Repeat steps b-d for any other instances of the snippet in the topic.
-
Click
") to save your work.
to save your work.
To Apply Snippet Conditions at the Topic Level
This method is good if you have snippet conditions set throughout a topic and you want to include and exclude the same conditions for the entire topic. Otherwise, it is recommended that you apply snippet conditions at the snippet level.
-
Insert the snippet into the topics, or determine which topics already contain the snippet.
-
After you determine that a particular topic should display only certain tagged content from the inserted snippet, open the Content Explorer and select the topic file.
Note If there are several topics that you know in advance will include a particular snippet condition tag, you can open the File List window pane (View > File List) instead and select all of those files at the same time.
- In the local toolbar, click
 . The Properties dialog for the topic opens.
 - Click the Snippet Conditions tab.
-
If you want to exclude a condition tag from the
- Click OK.
- Insert the snippet into the topic, or determine which topic already contains the snippet.
Examples
Example — Snippet Level
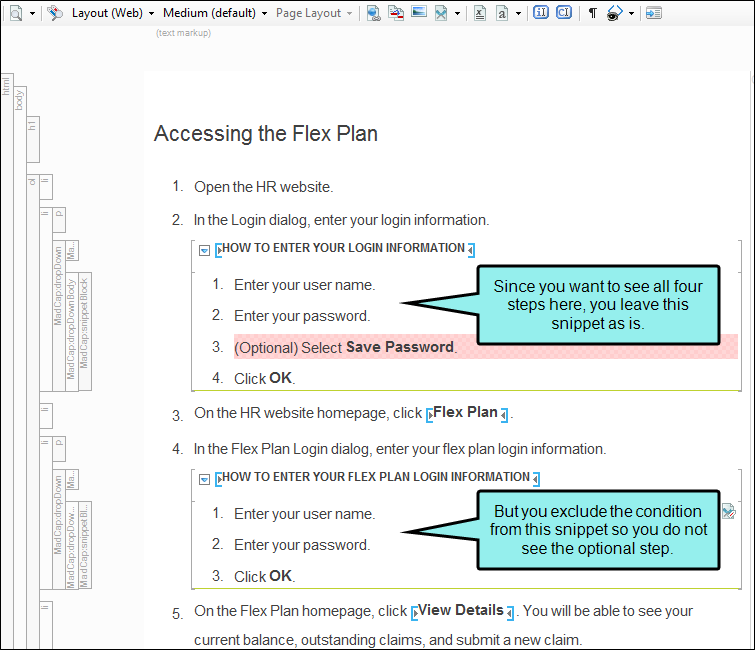
You are writing a user guide. There is a three-step process that users need to repeat very frequently, so you create a snippet for those steps. However, there occasionally is a fourth step in the process, where users can optionally select an extra check box before completing the process. You sometimes need to include this process multiple times in the same topic, so you create a snippet for the four-step process, and apply a condition to the optional step.
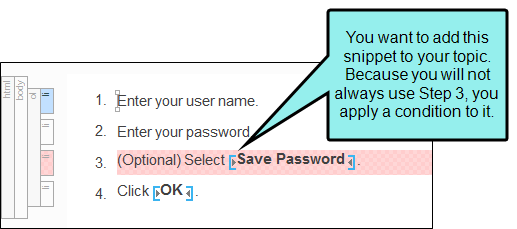
You add your snippet to the topic...
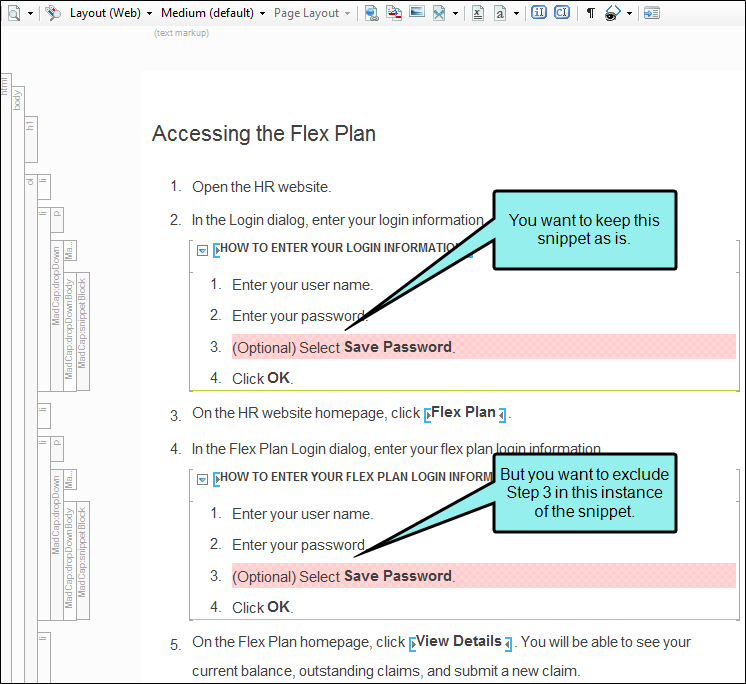
...and then exclude the snippet condition on the second instance of the snippet. By doing this, you won’t see the optional step in that instance of the snippet.
Later, if you need to edit the content, you only have one snippet to edit.
Example — Topic Level
You have a table with 15 rows and four columns. Suppose the table needs to be included in 40 topics. Rather than copying and pasting the table 40 times, you create one snippet containing the table and insert it into those 40 topics. However, let’s say that in 30 of those topics, you need to add three more rows to the table to explain something. In the remaining 10 topics, the three additional rows are not necessary. Otherwise, the table content is the same in all 40 topics. What do you do? You have a few options.
The first option is to add a note to the table explaining that the three additional rows are intended only for some of the topics but not others. However, this might be confusing to your readers.
The second option is to create two separate snippets—one for the 30 topics and another for the 10 topics. However, this means that you need to maintain identical information in two different places. And that is no way to single-source your content.
The third option is to create snippet conditions. Here is how you might do it in this example:
- Create a condition tag.
- Open the snippet and add the necessary three rows to the table.
- Using the table row structure bars, apply the new condition tag to the additional three rows.
- Use the File List window pane (View > File List) to select the 30 topics requiring the additional rows, and open the Properties dialog.
- Select the Snippet Conditions tab.
- Highlight the new condition tag, and select the Include option to the right.
- Use the File List window pane to select the 10 topics not requiring the additional rows, and open the Properties dialog.
- Select the Snippet Conditions tab.
- Highlight the new condition tag, and select the Exclude option to the right.
- After you save all of your changes and generate the target, you will notice that the three additional rows are displayed only in the 30 topics where they were included.
Example — Snippet Level Overriding Topic Level
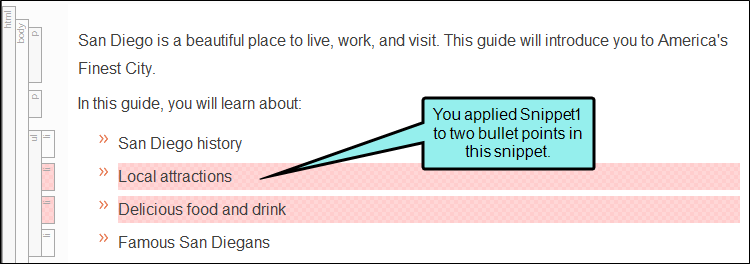
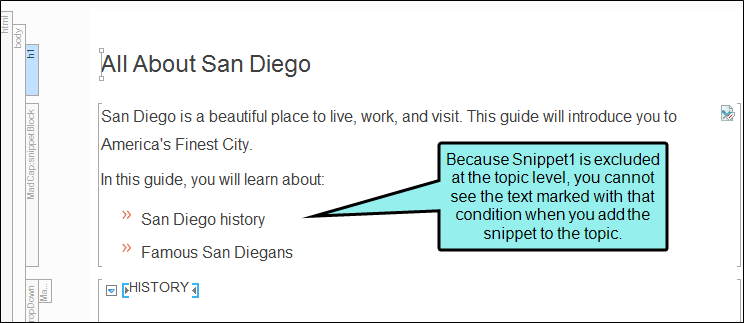
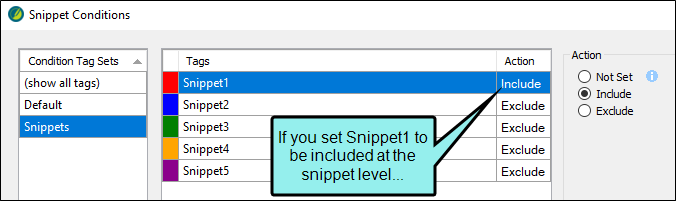
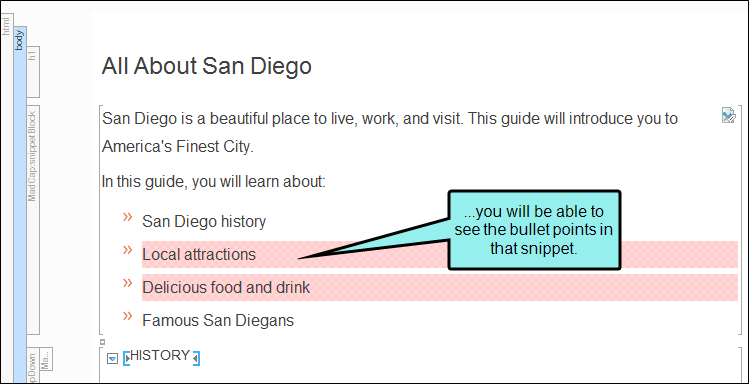
You are working in a topic that has several snippet conditions set at the topic level. When you insert an existing snippet into your topic, you notice that some of the text in the snippet is excluded using the condition tag Snippet1. However, the Snippet1 condition tag is also excluded at the topic level in the topic you are working on, so that text does not appear in the XML Editor or your output.
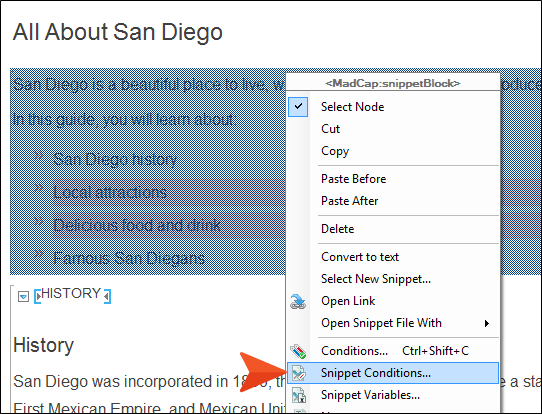
Snippet conditions on individual snippets override those at the topic level. So in the topic you right-click the snippet and choose Snippet Conditions.
In the Snippet Conditions dialog, you set the conditions on this snippet to include Snippet1. While Snippet1 will still be excluded at the topic level, in this particular snippet, you will be able to see the text that is marked with that tag.
What’s Noteworthy?
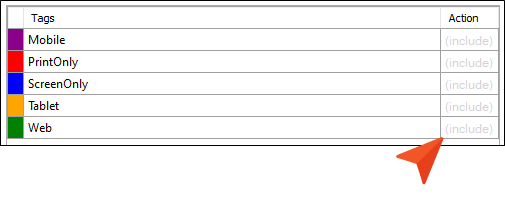
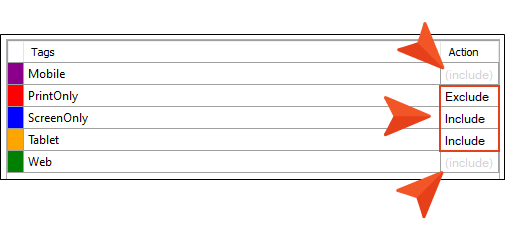
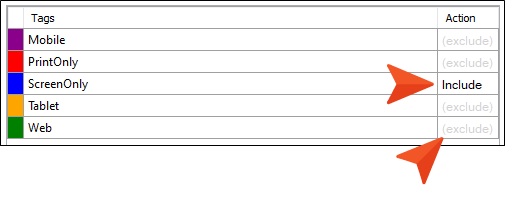
Warning The condition feature is an inclusive system. If you do not select any options, all of the tags will automatically be included, as indicated by the gray text in the Action cell. If you include only some tags and exclude others, any remaining tags without options specifically set will automatically be included. However, if you select Include for any of the tags (even just one) and do not select Exclude for any tags, all of the other tags that do not have the Include option set explicitly will automatically be excluded. If you have not explicitly set an option for a condition tag, make sure you look at the gray text in the Action cell to know what will happen for that tag in the output.
Tip If you are using snippet conditions, you may want to enable snippet condition indicators from the Show tags drop-down  in the XML Editor. This command enables or disables a marker
  that overlays snippets that have snippet conditions applied to them.

If you enable this indicator, you will see it on snippets if you have snippet conditions enabled at either the topic level or the snippet level.
Note Remember that snippet conditions only apply to a particular instance of a snippet. If you add new snippet conditions to an existing snippet, be sure to use the Link Viewer to check that the content in other instances of the snippet is still visible (or hidden) the way you want it to be.
Note You can generate a report to see topics in your project that contain snippet conditions at the topic or snippet level.


