Flare supports Microsoft PowerPoint output for slideshow presentations. This format is ideal for single-sourcing content (e.g., text, images, lists, tables) in your project and creating PowerPoint (PPTX) output. The content packaged for PowerPoint is your deliverable for printed distribution or online presentations. You do not need to edit slides in PowerPoint, but you can if necessary.
The PowerPoint output type is a hybrid format. Although it has elements of a print-based output, it is commonly shared and viewed digitally (e.g., you intend to create an online presentation).
When you create PowerPoint output from a new or an existing project, the main thing you need is a PowerPoint target. The output will display with basic styles already in place, but the format might be insufficient. With a little more effort, you can make your PowerPoint presentation shine by adding and styling content, arranging a TOC, adding a PowerPoint page layout, and specifying target options.
Example You are using Flare to make training material. This works great for creating eLearning courses in PDF or online formats, but you also need a slideshow presentation to deliver the content in front of an audience. You would like to single-source the content and export the material into a PowerPoint presentation. Flare’s PowerPoint target output type eliminates the task of copying and pasting content from your project into PowerPoint slides. PowerPoint output lets you format slides and maintain larger slide decks, as well as share content across your organization.
[Menu Proxy — Headings — Online — Depth3 ]
Adding Content for PowerPoint
Similar to other types of output, there are a number of ways to create, organize, and design a project for PowerPoint slides. The following points serve as a guideline to help you get started.
-
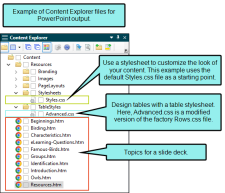
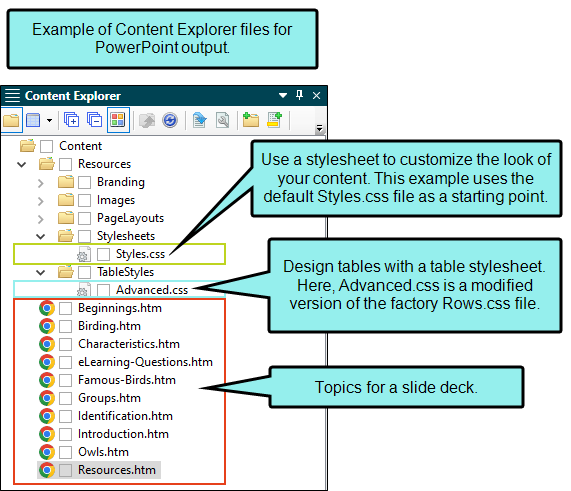
Create content for the presentation You can reuse content from existing topics or you can create content in new topics for PowerPoint output.
You can use features such as lists, images, snippets, QR codes, cross-references, etc.
Use stylesheets to add or edit styles and customize the look and feel of the content for your presentation. You can use the default stylesheet or create a new one.
If your presentation includes tables, you can use existing table styles (or create a new table stylesheet) to format the way they look and behave.
Note When creating content for a PowerPoint presentation, each "topic" typically equates to a "slide." If a topic is long (i.e., it runs beyond the frame of the slide) it will extend into multiple slides. This can happen depending on a myriad of reasons such as text overflow, font size, spacing between lines, etc. A couple ways to control your content is with reorganizing the topic or with page breaks. You can manually insert page breaks or you can set page breaks on styles.
Note Each element will likely be converted to its own editing box in PowerPoint.
-
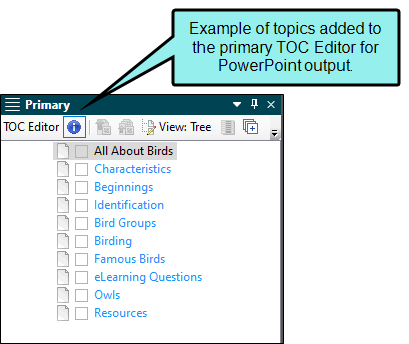
Add topics to a TOC outline You can add topics to an existing TOC or create a new TOC file if you want. This file serves as an outline for the topics in the PowerPoint output. Simply drag and drop topics from the Content Explorer to the TOC Editor, or use buttons in the local toolbar of the TOC.

Adding a Page Layout for PowerPoint
To add basic formatting to your PowerPoint output, use a factory page layout template. It is recommended to use either Landscape4x3.flpgl or Landscape16x9.flpgl for PowerPoint. Of those two choices, the slide size differs (i.e., displaying with a standard 4:3 or widescreen 16:9 aspect ratio). The templates include landscape page orientation, and a default body frame size, but do not include headers or footers. These two page layout templates improve the initial output appearance and workflow between Flare and PowerPoint.
How to Add a Page Layout
-
Do one of the following, depending on the part of the user interface you are using:
-
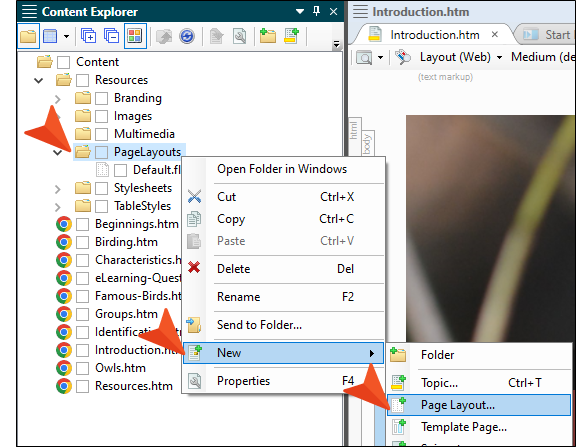
(Recommended) Right-Click In the Content Explorer, right-click a folder and from the context menu select New > Page Layout.
- Ribbon Select Project > New > Page Layout.
The Add File dialog opens.
Tip If your project does not include a folder for page layouts under the Content Explorer's Resources folder, it might be a good idea to create a new folder called PageLayouts.
-
-
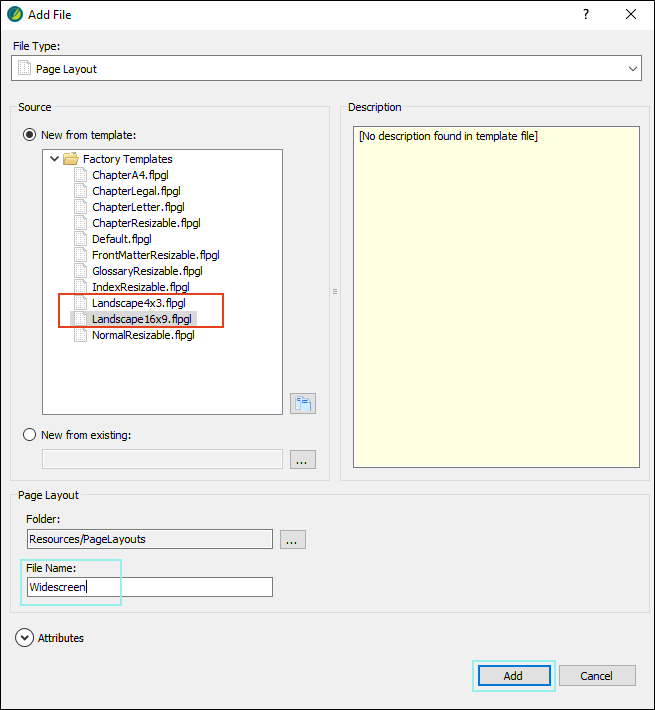
In the File Type field at the top, make sure Page Layout is selected.
-
In the Source area, under New from template, expand Factory Templates (if not already), and select the landscape template that will best fit the needs of your presentation (i.e., Landscape4x3.flpgl, or Landscape16x9.flpgl).
Note You can create other page layout templates for PowerPoint output. For example, most slide decks employ the landscape format with a standard (4:3) or widescreen (16:9) slide size, but you can create a presentation using the portrait format instead. Whatever the case, you can customize the page layout according to your intended design.
-
(Optional) The Folder field is automatically populated with the folder that has focus in the Content Explorer. If you want to place the file into a folder that you previously created in the Content Explorer, in the Folder field click
 and select the subfolder. Otherwise, keep the default location.
 -
In the File Name field, type a new name for the page layout.
-
(Optional) If you want to apply condition tags to the file, expand the Attributes section at the bottom of the dialog. Next to the Condition Tags field, click
and select the conditions you want to apply. Click OK. -
(Optional) If you want to apply file tags, expand the Attributes section at the bottom of the dialog. Next to the File Tags field, click
and select the file tags you want to apply. Click OK. -
Click Add. The page layout is added to the Content Explorer. The Page Layout Editor opens to the right, displaying the page layout.
Tip Once you have a page layout template in your project that you want to use for PowerPoint you might want to build and view the output. It is likely that you will want to make page layout adjustments. Before you build it, you must first tie the page layout with the PowerPoint target, so Flare knows what layout to use. Do this in the Target Editor by selecting the General tab, and then a Primary Page Layout.
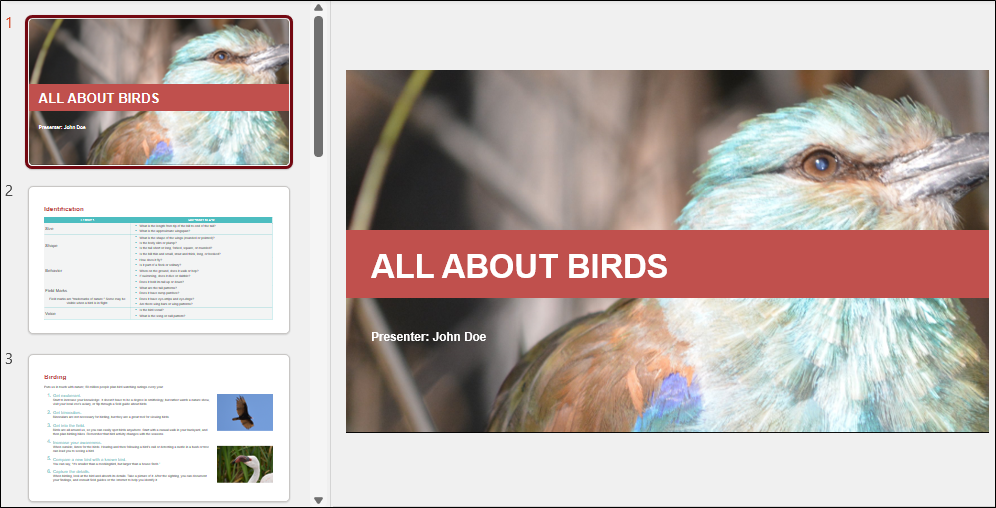
Example For a regional conference about birds, you have created a project using Flare and have added content to it. Knowing that you need to generate PowerPoint output, you plan for each topic to be a “slide” and use cascading stylesheets to design the content. Up until now, you have viewed your progress by building HTML5 output, but now you want to build and see it in PowerPoint.
First, add a page layout for PowerPoint. In the Content Explorer, right-click on a folder and from the context menu select New > Page Layout.
Then, in the Add File dialog, select a template, provide a name, and click Add. Note that 4x3 and 16x9 in the names of the two landscape template choices, refers to the aspect ratio of the slide.
The page layout is added to the designated folder in the Content Explorer.
Modifying a Layout in the Page Layout Editor
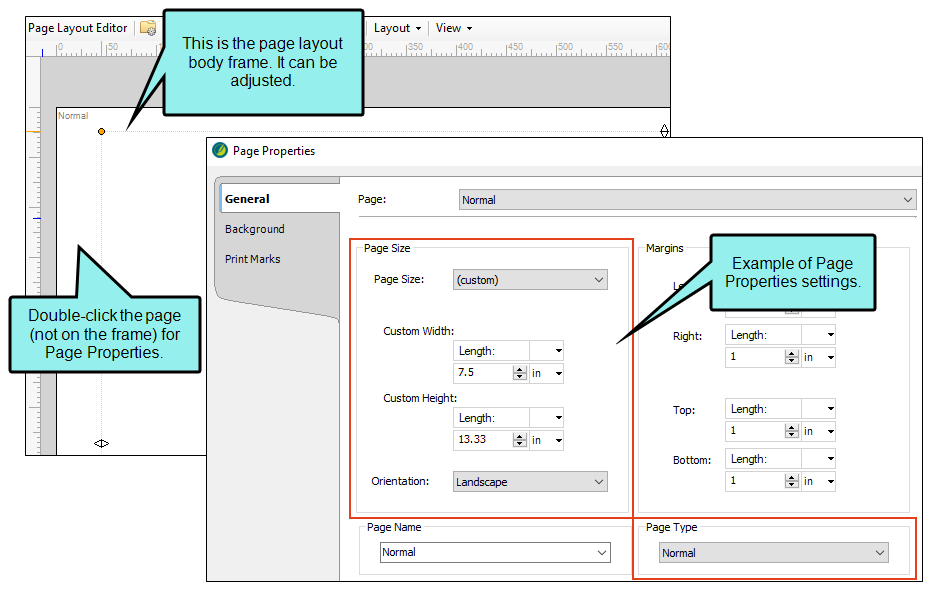
The advantage of using a factory page layout specifically for PowerPoint output is that a working template is set up for you. However, you can adjust properties such as page type, page size, page orientation, and body frame.
To edit the page properties, double-click the page in the Page Layout Editor and select Properties.
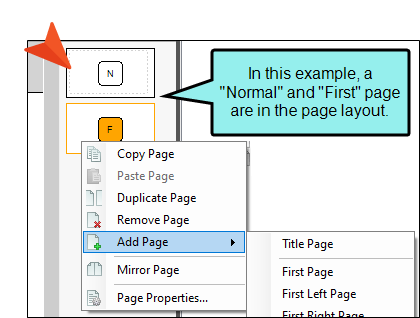
The landscape page layout templates include one page (i.e., a Normal page type) by default. Although you can generate PowerPoint output with a single page type in the page layout, you can add more pages. For example, you might want to add a First page for an introduction, or include a page with a different set of margins applied.
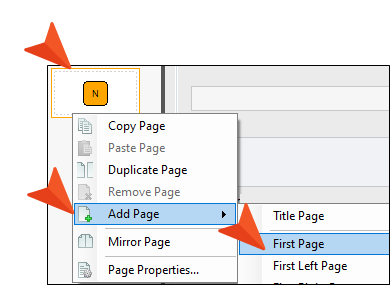
Right-click the small page graphic in the Page Layout Editor, and select an item from the context menu (e.g., Add Page > First Page).
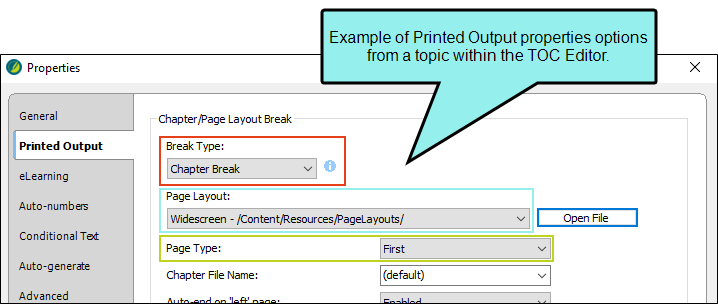
If your PowerPoint output design includes multiple page types (e.g., a First page, and a Normal page), you need to account for this using the TOC Editor's Printed Output options. For example, you might have a cover page or introduction using one page type, and then another page type starting with the next page. These options dictate how a page behaves in the output.
From each relevant topic in the TOC, select to display its properties. Select the appropriate Break Type, Page Layout, and Page Type.
Example When you add a page layout for PowerPoint to the project, a working template is set up for you. Once you build your target, you might realize you want to change page layout properties for customization.
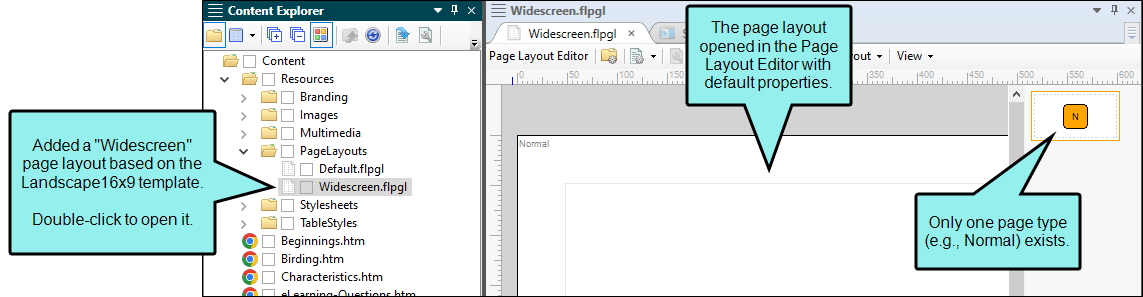
View the page layout in the Page Layout Editor. In this case, it displays with default properties. No adjustments have been made to it yet.
You want to add a template page for the first slide in your presentation. Right-click the small page graphic, and select Add Page > First Page. You can keep the default page properties or update them if you have a special need.
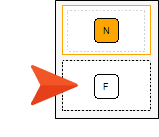
Notice another page type displays in the editor. Save the file.
From the TOC, locate the first slide (or welcome topic), right-click and select Properties.
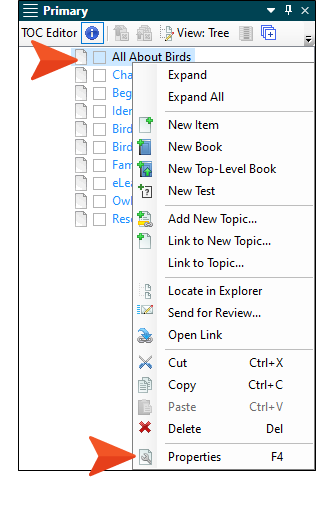
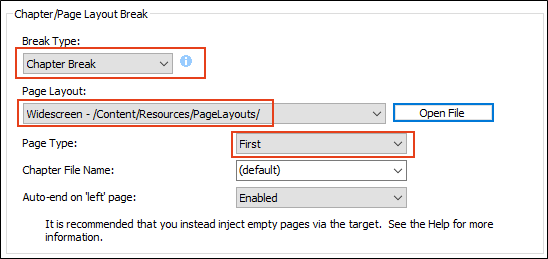
In the Printed Output tab select the appropriate Break Type (e.g., Chapter Break, Page Layout Break), Page Layout (e.g., Widescreen.flpgl), and Page Type (First). Click OK.
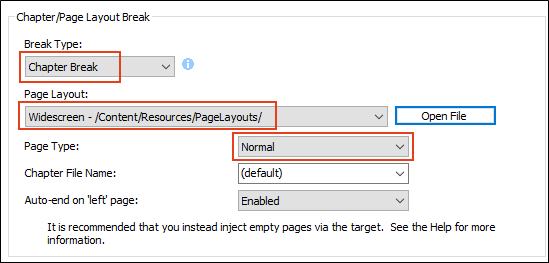
Locate the second slide, and select the Break Type (e.g., Chapter Break, Page Layout Break), Page Layout (e.g., Widescreen.flpgl), and Page Type (e.g., Normal). Click OK.
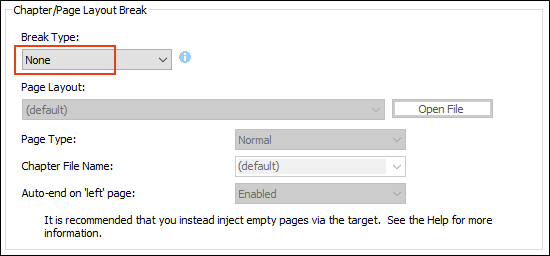
Then, for the third slide, confirm that the Break Type defaults to None. Any topics that occur after this slide will inherit its settings. Click OK.
Rebuild the PowerPoint output type. Notice how the page layout adjustments affected the format of the presentation.
Note If you are not using a PowerPoint page layout (where landscape mode is already set in the template), the output can default to a portrait page orientation. You can change the orientation using the Page Layout Editor.
Note Do not mix and match landscape and portrait page orientations for PowerPoint output—use one or the other. Otherwise, problems with formatting can occur. The more common use case is to use landscape.
Note There is an order of precedence with the three levels where you can specify a page layout. Specific entries in an outline TOC have the highest precedence, followed by page layouts at the target level, followed by page layouts at the project level. If you have a page layout set at the project or target level and it does not seem to be working the way you think it should, you might check to see if you have any page layouts set on specific TOC entries that are overriding the target- or project-level setting.
Note There is a limitation when setting gradient options for a PowerPoint page layout template. The gradient color will always start from left to right—regardless of which setting is selected. These settings are in Page Properties, with the Background tab in focus.
Adding and Editing a Target for PowerPoint
At a minimum, you must have a PowerPoint target. If you do not have one for PowerPoint output, select to add a new target to your project.
How to Add a PowerPoint Target
- Do one of the following, depending on the part of the user interface you are using:
- Ribbon Select Project > New > Add Target.
- Right-Click In the Project Organizer, right-click on the Targets folder and from the context menu select Add Target.
The Add File dialog opens.
-
In the File Type field at the top, make sure Target is selected.
-
In the Source area, under New from template, expand Factory Templates (if not already), and select the default template (e.g., MyTarget).
-
(Optional) If you want to place the file into a subfolder previously created in the Content Explorer or Project Organizer, in the Folder field click
and select the subfolder. Otherwise, keep the default location. -
In the File Name field, type a new name for the target.
-
From the Output Type field, select PowerPoint.
- (Optional) If you want to apply condition tags to the file, expand the Attributes section at the bottom of the dialog. Next to the Condition Tags field, click and select the conditions you want to apply. Click OK.
- (Optional) If you want to apply file tags, expand the Attributes section at the bottom of the dialog. Next to the File Tags field, click and select the file tags you want to apply. Click OK.
- Click Add. The target is added to the Targets folder in the Project Organizer. The Target Editor opens to the right.
How to Edit PowerPoint Options
If you are sending output to Microsoft PowerPoint, you can access PowerPoint options in the Target Editor. These options let you specify document properties and other options for the output.
-
Open a target that is using the PowerPoint format.
-
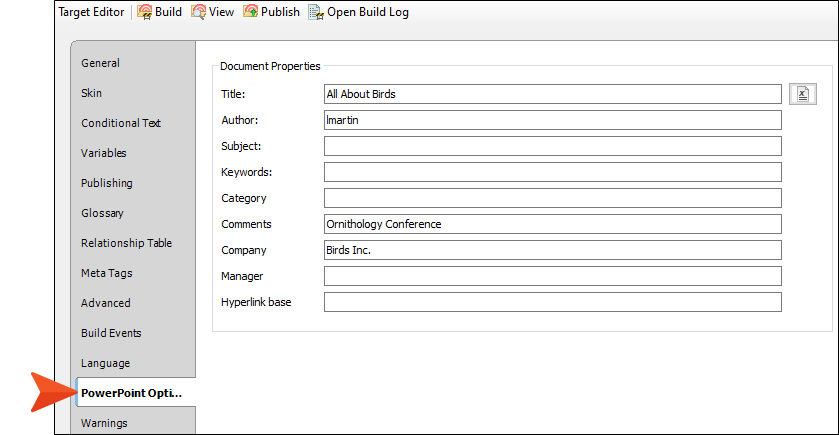
Select the PowerPoint Options tab.
-
Enter information as necessary. This includes metadata such as the document title, author, subject, keywords, etc. In the PowerPoint application, you can view the document properties information in File > Properties.
Note If you want to insert a variable in a field, you can click
 . The variable will appear as syntax in the field, but in the output the variable definition will be shown. The variable button displays after you click a field.
 -
Associate a page layout with the PowerPoint output so Flare knows there is a specific layout to use. Set the layout in the Target Editor if you are not setting it in the TOC, or if you are using more than one page layout in the project.
Note You can set the page layout at the TOC, target, or project level. For example, if you are using a page layout template with multiple pages types, you might want to set a page layout at a TOC node level. But if you plan to use the same page type for the entire slide show, then setting it at the target level might be better.
-
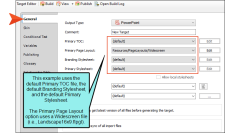
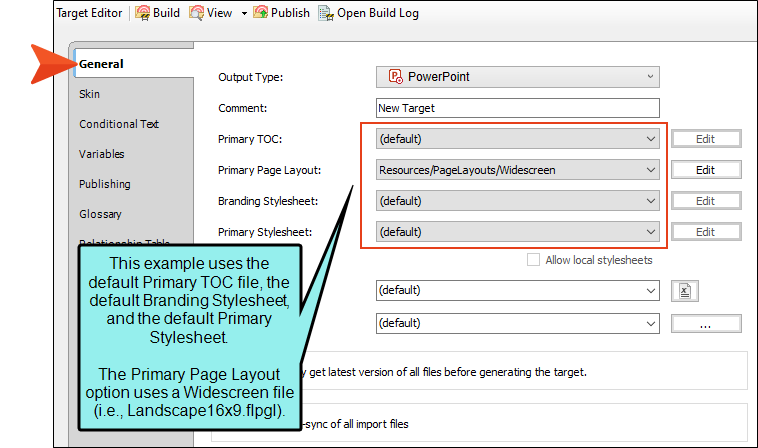
In the Target Editor, select the General tab.
-
From the Primary Page Layout drop-down, select the page layout that you want to use for topics in the target. (You can also set a TOC and stylesheet files for the PowerPoint target.)
Note The Target Editor > General tab > Output Type drop-down defaults to PowerPoint when interacting with a PowerPoint target.
Note The Target Editor includes many other options to consider for your PowerPoint output. For example, the Advanced tab has options for auto-generating proxies and handling text effects.
-
-
Click
") to save your work.
to save your work.
Building and Viewing a PowerPoint Target
When you have content, a PowerPoint page layout, and PowerPoint target in place for your project, you can build the output.
You can quickly build PowerPoint output from the PowerPoint target if you select Build. When it is complete, select View Output (or double-click the build row) from the Builds window pane. If the PowerPoint application is installed, the output opens in PowerPoint. The output files are placed in the Project's Output folder (e.g., C:\Project\Output\[name]\PPTX).
If no files have been identified for the page layout, TOC, or stylesheets in the Target Editor, the project builds with default target options.
Post-Processing in PowerPoint
The main point of the PowerPoint output type is that it puts content in a packaged form for PowerPoint. When you use Flare as your authoring source, the generated content is your deliverable for PowerPoint. There is no need to finalize the slide deck by customizing or cleaning up output.
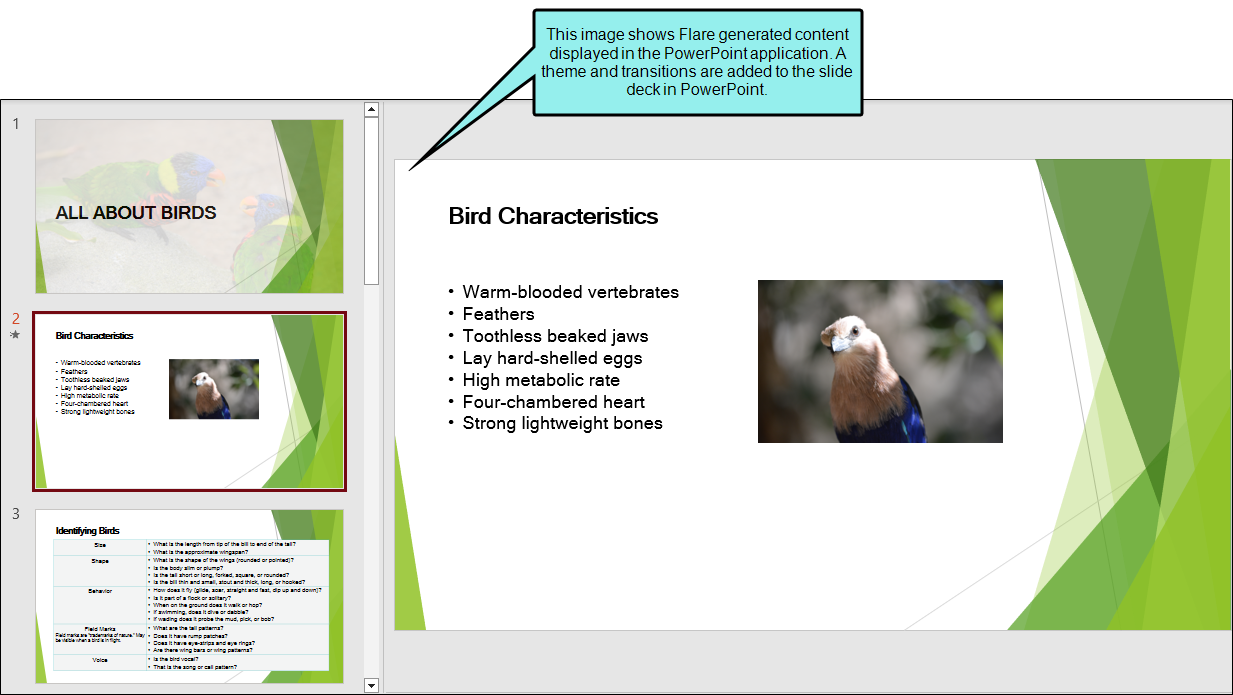
It is possible, however, to make changes in the PowerPoint application if absolutely necessary. For example, you might want to draw on slides, add themes, slide transitions, and slide animations.
Warning If you edit content in the PowerPoint application, those changes will not be in your source project in Flare. Anytime you rebuild the output using Flare, the fixes you made in PowerPoint will not be evident in the output. You will have to manually make those changes again. (You cannot import those changes back into Flare from PowerPoint.)
As a best practice, edit in Flare so the changes are available and saved in your source files.
Tip View your output in PowerPoint's reading or full-screen slide show mode to review your presentation. For example, you might want to verify links that you have included are working. You can test links in PowerPoint's normal mode but it is difficult to find the clickable spot. In full-screen (presentation mode) the links are quicker to review because the boundaries are clearer.
Supported Features in PowerPoint Output
Many features commonly used in Flare are supported in PowerPoint output (e.g., text, images, lists, tables), but some are not.
PowerPoint supports the following features, but with special behavior in the output.
|
Feature |
Special Behavior in PowerPoint Output |
|---|---|
|
CSS variables display in PPTX output, but the branding stylesheet must be specified at the target or project level. |
|
|
The text displays expanded like other print-based outputs. |
|
|
PPTX output is not interactive, but it displays multiple choice and multiple response question types. In the Target Editor's Advanced tab, you can select to show the correct answers in the output. |
|
|
An equation is exported as an image. |
|
|
The text displays expanded like other print-based outputs. In the Target Editor's Advanced tab, you can select how you want the text to be converted (e.g., as footnotes, inline, or remove the body). |
|
|
FAQ content displays as expanded text in a topic. You can use a custom FAQ skin component with your FAQ content. |
|
|
A glossary generates in PPTX output if specified in the Target Editor's Advanced tab. |
|
|
Headers and footers do not directly convert into PowerPoint headers and footers, but the content from headers and footers defined by the page layout converts to a text box. |
|
|
An inserted horizontal rule displays like other print-based outputs (e.g., as a line in PPTX output). |
|
|
Images are embedded in PPTX output. A background image is supported with properties: repeat and no-repeat. It does not support repeat horizontally or vertically. |
|
|
An index generates in PPTX output if specified in the Target Editor's Advanced tab. (Index terms need to be included in your project.) |
|
|
Links are functional both to external sites and to other slides. (Cross-references only point to a slide, not to another location on the slide.) |
|
|
Micro content associated with search results, such as featured snippets, Knowledge panel, and Promotion or Knowledge proxies do not display in PPTX output. However, micro content using the FAQ proxy does display in PPTX output. |
|
|
Most audio and video formats play in the output. Some player controls are not supported in the output. |
|
|
When setting gradient options for a PowerPoint page layout template, the gradient always starts from left to right, regardless of which setting is selected. The PowerPoint page layout defaults to a solid border (or column divider) even if another option is selected. |
|
|
A QR code is exported as an image. |
|
|
Tables that include rounded corners display as squared corners in PPTX output. |
|
|
Text wrapping around a floating image does not display as such in PPTX output. Text layout limitations might occur when floated, inline in combination with a block in the same parent. |
|
|
Text popups display as expanded text. In the Target Editor's Advanced tab, you can select how you want the text to be converted (e.g., as footnotes, inline, or remove the body). |
|
|
A TOC generates in PPTX output if specified in the Target Editor's Advanced tab. |
|
|
The text displays expanded like other print-based outputs. |
What’s Noteworthy?
Tip The PPTX file is in essence a ZIP file. You can rename the .PPTX extension to .ZIP and extract it. All the embedded files (XML files included in the single-packaged PPTX file) will display in organized folders and files.
Note You must have the PowerPoint application to view the output, but you do not need it installed to build the output.
Note The PPTX file is the same as the older PPT, but the appended X stands for XML support. The Open XML format manages multimedia, text, images, etc., that can be included in a presentation, and it stores data in folders that are zipped together rather than in one binary file.

